


12
© Monitor Audio Ltd 2001
Final Position & Adjustments
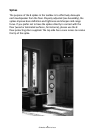
It’s time to sit down, play some music and listen a little more closely. If
the positioning is broadly correct, the loudspeakers should effectively
“disappear”, the sound stage extending beyond the outer edges of the
cabinets. There should also be a real sense of depth with images
appearing behind the plane of the speakers as well as in front. Try to
imagine the sound as a picture. It should have realistic scaling and 3D
perspectives. Ask yourself if the tonal colours and textures seem natural
- they shouldn’t be saturated or pale. If you’re listening to the music
rather than the speakers, that’s a good sign.
Remember, these observations need to hold true with different types of
music and recording. Don’t use just an audiophile-standard recording of,
say, a jazz trio as it will almost certainly flatter the sound of the
system - though it may be useful for fine-tuning the bass performance.
Use a cross section of the music you regularly listen to. The more
consistently musical the results the better.
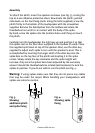
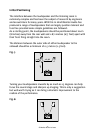
Modifying the in-room bass response of the loudspeakers is relatively
simple. For more bass, position the speakers closer to the rear wall; for
less, move them further into the room - especially if the bass is boomy
and/or uneven.
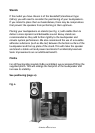
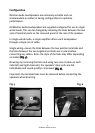
If your Monitor Audio loudspeaker has an internal rear chamber you can
further modify bass response by adding dry sand or lead shot.
The chamber is accessed at the back via a removable panel close to the
bottom of the speaker. Adding sand or lead shot damps cabinet
resonances and gives the bass a tauter, more controlled quality.
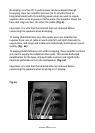
Important: only use dried sand. The sand or lead shot should be placed
in a plastic bag and firmly knotted. Damp sand must not be used as it
may eventually rot the wood. The amount of additional loading will vary
from room to room. If possible, discuss this with your dealer.