3. TV Features 15
For assistance call 1(800) 332-2119
ChannelView, “All” tab. Programs for the tuned channel
are listed on the right.
ChannelView Custom Channel Banks
Select a channel bank to customize.
Press
1.
GUIDE
to display ChannelView.
Press
2.
MENU
to move the highlight to the bank
header.
Press
3.
to select Bank 1, 2, or 3.
With the bank name highlighted, press
4.
ENTER
to
enter setup mode where you can select channels to
include in the bank.
Press
5.
EXIT
when finished with setup.
Using Custom Channel Banks
While watching TV, press •
CH
/ . The TV will
tune only to channels stored in the current bank.
To • change to a different channel bank:
Press 1.
GUIDE.
Press 2.
MENU.
ChannelView displays program descriptions sent by
broadcasters. This information may be unavailable
in some areas.
About ChannelView
ChannelView™ shows memorized channels on the ANT
input. It displays channel names and program information
for digital channels. No program information is displayed
for analog channels.
ChannelView allows you to set up three banks of custom
channels for convenient access. You can save groups of
channels by content (e.g., news, sports, children’s program-
ming) or by TV user.
Note: You must first set the TV Clock (page 24)
t
o
receive ChannelView listings.
ChannelView Channel Listings
Photos and Moving Video as
Composite Video
Note: 838 series TVs can display photos and play mu-
sic from a USB drive. See the detailed owner’s
guide at www.mitsubishi-tv.com.
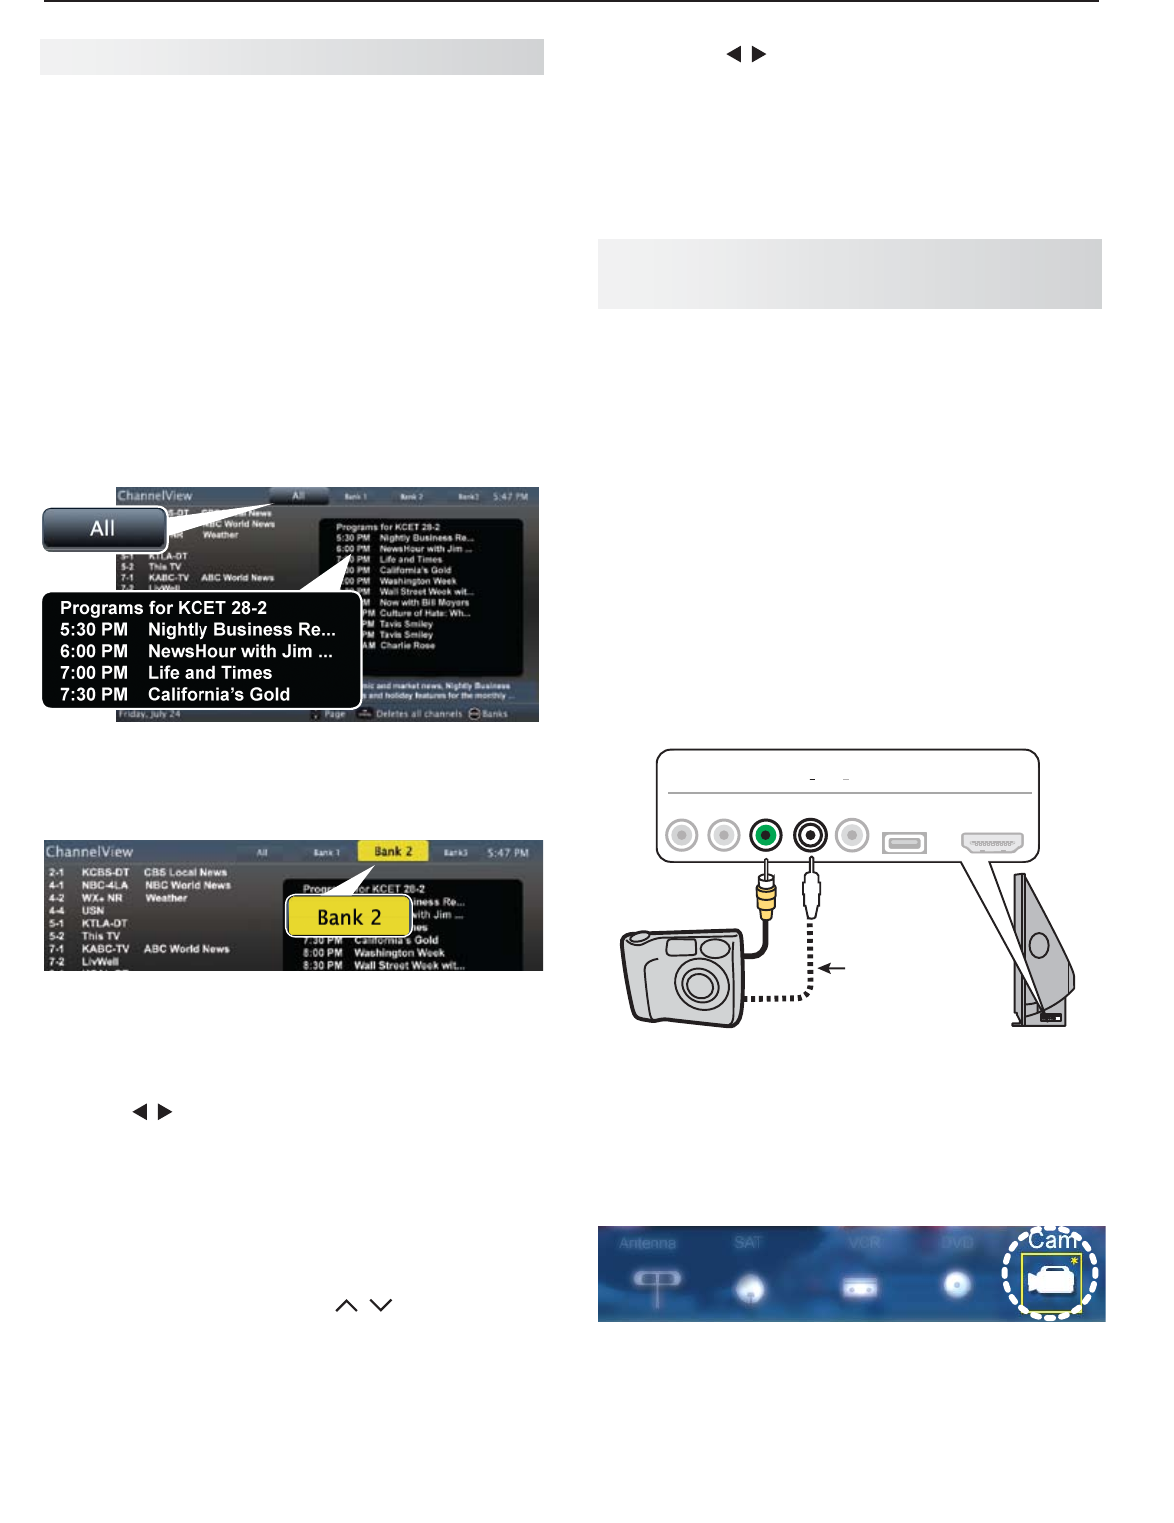
Connect the camera to the TV using a composite video
cable and control the slide show or movie through the
camera. The display resolution will be standard-defini-
tion (480i).
Refer to the owner’s manual supplied with the
1.
camera for instructions needed for this setup.
Set the camera’s output signal type to
2.
NTSC and
put the camera into playback mode.
With the camera still turned on, connect your digital
3.
camera’s composite video cable (usually yellow) to
the TV’s
Y/VIDEO
jack. To hear audio, connect the
camera’s audio output cable to the
AUDIO
L
jack.
Optional
Audio Cable
USB HDMI 4
INPUT 3
AUDIO
L R
Pb
Y/ VIDEO
Pr
AUDIO
L
Y/ VIDEO
Camera connection using a composite video cable
When the
4.
New Device Found screen displays,
assign the name Camcorder.
Press
5.
EXIT
to close the New Device Found screen.
Highlight the icon for the camera input and press
6.
ENTER
.
If viewing photos, control the slideshow from the
7.
camera. Advance through the images manually or
check if the camera can advance automatically.
Press 3. to highlight a bank.
Press 4.
MENU
to see channels in the bank.
To allow tuning to any channel in memory, select •
the All bank.
