


54
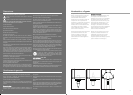
> 0.3 m
1.8 - 2.2 m
1
1
3
4
2
2
4
5
3
or
fig 2 fig 3 fig 4 fig 5
fig 1
above head height
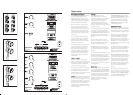
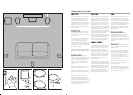
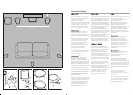
Room setup
e8c
The e8c loudspeaker is designed to be
placed underneath or above your TV screen
to centre dialogue to the visuals on the
screen. You can place it on a shelf above
the screen, or use the included wall bracket
to fix it to the wall. Alternatively you can
place it on a shelf below the screen and tilt it
upwards to face the listener if required.
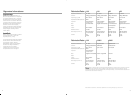
shelf
mount
The e8c is supplied fitted to a shelf stand.
You may loosen the fixing screw and rotate
the speaker on the stand to tilt it towards the
head of the seated listener if required.
Tighten the screw once the speaker is in the
optimum position (fig 4).
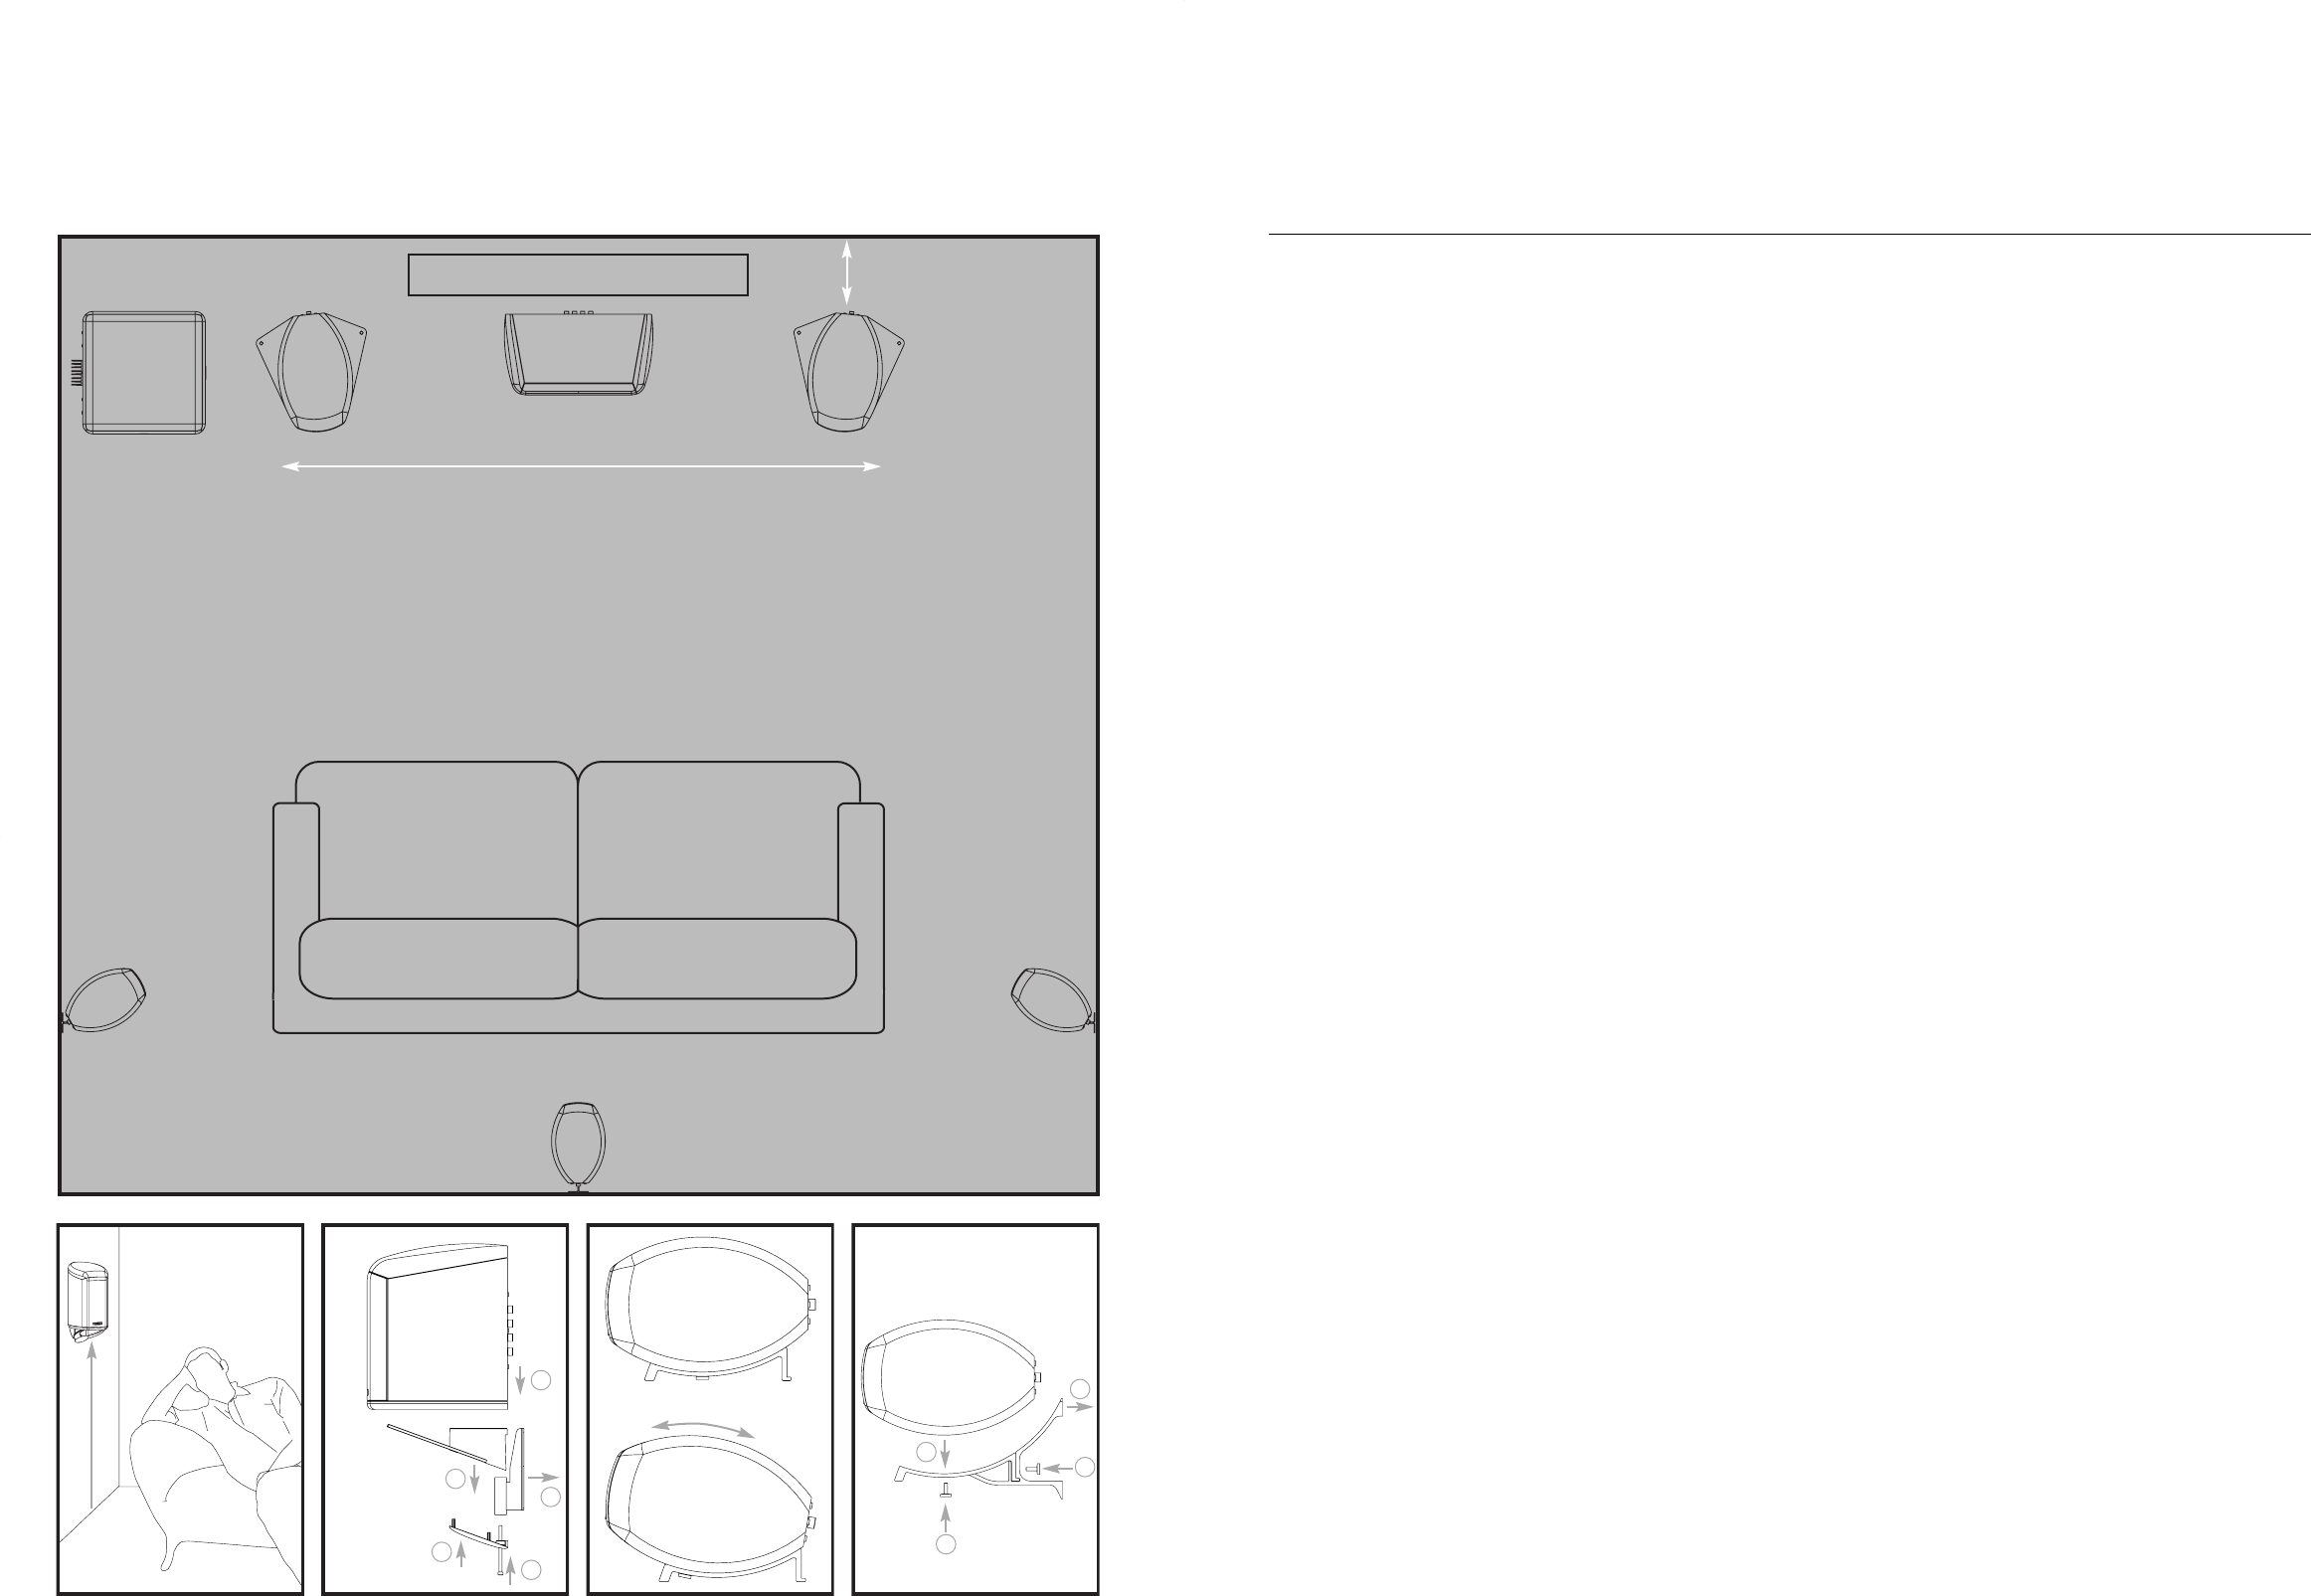
wall
mount
(fig 5)
Remove the e8c from its stand. Slide the
stand onto the wall bracket and secure it
with the locking screw.
Using the rear plate of the wall bracket as a
template, mark positions on the wall for four
screw fixings. Screw the bracket to the wall
using wall plugs and screws suitable for the
wall construction and the weight of the
loudspeaker.
Make the connections to the terminals on
the rear of the e8c through the elongated
hole provided.
Carefully place the e8c speaker onto the
speaker support arm. Secure the speaker
onto the arm using the fixing screw
provided.
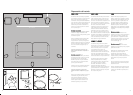
e80 / e81
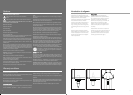
e80 and e81 speakers are designed to be
used close to rear walls, either on the
included wall brackets or
elegante floor
stands. When used as rear speakers on a
wall the optimum performance for surround
sound will occur when the speakers are
raised above head height (fig 2).
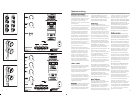
stand
mount
If using the Mission elegante stands, slide
the speaker support arm onto the stand
upright and secure it with the fixing screw.
Carefully place the e80 or e81 speaker onto
the speaker support arm, making sure that
the front extensions of the arm slot into the
recesses in the base of the speaker. Secure
the speaker onto the arm using the fixing
screw provided.
Make the connections to the terminals on
the rear of the speaker, as explained on
page 7.
wall
mount
(fig 3)
Using the rear plate of the wall bracket as a
template, mark positions on the wall for four
screw fixings. Screw the bracket to the wall
using wall plugs and screws suitable for the
wall construction and the weight of the
loudspeaker.
Slide the speaker support arm onto the
bracket and attach the base plate.
Make the connections to the terminals on
the rear of the speaker, as explained on
page 7.
Carefully place the speaker onto the
speaker support arm, making sure that the
front extensions of the arm slot into the
recesses in the base of the speaker. Secure
the speaker onto the arm using the fixing
screw provided.
e82 / e83
e82 and e83 floorstanding speakers
perform best when positioned more than
0.3m from a rear wall and away from
corners (fig 1). Moving the speakers towards
a wall or corner will increase the amount of
bass, conversely moving the speakers away
from a wall or corner will increase the clarity,
articulation and tautness of bass. For good
two-channel performance the speakers
should be around 1.8 - 2.2m apart (fig 1).
Where speakers are used as part of a multi-
channel system this distance can be altered
to suit your room furnishings. Spend some
time moving the speakers and listening for
the optimum performance.
e8as1 / e8as2
e8as1 and e8as2 subwoofers give clean
and articulate bass when positioned at least
0.3m from a corner. However if a higher
level of bass output is demanded, a corner
position may provide this at the possible
expense of some clarity. Again it is
beneficial to spend time moving the
subwoofer and listening for the optimum
performance.
The e8as1 and e8as2 subwoofers are
designed to provide the low frequency
foundation and reproduction of low
frequency effects in a music or home theatre
system. The method of connection and
setup will depend on the electronics that
you connect to the subwoofer. Please read
through the instructions to determine how
best to use your subwoofer.