HMS-10 OPERATING INSTRUCTIONS
15
MOUNTING HMS-10 LOUDSPEAKERS WITH
THE ADJUSTABLE MOUNT BRACKET
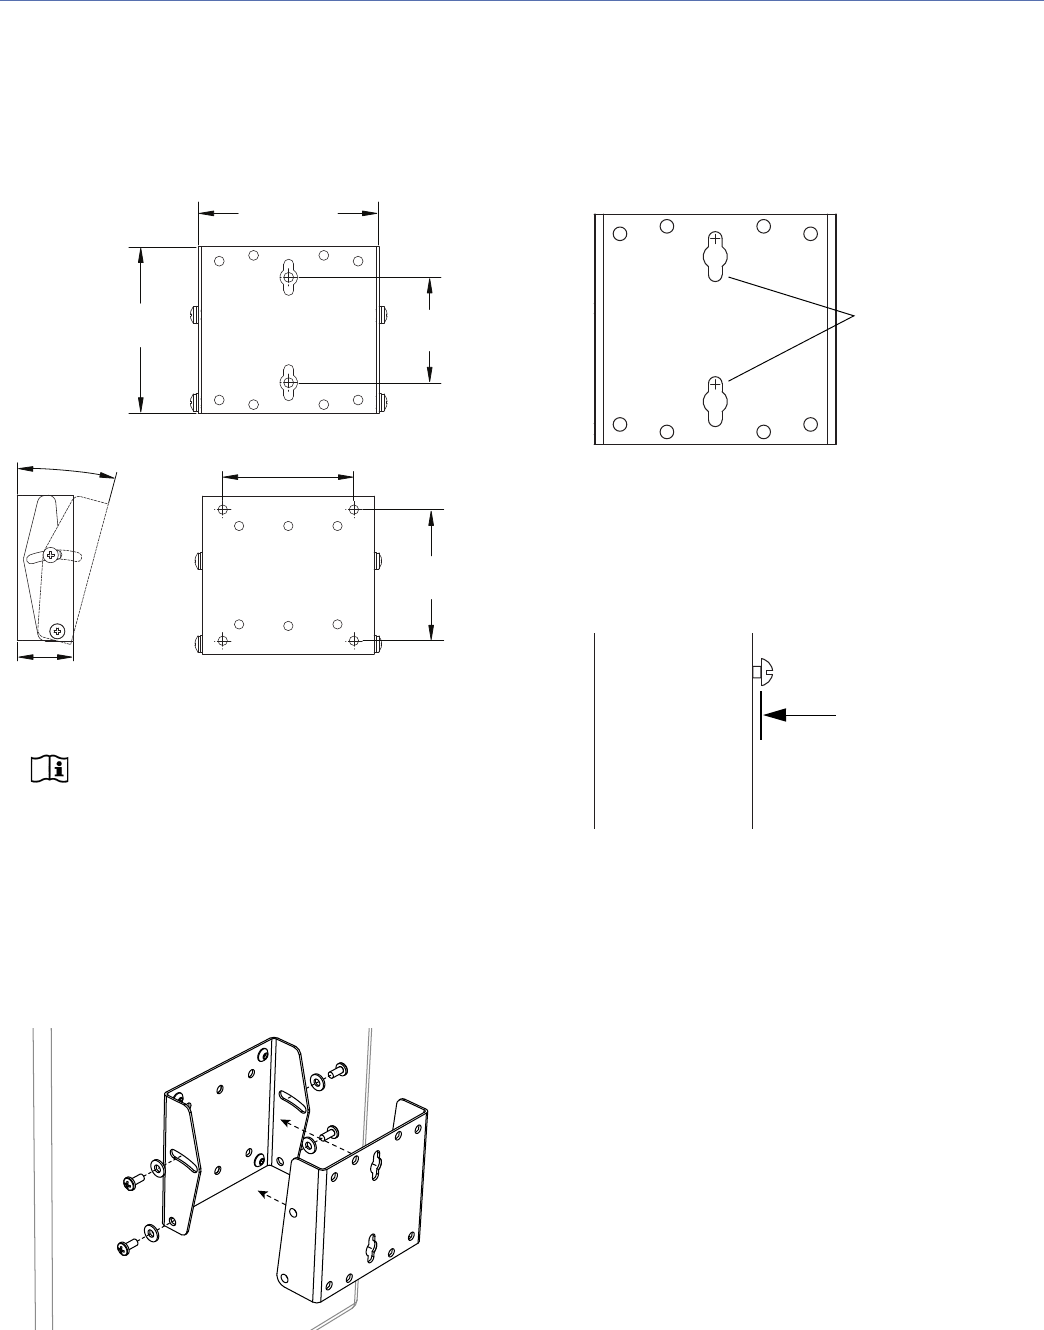
The HMS-10 can be wall mounted with the adjustable
mount bracket at downtilt angles up to 13 degrees and uptilt
angles up to 5 degrees (uptilt).
NOTE: When ordering the HMS-10 with the
adjustable mount bracket, the bracket is fac-
tory installed and already attached to the loud-
speaker.
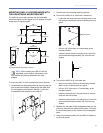
To mount the HMS-10 with the adjustable mount bracket:
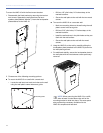
1. Disassemble the adjustable bracket by removing the four
side screws and washers. Separate the wall plate from
the loudspeaker plate (labeled “Monitor”). Leave the
loudspeaker plate attached to the HMS-10.
2. Choose one of the following mounting options:
■ To mount the HMS-10 on a wall with a wood stud:
– Locate the stud and mark two mounting holes on the
wall using the wall plate’s center mounting slots as a
guide.
– Drill two 1/8” pilot holes, 2.0 inches deep, at the
marked locations.
– Install the wood screws in the pilot holes. Leave the
screws extended approximately 3/8” from the wall
surface.
■ To mount the HMS-10 on a concrete wall:
– Mark two mounting holes on the wall using the wall
plate’s center mounting slots as a guide.
– Drill two 5/16” pilot holes, 2.5 inches deep, at the
marked locations.
– Install the wall anchors in the pilot holes so they are
flush with the wall surface.
– Install the wood screws in the wall anchors. Leave the
screws extended approximately 3/8” from the wall
surface.
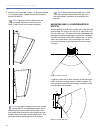
3. Reattach the wall plate to the loudspeaker plate with the
previously removed four washers and screws. The wash-
ers should be placed on the outside of the loudspeaker
plate.
4. Hang the mounting bracket, with the HMS-10 attached,
on the wall screws.
Adjustable Bracket (OmniMount 17FM-T)
1.84
[46.74 mm]
5.16
[131.06 mm]
4.75
[120.65 mm]
3.00
[76.20 mm]
3.94
[100.00 mm]
3.94
[100.00 mm]
+5°/–13°
Wall Plate
Loudspeaker
Plate
Mounting slots
3/8”


