Installing the Unit
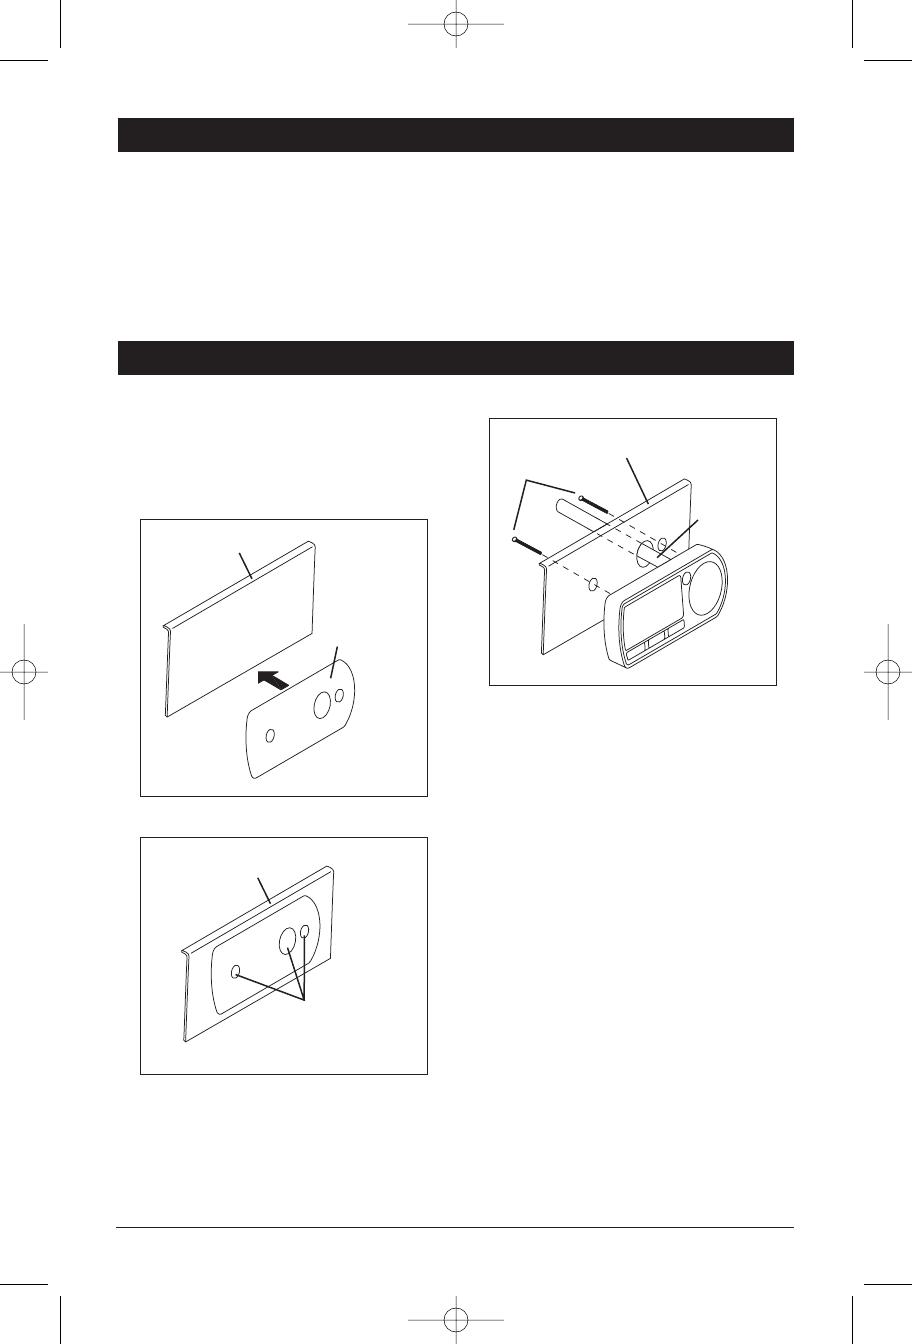
1. Using the foam adhesive backer of the remote as
a template, determine the mounting location on
the mounting surface and mark the three hole
locations.
2. Remove the foam adhesive backer and drill two
3/8" and one 5/8" mounting holes in the marked
positions.
3.Remove the backer to the foam adhesive backer
and adhere it to the back of the remote.
4. Feed the remote wire through the 5/8" hole in the
mounting surface and attach the remote to the
mounting surface using the supplied screws.
5. Attach the remote wire to the unit according to
the wiring diagram on Page 11.
Note: The Wired Remote comes with an extension
cord so the remote can be mounted a far distance
from the receiver.
This unit is a wired remote control made using a modified controller or similar layout. It is capable of
operating the specified functions on the M5100CD receiver. The body, buttons, controls and display are
UV and water-resistant. It includes a LCD and an illumination circuit.
Take a moment to read through this section and become familiar with the operations and features of this
outstanding product. It is advisable to keep this manual in your vehicle so it is readily available for refer-
ence. Be sure to fill out and send in your warranty card to ensure that you receive the full benefits of war-
ranty repair in the unlikely event that your system will need service.
Waterproof Wired Remote Introduction
Installation Procedures
8
Mounting Surface
Foam Adhesive
Backer
Mounting Surface
Mark & Drill Holes
Screws
Wire to Unit
Mounting Surface
M5100CDUMFinal 2/1/05 4:58 PM Page 8


