


4
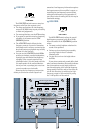
1. Connect the line-level monitor signal from
your mixer (or other signal source) to the
SIGNAL INPUT
jack on the HR824
Studio Monitor (
1
⁄
4
-inch TRS, XLR, or RCA).
2. Connect the supplied AC power cord to the
IEC socket
on the back of the monitor.
Plug the other end into an AC outlet properly
configured with the correct voltage for your
particular model.
3. Set the
POWER MODE
switch on the
rear panel to the
ON
position. With the
power switch
on the front panel in the
down position, the power amplifier is in
Standby mode.
4. Start your signal source (tape deck, CD,
DAW, or whatever), but leave the master
level control on your mixer down.
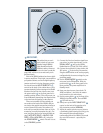
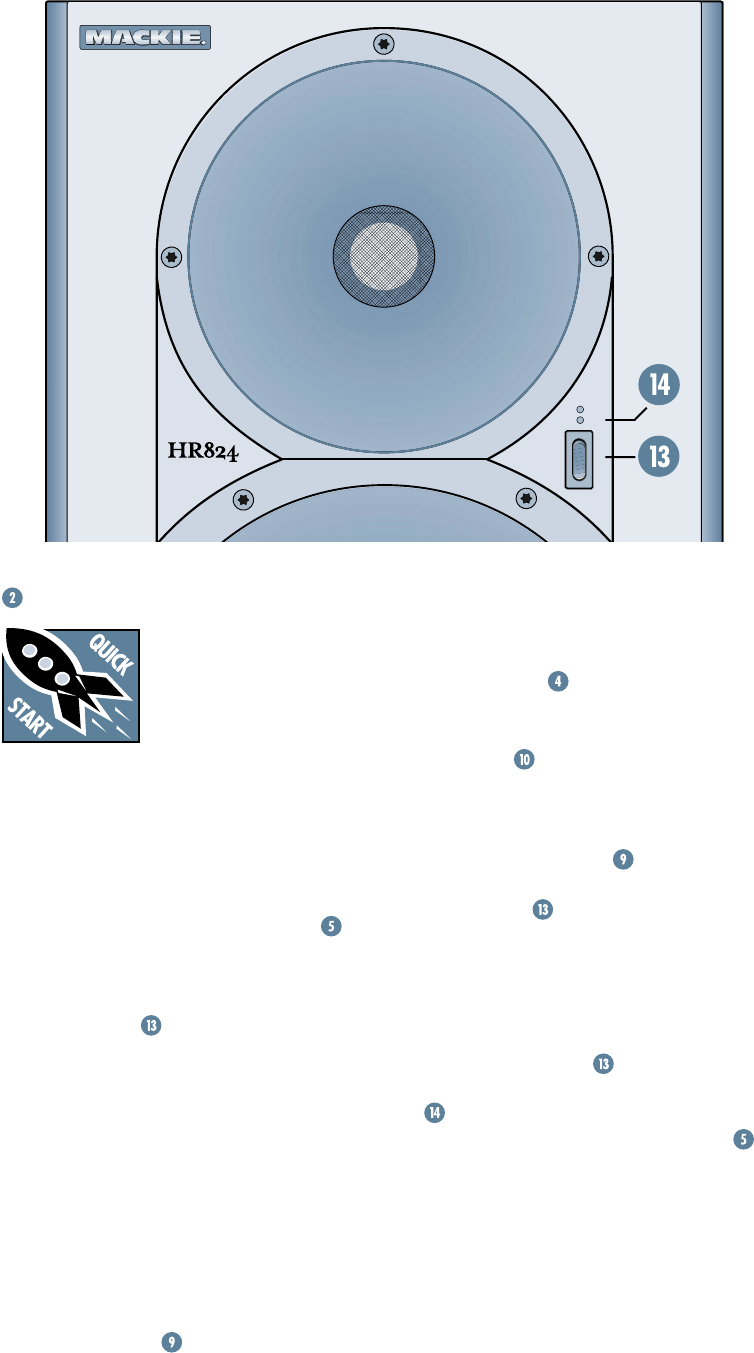
5. Set the power switch
on the front of the
HR824 to the
ON
position. The red
PWR
LED will turn on.
6. Slowly turn up the
INPUT SENSITIVITY
control on the back of the monitor to its
fully clockwise position
(NORMAL)
.
7. Adjust the master volume on your mixer to
a comfortably loud listening level. Enjoy the
silky smooth highs and authoritative,
commanding lows of the HR824. Then read
the rest of this manual…especially the
following:
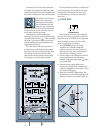
QUICK START.
We realize that you can’t
wait to hook up your new
Mackie Designs HR824
High Resolution Studio
Monitors and try them out.
Nevertheless, please take the time to read this
page NOW, and the rest can wait until you’re
good and ready.
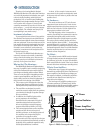
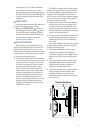
Each of the HR824 cabinets has its own built-
in power amplifiers. That’s right, two amplifiers
per speaker cabinet; one for the high-frequency
tweeter and one for the low-frequency woofer.
You should turn the
INPUT SENSITIVITY
control on the back of the cabinet down (fully
counterclockwise) before turning on the Studio
Monitors for the first time. Also be sure to set
the power switch
on the front panel to its
standby position (down). This will prevent you
from accidentally connecting a hot signal source
to the monitors and getting a rude surprise.
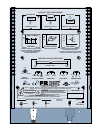
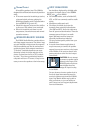
There are a number of other settings you
can make on the back of the HR824, and you
can look at the graphic instructions relating to
each of them on the back of the cabinet (or
wait until you read about them later on in this
manual so you really know what they do). For
now, just leave them at the factory default set-
tings (
ACOUSTIC SPACE = WHOLE; LOW
FREQ = 37Hz; HIGH FREQ = 0
), except for
the
POWER MODE
switch. Be sure it is set
to the
STANDBY
position.
OL
PWR
HIGH RESOLUTION
STUDIO MONITOR
ON