(space) . - 1
G H I 4
P Q R S 7
D E F É È 3
M N O Ö Ø Ñ 6
W X Y Z 9
A B C Å Ä Á À 2
J K L 5
T U V Ü Ú 8
0
SEARCH
CONTACT
PHONE BOOK SETTINGS CONF GUIDE RECORDING STATUS
ADD
CONTACT
EDIT
CONTACT
ERASE
CONTACT
ERASE
ALL
STATUS
LANGUAGE
KEY
TONE
TIME
DATE
RING
LEVEL
FLASH/R
MOBILE
LEVEL
EQUALIZER
AUX
SCREEN
TEXT
DEFAULT
SEARCH
GROUP
SHOW
GROUP
ADD
GROUP
EDIT
GROUP
ERASE
GROUP
ERASE
ALL
SETTINGS
STATUS
PLAYBACK
FILE
EDIT
FILE
DELETE
FILE
DELETE
ALL
SETTINGS
STATUS
4
5
KEYPAD
DESCRIPTION DESCRIPTION
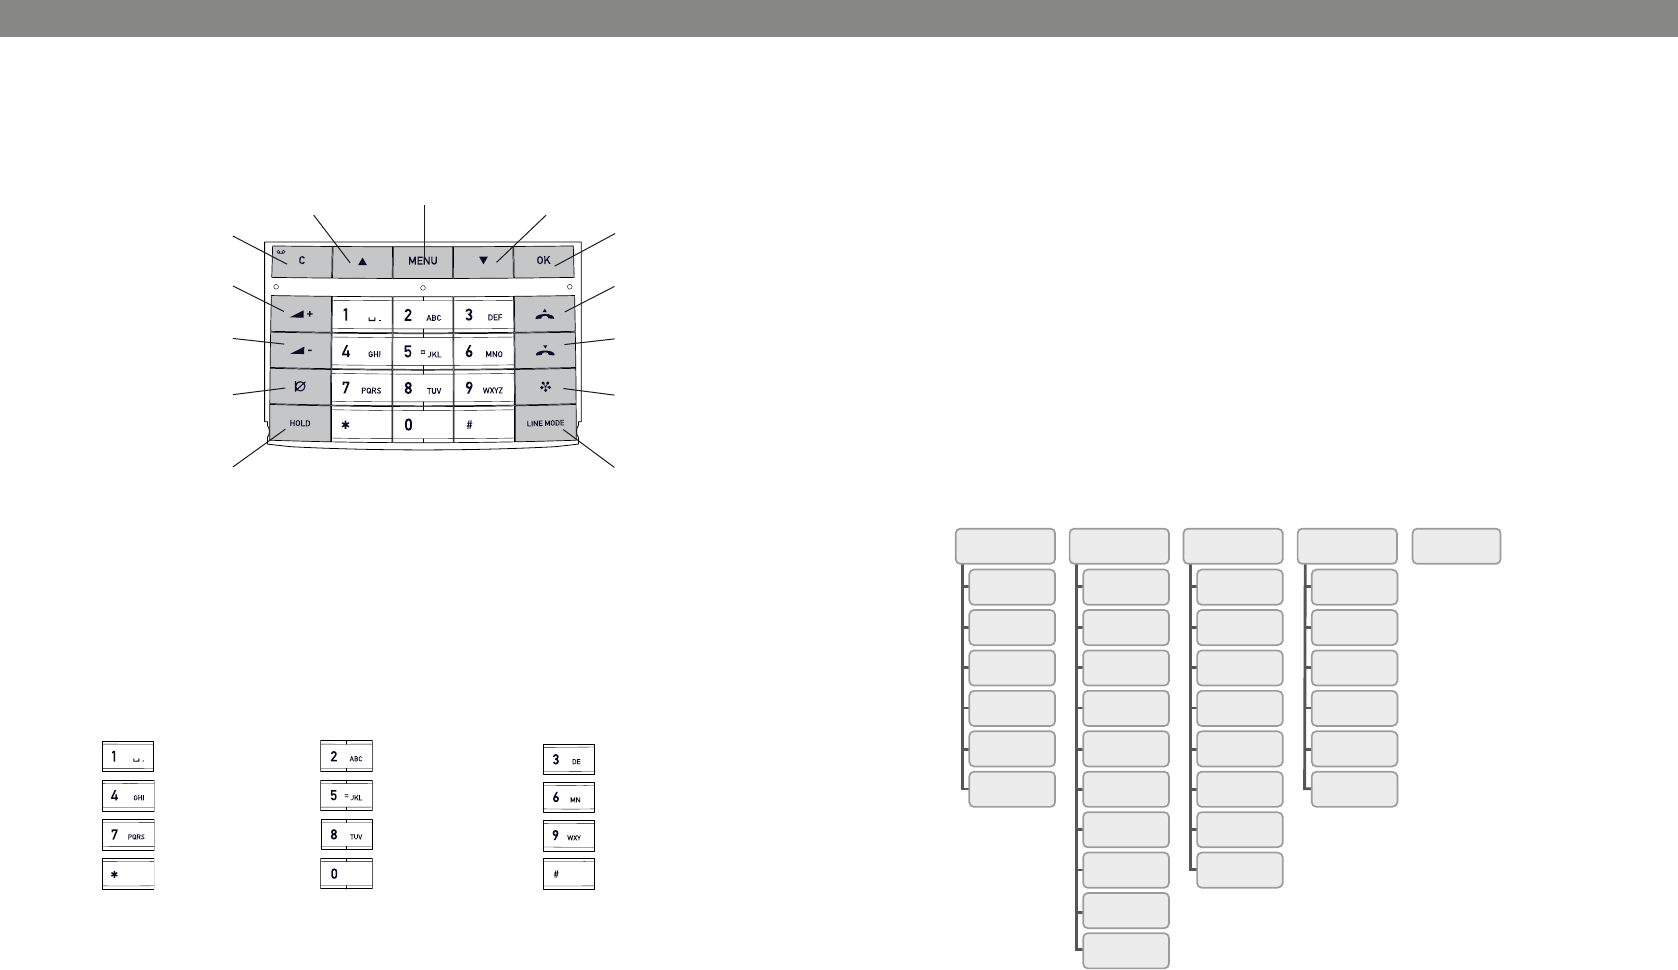
Writing text
Each button contains letters and characters – more than those shown on the button
(see illustration below). Press the same button repeatedly to change to another charac-
ter. If there are two letters under the same button that you want to enter one after the
other, you need to pause slightly before entering the second letter.
Press the C button to delete the last character you entered.
MENU,
settings menu
UP ARROW
navigation in menus,
display of call list
C,
no/end/back
recording
Increase volume
Decrease volume
MUTE
the caller cannot
hear you
HOLD
puts a call on hold
Alphanumerical buttons, phonebook
OK,
yes/conrm choice
Answer/connect
calls and Flash
Hang up/end call
CONFERENCE
automatic dialling
of conference
groups
LINE MODE,
connectivity
options
DOWN ARROW
navigation in menus,
display of call list
NAVIGATION AND SELECTION IN MENUS
Press MENU.
Select the option you want from the menu using the arrow buttons.
Conrm by pressing OK to select the marked option.
Cancel the setting or go back one level in the menu by pressing C.
Quit the menu by pressing MENU again.
Note that after you have made changes to a setting, you must press OK to activate
the setting.
Writing style in instructions
In the instructions, MENU > SETTINGS means you should:
Press MENU.
Mark the SETTINGS option using the arrow buttons and conrm by pressing OK to
open the menu.
Menu tree


