


16
|
English
General features
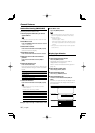
Station/Disc Naming (SNPS/DNPS)
Attaching a title to a Station or CD.
1 Receive/play the station/disc you want to
attach a title to
• A title cannot be attached to MD or Audio file media.
2 Enter Menu mode
Press the [MENU] button for at least 1 second.
"MENU" is displayed.
3 Select Name set mode
Push the Control knob towards [FM] or [AM].
Select the "Name Set" display.
4 Enter Name set mode
Press the Control knob for at least 1 second.
5 Move the cursor to the enter character
position
Push the Control knob towards [4] or
[¢].
6 Select the character type
Press the Control knob.
Each time you press the knob, the character type
alternates between the types shown in the table
below.
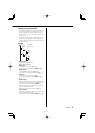
Character type
Alphabet upper case
Alphabet lower case
Numbers and symbols
Special characters (Accent characters)
7 Select the characters
Push the Control knob towards [FM] or [AM].
•
Enter characters by using a remote control with
numbers buttons.
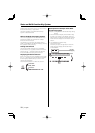
Example: If you are entering "DANCE".
Character Button Times pressed
"D" [3] 1
"A" [2] 1
"N" [6] 2
"C" [2] 3
"E" [3] 2
8 Repeat steps 5 through 7 and enter the name.
9 Exit Menu mode
Press the [MENU] button.
• When operation stops for 10 seconds the name at
that time is registered, and Name Set mode closes.
• Memory numbers
- FM/ AM: 30 stations
- Internal CD player: 10 discs
- External CD changer/ player: Varies according to the
CD changer/ player. Refer to the CD changer/ player
manual.
• Change the title of station/CD by the same operation
used to name it.
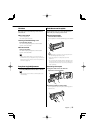
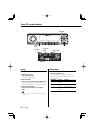
Display Type Selection
Changing the display mode.
1 Select the key function section
Press the [NEXT] button.
Repeatedly press the button until "DISP" is
displayed above the [2] button.
Refer to <Notes on Multi-function Key System>
(page 10).
2 Enter display control mode
Press the [2] ("DISP") button.
3 Select the display mode
Press the [1] ("MODE") button.
4 Select the display Type
Push the Control knob towards [4] or
[¢].
Each time you push the knob, the display mode
alternates between the display modes shown in
the table below.
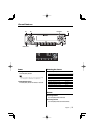
Display Mode Display
"Display Type A"
1
"Display Type B"
1
2
"Display Type C"
4
3
3
5
3
6