


4
EN
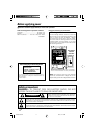
Before applying power
Preparing the remote control
Insert batteries type R6/LR6 (“AA” size) into the
remote control.
Operation
When the standby indicator is lit, the power turns
ON when you press the POWER
button on the
remote control. When the power comes on, press
the button you want to operate.
Notes:
•The supplied batteries may have shorter lives than
ordinary batteries due to use during operation
checks.
•When the remote-controllable distance gets shorter
than before, replace both batteries with new ones.
• Placing the remote sensor in direct sunlight, or in
direct light from a high frequency fluorescent lamp
may cause a malfunction.
In such a case, change the location of the system
installation to prevent malfunction.
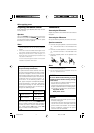
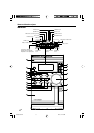
Connections
Connecting the FM antenna
Adjust the position of the FM antenna for the best
reception.
Connecting the AM antenna
Set up the AM loop antenna, and then connect it.
Speakers connection
• Connect the right speaker to terminal marked
“R” , with the red wire to + and the black wire
to –.
• Connect the left speaker to terminal marked
“L” , with the red wire to + and the black wire
to –.
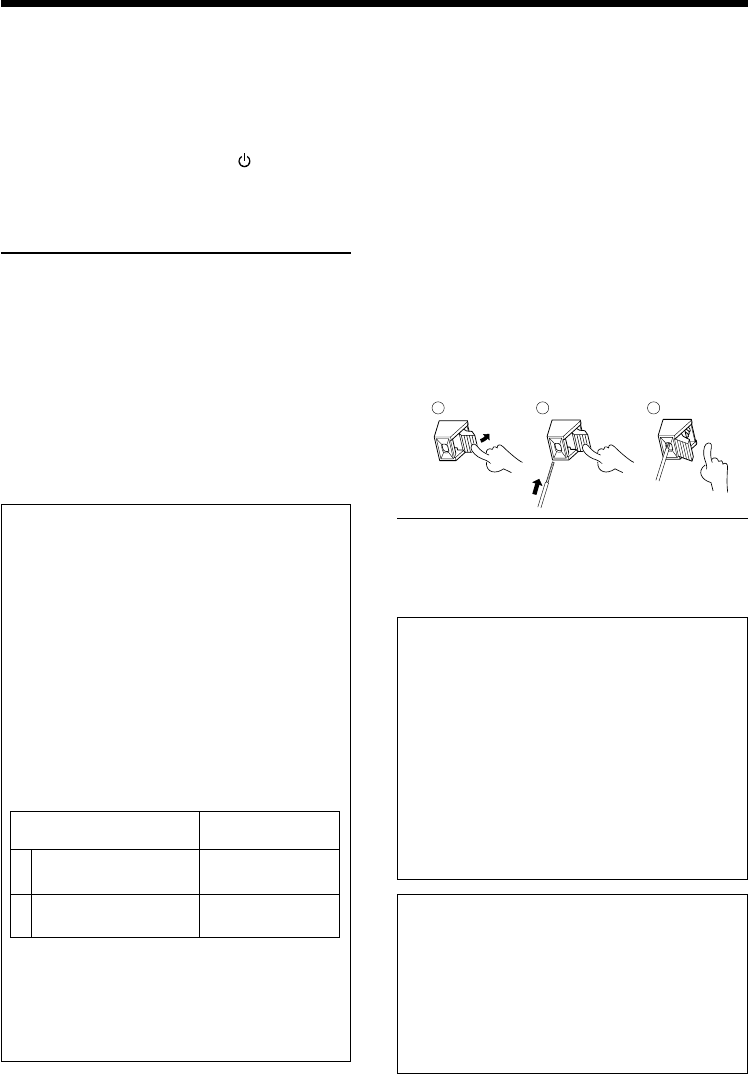
• Clip the stripped portion of the speaker wire
as shown.
Notes:
•For optimal sound performance, it is recommended
to use the supplied speakers.
• Do not connect more than one speaker to any one
pair of +/– speaker terminal.
CAUTION
Be sure to adhere to the following, or proper
ventilation will be blocked causing damage
or fire hazard.
• Do not place any objects impairing heat ra-
diation onto the top of the unit.
•Leave some space around the unit (from the
largest outside dimension including projec-
tion) equal to or greater than, shown below.
Top panel : 50 cm
Back panel : 10 cm
1 2
3
CAUTION
• Place the unit where the AC power cord can
be easily unplugged.
•The power in this unit will not be completely
cut off from the AC wall outlet when the
power switch is turned OFF. To cut off the
power completely, unplug the AC power
cord from the AC wall outlet.
Channel space switching
(except for the Europe and Australia)
The space between radio channels has been
set to the one that prevails in the area to which
the system is shipped. However, if the current
channel space setting does not match the set-
ting in the area where the system is to be used,
for instance when you move from area 1 or
area 2 shown in the following table or vice
versa, proper reception of AM/FM broadcasts
cannot be expected. In this case, change the
channel space setting for each AM and FM
broadcast in accordance with your area by re-
ferring to the following table.
When the system is on, press TUNER band
button to select TUNER mode and waveband
of which you wish to set the channel space.
Then, while pressing 6 button, press 4
button to switch the channel space.
Area
CHANNEL
Space frequency
1
2
U.S.A., Canada and South
American countries
Other countries
FM: 100 kHz
AM: 10 kHz
FM: 50 kHz
AM: 9 kHz
*5469/01-07/EN 04.6.1, 11:19 AM4