


– 9 –
English
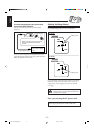
Use a screwdriver to rotate the voltage selector so the voltage
number the voltage mark is pointing at is the same as the
voltage where you are plugging in the unit. (See the back
cover page.)
• DO NOT plug in before setting the voltage
selector on the rear of the unit and all connection
procedures are complete.
Now, you can plug the AC power cord.
IMPORTANT: Be sure to check all connections to be done
before plugging the AC power cord into a wall outlet.
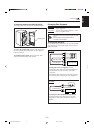
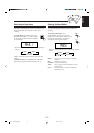
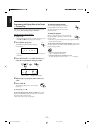
Adjusting the Voltage Selector
Before plugging in the unit, set the correct voltage for your
area with the voltage selector on the rear of the unit.
Voltage mark
VOLTAGE
SELECTOR
110V
127V
220V
230V
-240V
VOLTAGE
SELECTOR
110V
127V
230V
220V
For UX-P5
For UX-P3
Voltage mark
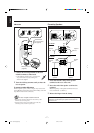
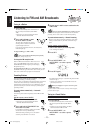
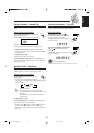
To connect audio equipment with an optical digital
input terminal (ONLY FOR UX-P5)
You can record CD sound onto the connected digital
equipment.
OPTICAL
DIGITAL
OUT
Before connecting the other equipment,
remove the protective plug from the
terminal.
Protective plug
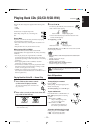
Connect an optical digital cord (not supplied) between the
optical digital input terminal on the other equipment and the
OPTICAL DIGITAL OUT terminal.
To optical digital input
Audio equipment
with an optical digital
input
EN01-13.UX-P5&3[[UW,UY] 01.2.26, 11:01 AM9