


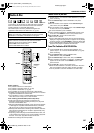
Masterpage:Right+
Filename [TH-R1R3EU_10Subsidiary.fm]
Page 80Monday, 28 March 2005 21:23
SUBSIDIARY SETTINGS
80
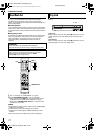
Manual Channel Set
Store channels that were not stored during Auto Set Up
(A pg. 17), Preset Download (A pg. 18) or Auto Channel Set
(A pg. 79).
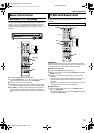
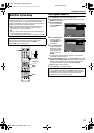
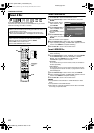
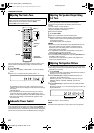
1 Press SET UP to access the Main Menu screen.
2 Press selection keys to select AINITIAL SET UPB, then press
ENTER for confirmation.
3 Press selection keys to select AMANUAL CH SETB, then press
ENTER.
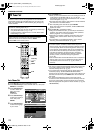
4 Press selection keys
to select a blank
position in which you
want to store a
channel, then press
ENTER twice.
5 Press selection keys
to select ABANDB, then
press ENTER.
6 Press selection keys
to change the band
between CH (regular)
and CC (cable), then
press ENTER.
7 Press selection keys
to select ACHB, then
press ENTER for
confirmation.
8 Press selection keys
to select a channel
number you want to store, then press ENTER.
● To enter the registered station name (A pg. 91), press
selection keys to select AIDB, then press ENTER. Press FG.
● For fine tuning adjustment, press selection keys to select
AFINEB. Press DE to perform fine-tuning.
● When storing a channel that sends scrambled broadcasts,
press selection keys to select ADECODERB, then press
ENTER. Press selection keys to set ADECODERB to AONB
(AOFFB is the default setting).
● When AL-2 SELECTB is set to AVIDEO/RGBB, AS-VIDEO/RGBB,
ASAT VIDEO/RGBB or ASAT S-VIDEO/RGBB, the ADECODERB
setting cannot be changed. (A pg. 70)
9 Press SET UP or RETURN 3 times to complete the setting.
● To change positions, see AChange Station Channel PositionB on
the right column.
● If you wish to set station names other than the ones registered
in your unit, see ASet Stations (B)B (A pg. 81).
Delete A Channel
1 Perform steps 1 - 3 of AManual Channel SetB on the left
column.
2 Press selection keys to select the channel you want to delete.
3 Press CANCEL to delete a channel. The channel next to the
cancelled one moves up one line.
● Repeat steps 2 - 3 as necessary.
4 Press SET UP or RETURN twice to complete the setting.
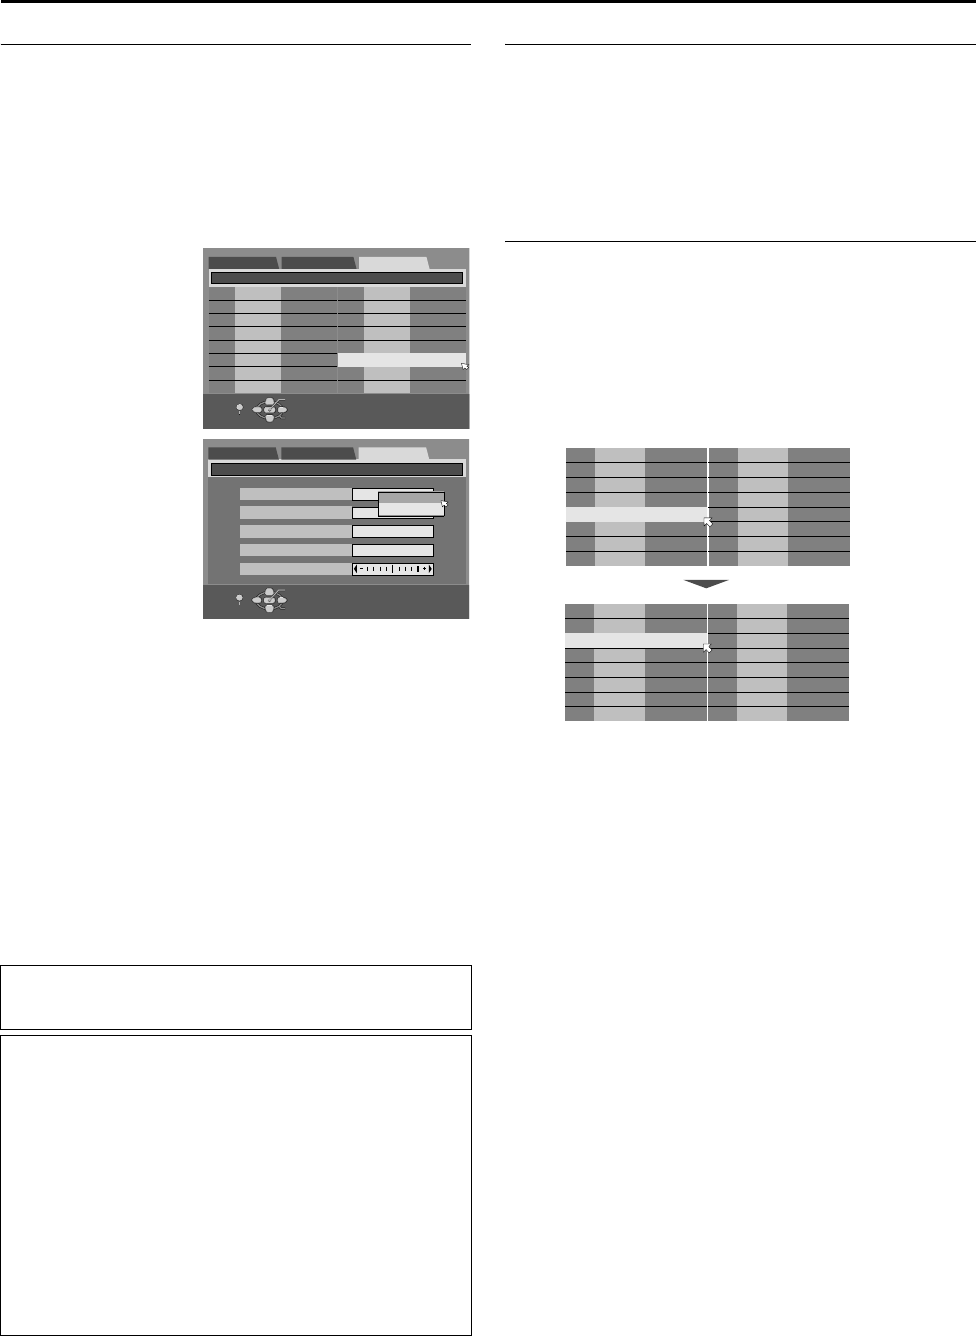
Change Station Channel Position
1 Perform steps 1 - 3 of AManual Channel SetB on the left
column.
2 Press selection keys to select the channel you want to move,
then press ENTER.
3 Press selection keys to select the new channel position, then
press ENTER.
Example: If you moved the station in position 4 to position 2, the
stations originally in positions 2 and 3 each move down
one space.
● Repeat steps 2 - 3 as necessary.
4 Press SET UP or RETURN twice to complete the setting.
ATTENTION:
Guide Programme numbers are not set when channels are
stored manually. (A pg. 78, AS
HOWVIEW System SetupB)
INFORMATION
If you have selected AMAGYARORSZÁGB, AČESKÁ
REPUBLIKAB, APOLSKAB or AOTHER EASTERNB for the country
setting (A pg. 79), ATV SYSTEMB setting appears instead of
ADECODERB setting on the Manual Channel Set screen. When
you can see the picture but can hear no audio, select appropriate
TV system (D/K or B/G). Normally, TV programmes are
broadcast as follows.
For Eastern Europe: D/K
For Western Europe: B/G
A Select a country in Eastern Europe in step 4 of AAuto
Channel SetB (A pg. 79).
B Press selection keys to select ATV SYSTEMB in step 5 of the
above AManual Channel SetB.
C Press selection keys to select appropriate TV System (D/K
or B/G).
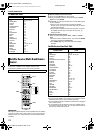
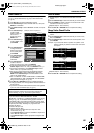
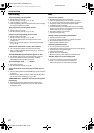
(Example) To store in position 12.
01 25 ARD
02 C08 SKY1
03 10 ZDF
04 C65 DAI1
05 C31 BBC1
06 C32 BBC2
07 C33 3SAT
08 C26 E-SP
09 55 WEST
10 C24 SAT1
11 C23 OSF
12
----
13
----
14
----
DVD SET UP FUNCTION SET UP
INITIAL SET UP / MANUAL CH SET
SELECT WITH [CURSORS]
THEN PRESS [ENTER]
INITIAL SET UP
OK
SELECT
RETURN
SET UP
PR CH PR CHID
ID
CH
01
----
DVD SET UP FUNCTION SET UP
INITIAL SET UP / MANUAL CH SET
SELECT WITH [CURSORS]
THEN PRESS [ENTER]
INITIAL SET UP
BAND
CH
ID
DECODER
FINE
CC
CH
OK
SELECT
RETURN
SET UP
OFF
01 04 ARD
02 19 VORN
03 05 ANT3
04 01 ZTV
05 02 VLE2
06 10 BBC
07
----
08
----
09
----
10
----
11
----
12
----
13
----
14
----
01 04 ARD
02 01 ZTV
03 19 VORN
04 05 ANT3
05 02 VLE2
06 10 BBC
07
----
08
----
09
----
10
----
11
----
12
----
13
----
14
----
PR CH PR CHID
ID
PR CH PR CHID
ID
TH-R1R3EU_00.book Page 80 Monday, March 28, 2005 9:23 PM