– 9 –
R
L
R
L
SPEAKER IMPEDANCE 4~16Ω
SPEAKERS
CAUTION:
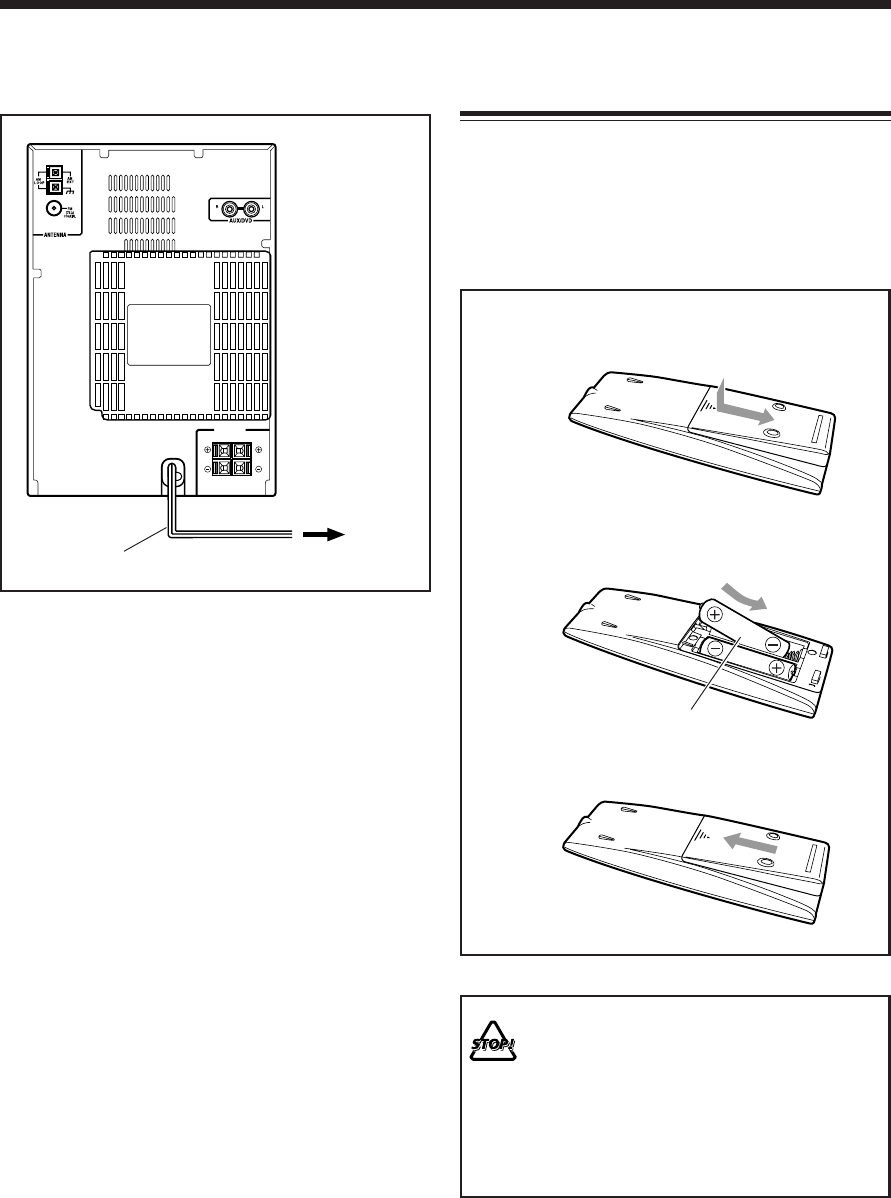
Putting the Batteries into the Remote
Control
Insert the batteries—R6P(SUM-3)/AA(15F)—into the
remote control, by matching the polarity (+ and –) on the
batteries with the + and – marking on the battery
compartment.
When the remote control can no longer operate the unit,
replace both batteries at the same time.
R6P(SUM-3)/AA(15F)
1
2
3
• DO NOT use an old battery together with a new
one.
• DO NOT use different types of batteries together.
• DO NOT expose batteries to heat or flame.
• DO NOT leave the batteries in the battery
compartment when you are not going to use the
remote control for an extended period of time.
Otherwise, it will be damaged from battery
leakage.
When you connect the AC power cord into a wall outlet,
the unit automatically starts display demonstration
(Automatic display demonstration).
• Each time you press and hold COLOR/DEMO (or
COLOR on the remote control) for more than 2 seconds,
Automatic display demonstration turns on and off
alternately.
To stop and cancel the display demonstration, press
COLOR/DEMO (or COLOR on the remote control) during
display demonstration while the unit is in standby mode.
• Pressing DIMMER or DISP/CHARA on the remote
control also cancels the display demonstration.
– When you press DIMMER while the unit is in standby
mode, the unit lets you know the time with tones (see
page 12).
– Each time you press DISP/CHARA while the unit is in
standby mode, the clock indication turns on and off
alternately (see page 12).
To start the display demonstration manually, press
COLOR/DEMO (or COLOR on the remote control) while
the unit is in standby mode.
• Each time you press the button, the display demonstration
alternates between on and off.
NOW, you can plug in the unit and other connected
equipment FINALLY!
AC power cord
To a wall
outlet
EN01-09UX-Z7MDR[B]f 02.6.28, 13:469


