


34
English
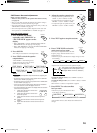
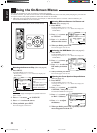
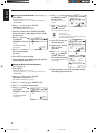
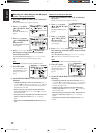
SEA ADJUST
SEA USERMODE
SET
:MEMORY
100 10kHz1k
4. Press % / fi to move
to “SEA ADJUST.”
The SEA ADJUST menu
appears.
5. Press % / fi / @ / # to
adjust the SEA mode as
you want.
@ / # : Select the frequency ranges.
% / fi : Adjust the frequency levels.
6. Press SET to store the setting into the SEA
USERMODE.
• If you press EXIT, without pressing SET in this step, you can
return to the SEA menu. (The adjustment you have made is
active but not stored.)
7. When you finish, press EXIT repeatedly until the
menu disappears from the TV.
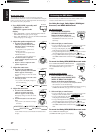
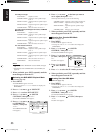
Setting the Basic Setting Items (Also see
pages 12 – 15)
1. Press MENU.
The MAIN MENU appears on the TV.
• Pressing one of the % / fi / @ / # buttons also displays the
MAIN MENU.
2. Press % / fi to move
to “SETTING,” then
press @ / #.
The SETTING 1 or SETTING
2 menu appears.
3. Press % / fi to move
to the item you want to
set or adjust, then press
@ / #.
• To go to the SETTING 2
menu, move to “NEXT
PAGE,” then press @ / #.
• To go back to the SETTING
1 menu, move
to
“PREVIOUS PAGE,” then
press @ / #.
On the SETTING 1 and 2 menus, you can do the following:
“SUBWOOFER”: Set the subwoofer information
(see page 12).
“FRONT SPK”: Set the front speaker information
(see page 14).
“CENTER SPK”: Set the center speaker information
(see page 14).
“REAR SPK”: Set the rear speaker information
(see page 14).
“CNTR DELAY”: Adjust the delay time of the center
speaker output (see page 14). *
“REAR DELAY”: Adjust the delay time of the rear
speaker output (see page 14). **
“CROSSOVER”: Set the crossover frequency
(see page 15).
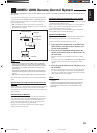
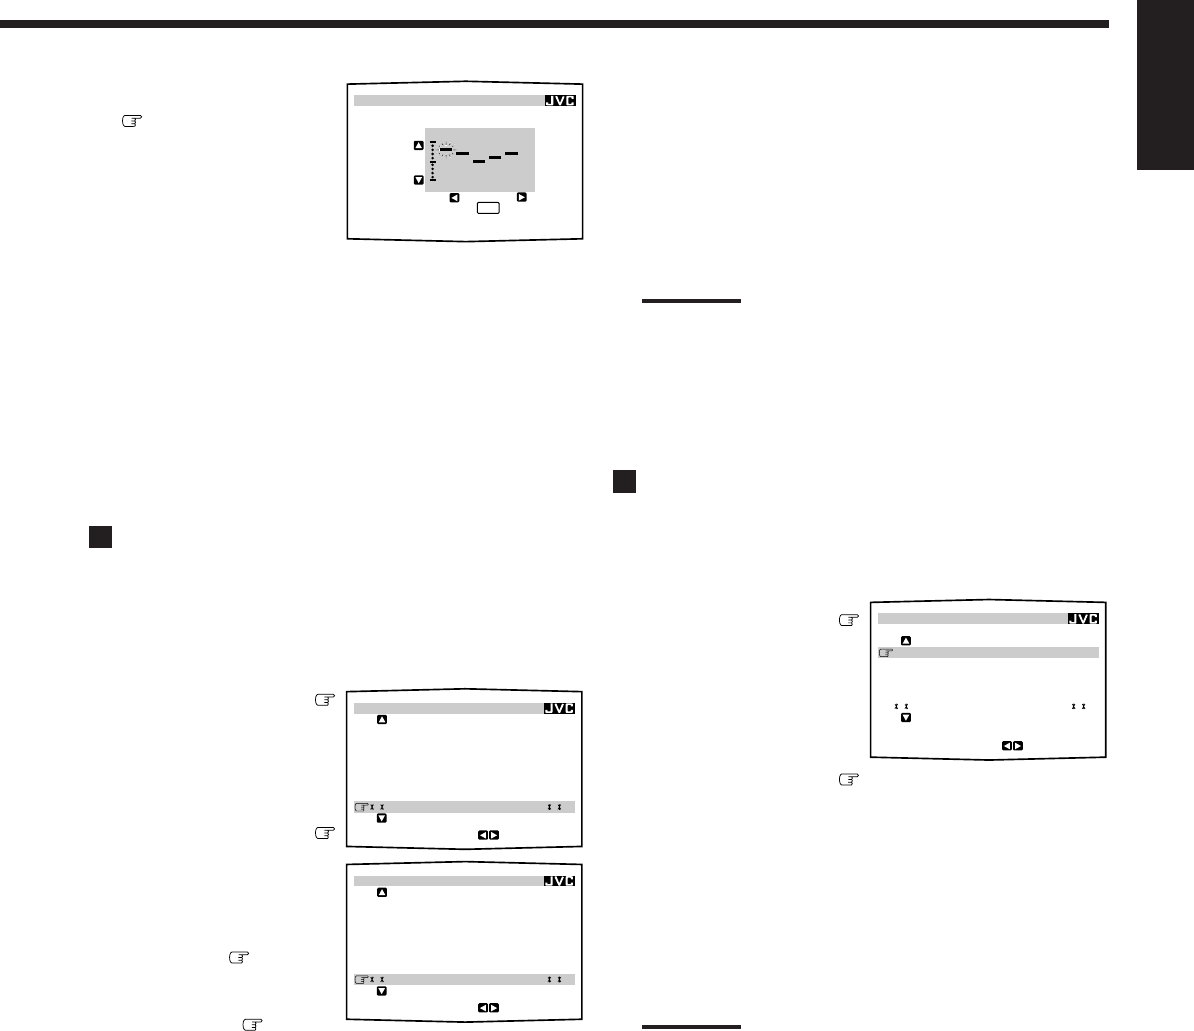
SETTING 1
SUBWOOFER : NO
FRONT SPK : LARGE
CENTER SPK : SMALL
REAR SPK : LARGE
CNTR DELAY : 3msec
REAR DELAY : 5msec
CROSSOVER :100
Hz
NEXT PAGE
:ENTER
SETTING 2
LFE ATT. : 0
dB
COMP. : OFF
DIGITAL 1 : DBS
DIGITAL 2 : CD
DIGITAL 3 : MD
FL DISP. : NORMAL
PREVIOUS PAGE
:ENTER
“LFE ATT.”: Set the low frequency effect attenuator
level (see page 15).
“COMP.”: Set the dynamic range compression
(see page 15).
“DIGITAL 1/2/3”: Set the digital input terminal
(see page 13).
“FL DISP.”: Shows the disc text information on the
display (see page 13).
Notes:
*
Not adjustable when “CENTER SPK” is set to “NONE” (see
page 14).
**
Not adjustable when “REAR SPK” is set to “NONE” (see page
14).
4. When you finish, press EXIT repeatedly until the
menu disappears from the TV.
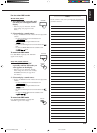
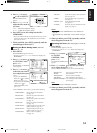
Operating the Tuner (Also see pages 17 and 18)
1. Press MENU.
The MAIN MENU appears on the TV.
• Pressing one of the % / fi / @ / # buttons also displays the
MAIN MENU.
2. Press % / fi to move
to “TUNER
CONTROL,” then
press @ / #.
The TUNER CONTROL menu
appears.
3. Press % / fi to move to the item you want to
set or adjust, then press @ / #.
On the TUNER CONTROL menu, you can do the following:
“PRESET CH”: Select a preset channel station.
“BAND”: Select the band.
“FREQUENCY”: Tune in a station manually.
“FM MODE”: Select the FM reception mode.*
“PRESET MEMORY”: See “Storing the Preset Stations” on
the next page.
Note:
*
Not displayed when an AM station is selected.
4. When you finish, press EXIT repeatedly until the
menu disappears from the TV.
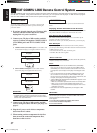
TUNER CONTROL
PRESET CH : 1
BAND :FM
FREQUENCY : 87.50
MHz
FM MODE :AUTO
PRESET MEMORY
:OPERATE
EN31_41.RX-889P[US, UB]/f 99.4.12, 5:34 PM34