31
Activating the Surround/DSP modes
Available Surround/DSP modes vary depending on the speaker
settings and the incoming signals. For details, see page 30.
Activating one of the Surround/DSP modes automatically
recalls the memorized settings and adjustments.
• To adjust the speaker output level, see page 22.
• When activating one of the Surround/DSP modes, you
can adjust CENTER TONE. (see page 24)
• When activating one of the Surround/DSP modes
(except Pro Logic IIx Music, Pro Logic II Music, NEO:6
Music, and ALL CH STEREO), you can adjust CENTER
ALIGN. (see page 24)
• When activating NEO:6 MUSIC, you can adjust CENTER
GAIN. (see page 24)
• When activating the DSP mode (except All Channel
Stereo mode), you can adjust the following settings:
EFFECT (see page 23)
LIVENESS (see page 23)
ROOM SIZE (see page 23)
• When activating “PLIIx MUSIC” and “PLII MUSIC”, you
can adjust the following settings:
CENTER WIDTH (see page 24)
DIMENSION (see page 24)
PANORAMA (see page 23)
Selecting the Surround/DSP modes
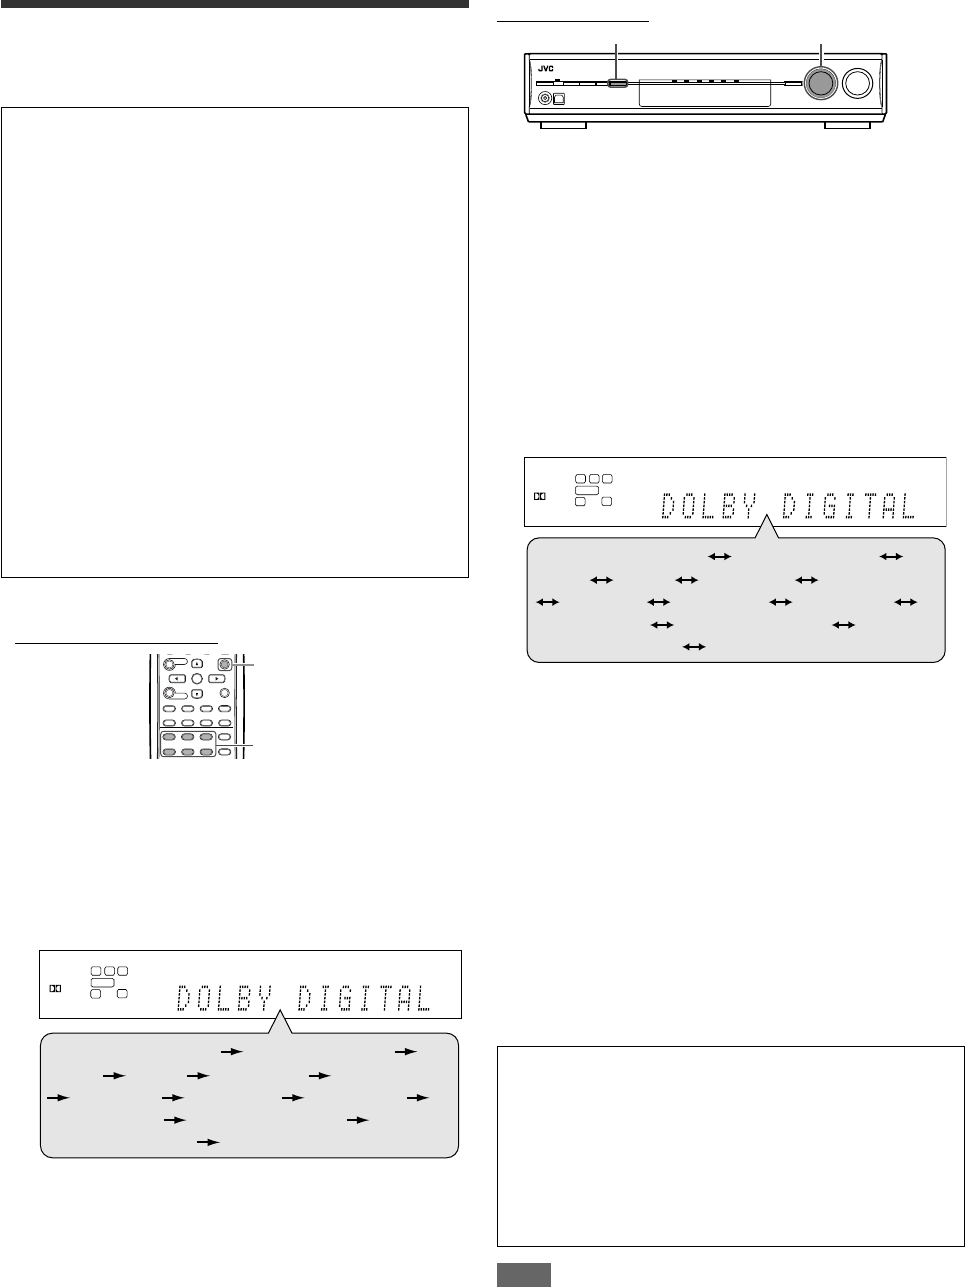
From the remote control:
1
Select and play any source.
• Make sure you have selected the input mode (analog or
digital) correctly.
2
Press SURROUND repeatedly to select the
Surround/DSP mode you want.
Ex.: When “DOLBY DIGITAL” is selected for Dolby Digital
multi-channel software:
*
1
“AUTO SURROUND” is the initial setting.
*
2
Available Surround modes vary depending on the speaker
settings and the incoming signals. For details, see page
30.
*
3
If an incoming signal is a multi-channel (more than 2
channel) digital signal, “MONO FILM” is not available.
*
4
If “SURROUND SPK” is set to “<NO>,” “ALL CH STEREO”
is not available.
To cancel Surround/DSP modes
Press SURROUND repeatedly so that “SURROUND OFF”
appears on the display.
On the front panel:
Before you start, remember...
There is a time limit in doing the following steps. If the setting is
canceled before you finish, start from step
2
again.
1
Select and play any source.
• Make sure you have selected the input mode (analog or
digital) correctly.
2
Press SURROUND.
MULTI JOG now works for selecting Surround/DSP modes.
3
Turn MULTI JOG to select the Surround/DSP
mode you want.
Ex.: When “DOLBY DIGITAL” is selected for Dolby Digital
multi-channel software:
*
1
“AUTO SURROUND” is the initial setting.
*
2
Available Surround modes vary depending on the speaker
settings and the incoming signals. For details, see page
30.
*
3
If an incoming signal is a multi-channel (more than 2
channel) digital signal, “MONO FILM” is not available.
*
4
If “SURROUND SPK” is set to “<NO>,” “ALL CH STEREO”
is not available.
To cancel Surround/DSP modes
Turn MULTI JOG so that “SURROUND OFF” appears on the
display.
When you select “AUTO SURROUND”
You can enjoy the Surround mode easily.
• For details about the Surround modes, see page 30.
• When “AUTO SURROUND” is activated, the AUTO SURR indicator
lights up on the display.
How does “AUTO SURROUND” work?
• If a multi-channel signal comes in, an appropriate Surround
mode will be selected automatically.
• If a Dolby Digital 2-channel with surround signal comes in,
“PLII MOVIE” will be selected.
• If a Dolby Digital 2-channel without surround signal comes in,
“SURROUND OFF (stereo)” will be selected.
• If a Linear PCM signal comes in, “SURROUND OFF (stereo)”
will be selected.
NOTE
“AUTO SURROUND” does not take effect in the following cases:
– While playing an analog source,
– While selecting one of the fixed digital decode mode—“DOLBY
DIGITAL” or “DTS” (see page 13).
1
2
1,3
2
L
LS RS
S.WFR LFE
CR
DIGITAL
DIGITAL AUTO
SURROUND OFF
(Back to the beginning)
Surround modes
*
2
AUTO SURROUND*
1
HALL1 HALL2 LIVE CLUB DANCE CLUB
PAVILION THEATER1 THEATER2
MONO FILM
*
3
ALL CH STEREO*
4
L
LS RS
S.WFR LFE
CR
DIGITAL
SURROUND OFF
(Back to the beginning)
Surround modes
*
2
AUTO SURROUND
*
1
HALL1 HALL2 LIVE CLUB DANCE CLUB
PAVILION THEATER1 THEATER2
MONO FILM
*
3
ALL CH STEREO
*
4


