


7
ENGLISH
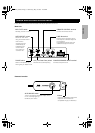
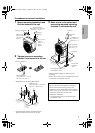
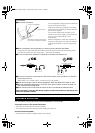
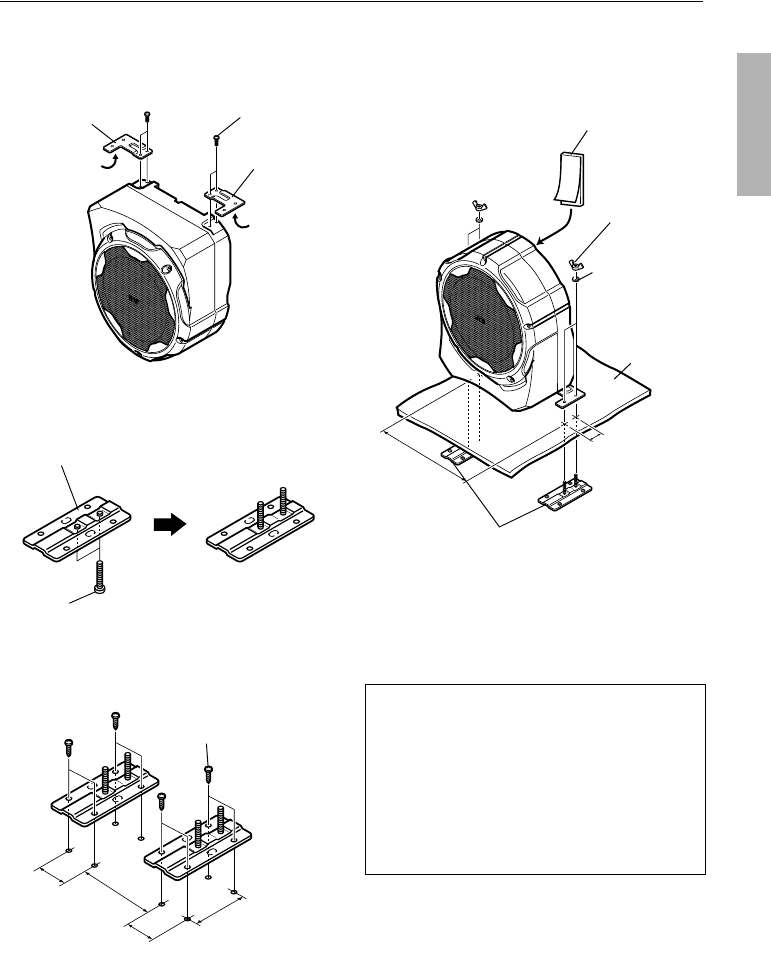
Procedures for vertical installation
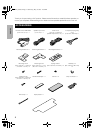
1 Mount mounting brackets A and
B at the bottom of the unit
2 Tighten screws on mounting
bracket C and mount it in the car
• Assemble two mounting brackets C.
• Use the paper pattern to determine the
position and mount the unit in the car.
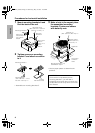
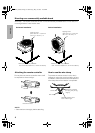
3 Make a hole in the carpet and
secure the mounted mounting
brackets C with butterfly nuts
• Use the paper pattern to determine the
positions.
• Attach the cushion when the back of the unit
comes into contact with the car.
Mounting screw
(Dia. 7/32 inch c 11/32 inch
/ M 5 mm c 8 mm) c 4
Mounting
bracket A
Mount such
that the
letter AAB is
at the
bottom.
Mount such
that the letter
ABB is at the
bottom.
Mounting bracket B
Mounting bracket C
Mounting screw
(Dia. 7/32 inch c 1 inch /
M 5 mm c 25 mm) c 2
Tapping screw
(Dia. 3/16 inch c 13/16 inch
/ M 4 mm c 20 mm) c 8
1
-
9
/
3
2
i
n
c
h
(
3
2
m
m
)
2
-
7
/
3
2
i
n
c
h
(
5
6
m
m
)
1
-
9
/
3
2
i
n
c
h
(
3
2
m
m
)
1
0
-
1
/
8
i
n
c
h
(
2
5
7
m
m
)
CAUTION
Be sure to check the positions of piping,
tanks and electrical wiring and do not
interfere or touch these items when making
holes in the car to mount the unit. Treat the
machined areas with anti-rust and
waterproof measures.
• If left untreated, they may cause traffic
accidents or fire.
Butterfly nut
(Dia. 7/32 inch /
M 5 mm) c 4
Spring washer
(Dia. 7/32 inch /
M 5 mm) c 4
Carpet etc.
Use a cutter
to make 4
holes.
Mounting bracket C (c2)
assembled in step 2
Cushion
Peel off the
sheet
1
1
-
1
3
/
3
2
i
n
c
h
(
2
8
9
m
m
)
1
-
1
/
8
i
n
c
h
(
2
8
m
m
)
CS-DA1_EN.book Page 7 Wednesday, May 23, 2007 12:09 PM