44
Listening to Other Equipment/Recording Sound English
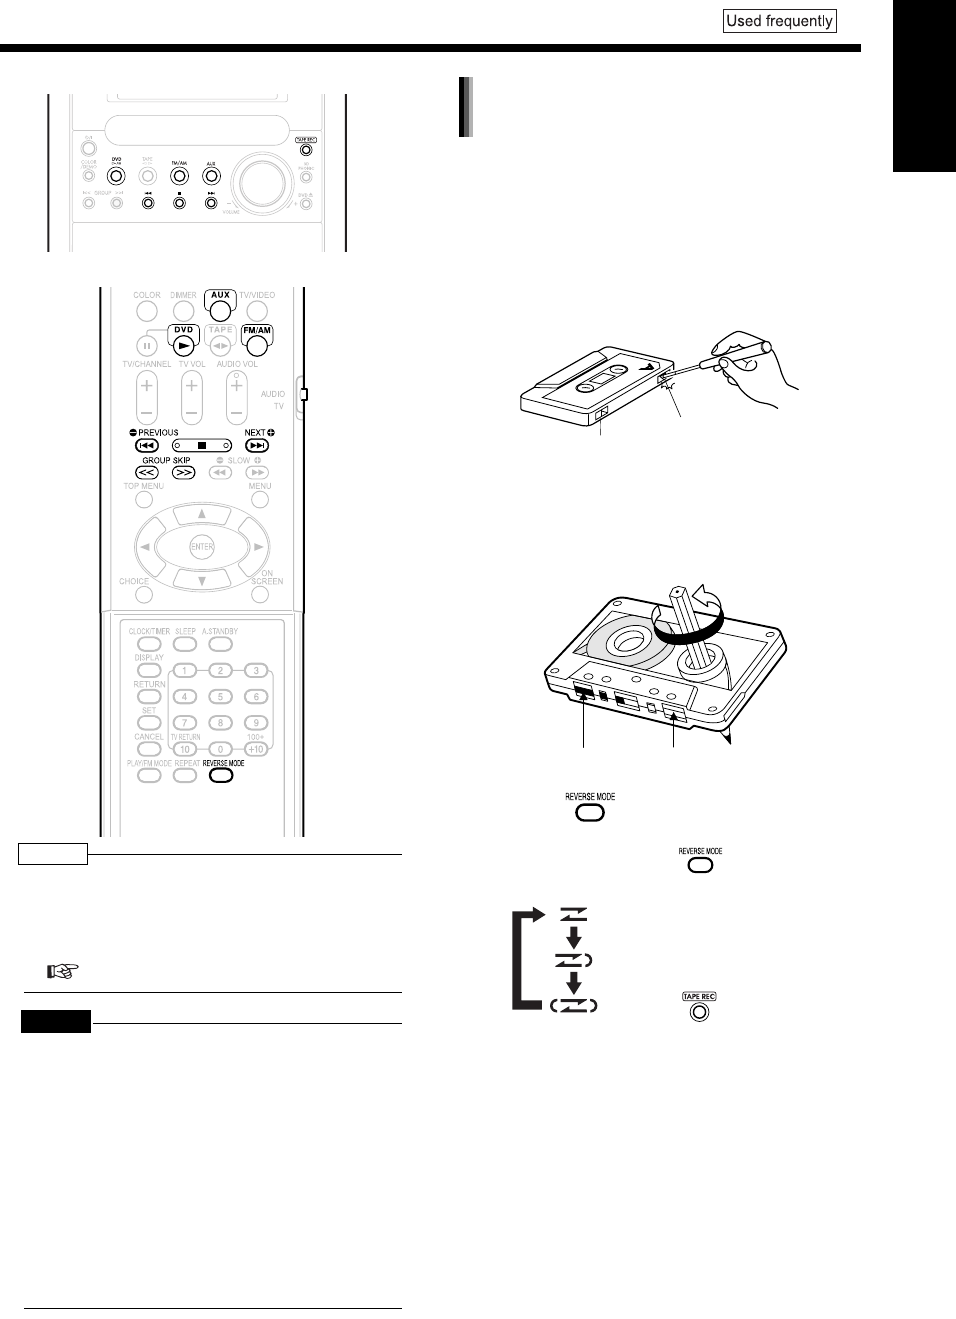
Recording Sound to Cassette Tapes
Main unit
Remote control
NOTE
• The sound input level during recording is automati-
cally adjusted.
• When you record tracks from a disc, a 4-second
blank is inserted between tracks in the recording.
You can record tracks with no blank time.
( page 45)
CAUTION
• It may be unlawful to record or playback
copyright material without the consent of the
copyright owner.
• Do not use long cassette tapes such as C-120 or
C-150. Long cassette tapes are thin and stretch
easily, and may become tangled in the inner part
of the main unit.
• Since this product is not compatible with TYPE II
and TYPE IV cassette tapes, do not use these
types of cassette tapes. This product does not
meet the specifications for these tapes, so sound
is not properly recorded to these types of cas-
sette tapes. You cannot obtain proper playback
sound.
• Write protect tags are attached to a cassette
tape for preventing the erasing of recorded
sound. They enable you to avoid losing impor-
tant recordings because once you snap off the
write protect tags, you cannot record to the cas-
sette tape or erase recorded material.
• When you want to use the cassette tape for
recording again, cover the tag holes with adhe-
sive tape.
1 Insert a cassette tape for record-
ing.
• Before inserting the cassette tape, wind the
tape past the leader part of the cassette
tape.
2 Press to select the reverse
mode.
• Each time you press , the display tog-
gles as follows.
• You can change the reverse mode during
recording.
(Continued on next page)
Preventing recorded sound from
being erased
Write protect
tag for side A
Write protect
tag for side B
Magnetic tape
(recordable part)
Leader tape (unrecordable part)
: For one-way recording on either
side.
: Pressing automatically
starts one return recording on
both sides.
: For one return recording on both
sides.
UX-QD9[US].book 44 ページ 2004年10月8日 金曜日 午前10時27分


