


16
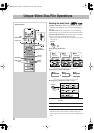
To adjust the picture tone
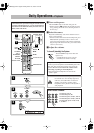
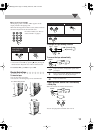
1
Select “USER1” or “USER2.”
• Follow steps
1
and
2
on page 15.
2
Select a parameter you want to adjust.
3
Adjust the parameter.
4
Repeat steps
2
to
3
to adjust other parameters.
To erase the VFP screen,
press VFP again.
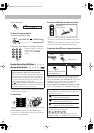
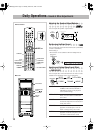
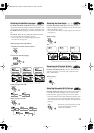
Changing the Display Brightness
*Excluding the KARAOKE SCORING lamp and VARIO
BASS lamp (if they are in use.).
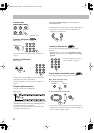
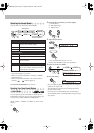
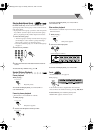
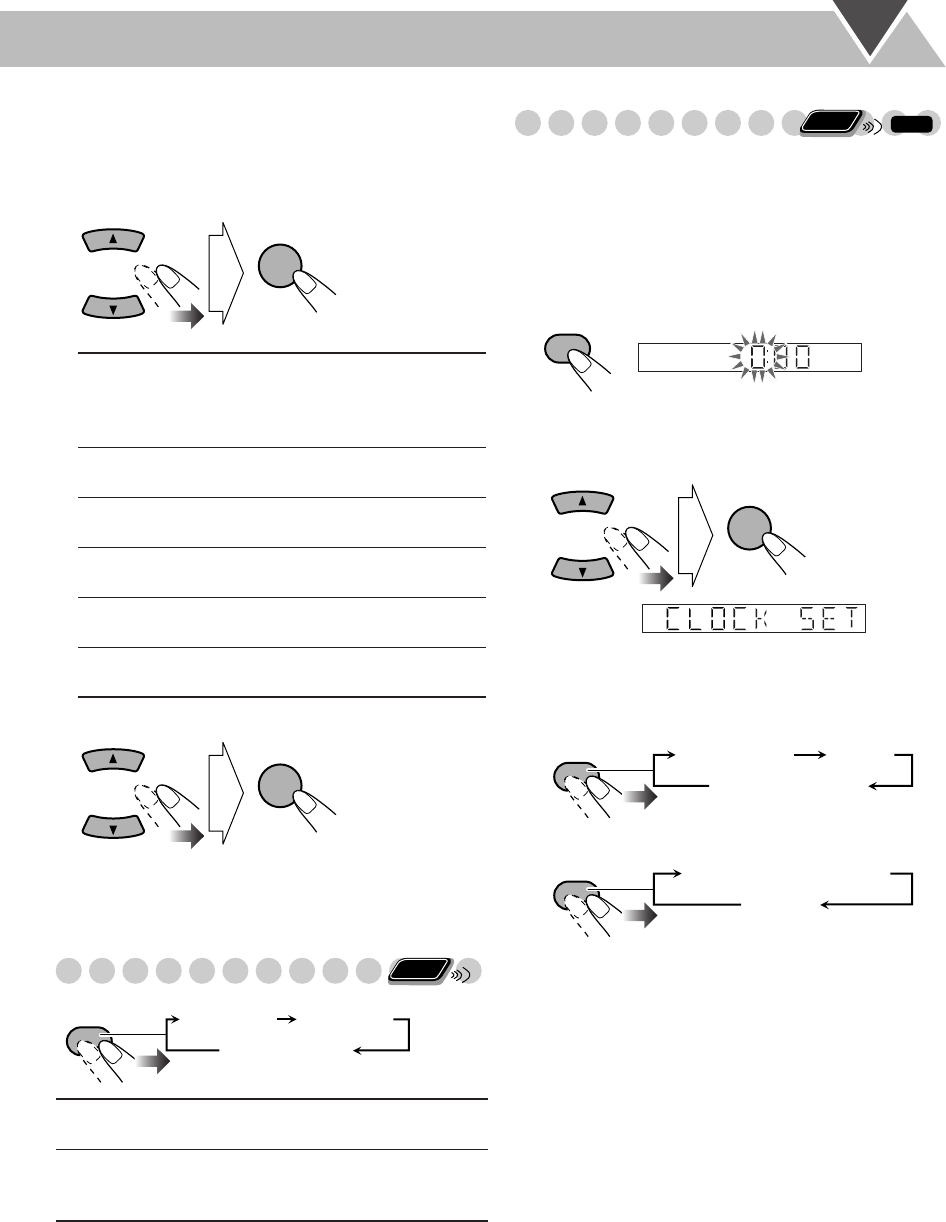
Setting the Clock
Without setting the built-in clock, you cannot use any timers
except the Sleep Timer.
• To exit from the clock setting, press CLOCK/TIMER as
required.
• To correct a misentry during the process, press CANCEL.
You can return to the previous step.
1
Activate clock setting mode.
• If you have already adjusted the clock before, press the
button repeatedly until the clock time starts flashing.
2
Adjust the hour, then minute.
Now the built-in clock starts working.
To display the clock during playback
For “DVD/CD” and “USB”:
For “TAPE,” “TUNER AM,” “TUNER FM” and “AUX”:
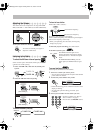
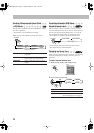
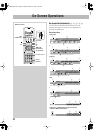
GAMMA
Adjust if the neutral color is bright
or dark. The brightness of dark and
bright portions is maintained
(–3 to +3).
BRIGHTNESS
Adjust if the picture is bright or dark
as a whole (–8 to +8).
CONTRAST
Adjust if the far and near position is
unnatural (–7 to +7).
SATURATION
Adjust if the picture is whitish or
blackish (–7 to +7).
TINT
Adjust if the human skin color is
unnatural (–7 to +7).
SHARPNESS
Adjust if the picture is indistinct
(–8 to +8).
DIMMER 1
Dims the display and the illumination* on
the main unit.
DIMMER 2
Dims the display (more than DIMMER 1)
and turns off the illumination* on the
main unit.
ENTER
/SET
ENTER
/SET
Remote
ONLY
DIMMER
DIMMER 1 DIMMER 2
DIMMER OFF
(Canceled)
Remote
ONLY
INFO
CLOCK/
TIMER
ENTER
/SET
DISPLAY
Disc/file type Clock
Playback information
DISPLAY
Current source information
Clock
DX-U6[U].book Page 16 Monday, March 26, 2007 2:22 PM