39
9. When you have completed your selection for
the surround channel, press the
Set Button
^
, and then press the Selector Buttons 5
on the front panel to change the display to
S-W SPEAKER.
10. Press the Set Button
^
, and then press
the
Selector Buttons 5 on the front panel
to select the option that best describes your
system.
The choices available for the subwoofer position
will depend on the settings for the other speakers,
particularly the front left/right positions.
If the front left/right speakers are set to
SMALL,
the subwoofer will automatically be set to
SUB,
which is the “on” position.
If the front left/right speakers are set to
LARGE,
three options are available:
•
If no subwoofer is connected to the DCR600
II
,
press the
Selector Buttons 5 so that
SUB NONE appears in the Main
Information Display
U. When this option
is selected, all bass information will be routed
to the front left/right “main” speakers.
•
If a subwoofer is connected to the DCR600
II
,
you have the option to have the front
left/right “main” speakers reproduce bass
frequencies at all times, and have the sub-
woofer operate only when the DCR600
II
is
being used with a digital source that contains
a dedicated Low-Frequency Effects, or LFE,
soundtrack. This allows you to use both your
main and subwoofer speakers to take advan-
tage of the special bass created for certain
movies. Press the
Selector Buttons 5 so
that
SUB (LFE) appears in the Main
Information Display
U.
•
If a subwoofer is connected and you wish to
use it for bass reproduction in conjunction
with the main front left/right speakers,
regardless of the type of program source
or surround mode you are listening to,
press the
Selector Buttons 5 so that
SUB L/R+LFE appears in the Main
Information Display
U. When this option
is selected, a “complete” feed will be sent
to the front left/right “main” speakers,
and the subwoofer will receive the bass
frequencies.
11. When all speaker selections have been
made, press the
Set Button
^
to return to
normal operation.
Adjusting the Output Levels
Output level adjustment is a key part of the
configuration process for any surround sound
product. It is particularly important for a Dolby
Digital receiver such as the DCR600
II
, as correct
outputs will ensure that you hear soundtracks in
their proper place with the proper directionality
and intensity.
IMPORTANT NOTE: Listeners are often
confused about the operation of the surround
channels. While some assume that sound
should always be coming from each speaker,
most of the time there will be little or no sound
in the surround channels. This is because they
are only used when a movie director or sound
mixer specifically places sound there to create
ambience or a special effect, or to continue
action from the front of the room to the rear.
When the output levels are properly set, it is
normal for surround speakers to operate only
occasionally. Artificially increasing the volume
to the rear speakers may destroy the illusion of
an enveloping sound field that duplicates the
way you hear sound in a movie theater or con-
cert hall.
Before beginning the adjustment process, make
certain that all speaker connections have been
properly made. The system volume should be
set to the level that you will use during a typical
listening session. The Bass and Treble controls
should be set to 0dB, or press the
Tone Mode
Button
6 to disable them. To adjust the Bass
and Treble controls, press the
Tone Mode
Button
6, followed by the Set Button ^,
and use the
Selector Buttons 5 to adjust the
Bass, then Treble, by up to plus or minus 10dB.
To assist in making speaker configuration set-
tings, the icons in the
Speaker/Channel Input
Indicators
M change as the speaker type is
selected at each position. When only the center
icon box containing the abbreviation for the
speaker position is lit, the speaker is set for
“Small.” When the inner box and the two outer
boxes are lit, the speaker is set for “Large.”
When no indicator appears at a speaker
location, that position is set for “None” or
“No” speaker.
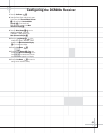
For example, in the following figure, the front
left and front right speakers are set for
LARGE,
the center, surround left (SL) and surround right
(SR) speakers are set for
SMALL, and a
subwoofer is set, as shown by the box with
the abbreviation “LFE”, which stands for
“low-frequency effects.”
To adjust and calibrate the output levels, follow
these steps. For accurate calibration, it is a
good idea to make these adjustments while
seated in your favorite listening position:
1. Put the DCR600
II
in the Dolby Pro Logic II mode
by pressing the
Surround Mode Selector 7
on the front panel, or by pressing the Surround
Mode Selector
t on the remote, until
DOLBY PRO LOGIC II – MOVIES
appears in the Main Information Display U
and the PRO LOGIC II Indicator F lights up.
2. Press the Test Button q on the remote.
T-T FL 0dB will appear in the Main
Information Display
U and the letters FL
will flash once each second.
3. The test noise will immediately begin to
circulate in the speakers in a clockwise
rotation, pausing at each position for three
seconds. As the test noise rotates, the speaker
position will be shown in the Main Information
Display
U .
NOTE: This is a good time to verify that the
speakers have been properly connected. As
the test noise circulates, listen to make
certain that the sound comes from the speaker
position shown in the Main Information
Display. If the sound from a speaker location
does NOT match the position indicated in the
display, turn the DCR600
II
off using the Main
Power Switch
1 and check the speaker
wiring to make certain that each speaker is
connected to the correct output terminal.
4. After checking for speaker placement, let the
test noise circulate, and listen to see which
channels sound louder than the others. Use
the front left (
FL in the display) speaker as a
reference by adjusting the volume to a com-
fortable level while the test tone is at the
front left speaker. For the other channels, do
not adjust the volume. Instead, press the
⁄
/
¤
Buttons y on the remote or the
Selector Buttons 5 on the front panel for
each channel to begin to bring them to the
same level. Note that when one of the buttons
is pushed, the test noise circulation will pause
Configuring the DCR600
II
Receiver


