7
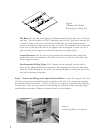
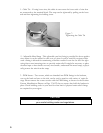
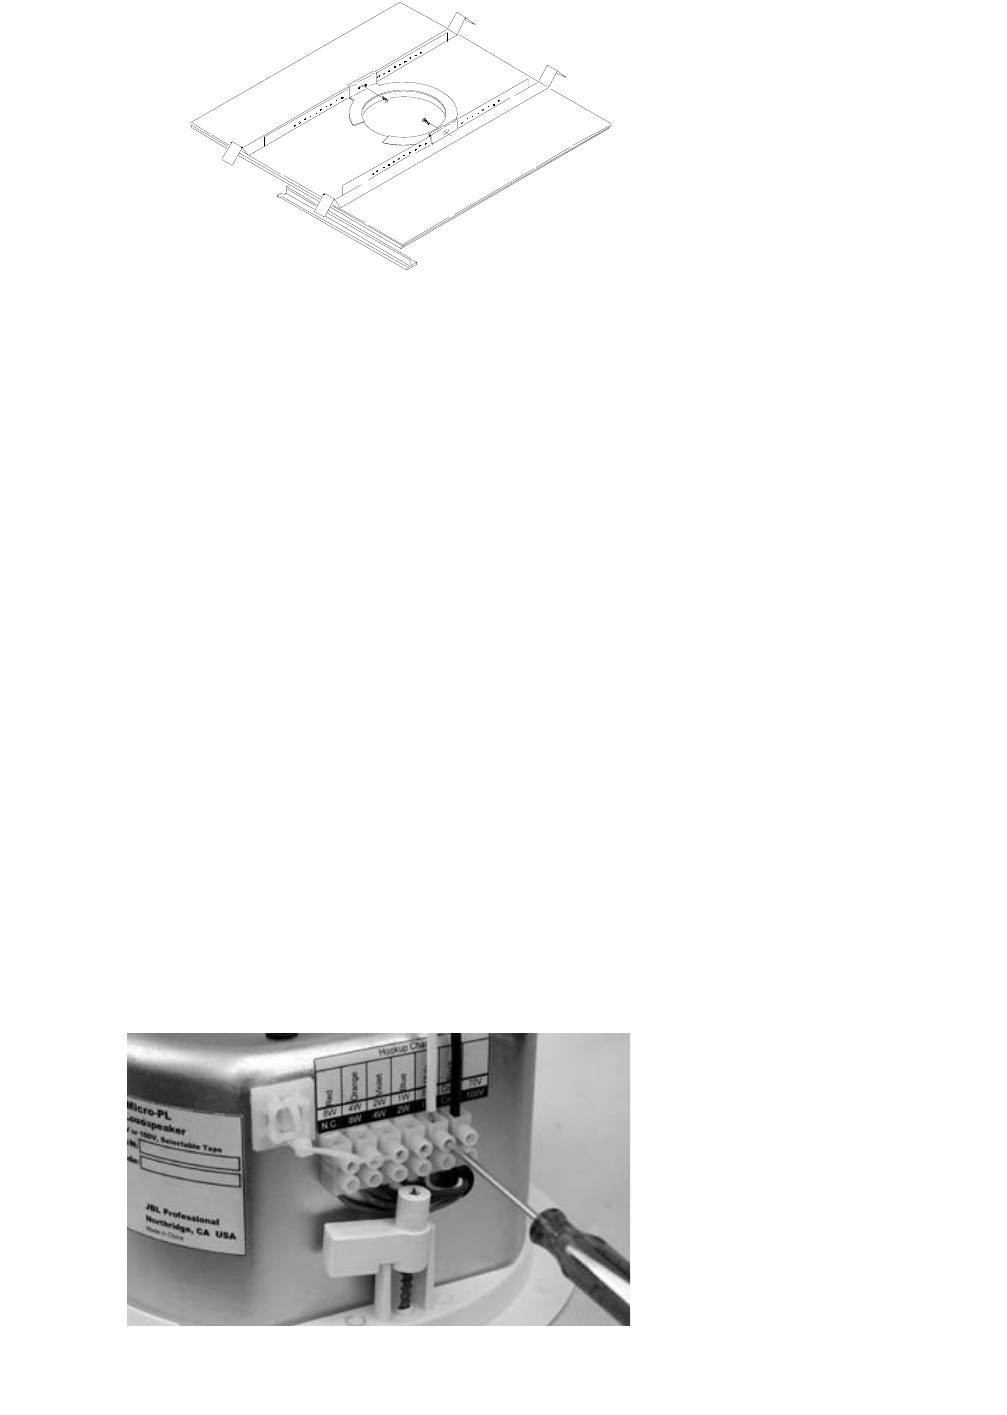
Figure 4:
C-Bracket and Tile Rail
Positioning on Ceiling Tile
Tile Rails: The tile rails are designed to fit either standard 24-inch wide tiles or 600-mm
wide tiles. The tile rail pieces do NOT physically attach to the T-grid struts. Instead, the
inverted-V shape at the ends of the rails sit OVER the T-grid strut. During normal
operation, the rails are supported by the edge of the tile. In the unlikely even that the tile
comes out or falls apart, the ends of the support rails are designed to catch onto the T-
grid, providing secure support to hold the loudspeaker assembly in place.
Cutout Placement: The tile rails are pre-punched with attachment holes along their
length. Placement is not limited to the center of the tile, as is the case with many other
tile rail support systems.
Non-Suspended Ceiling Types: The C-bracket can be optionally used by itself to
shore up the ceiling material and to spread out the clamping force from the tab clamps.
Insert the C-plate through the cut hole in the ceiling and place it on the back side of the
hole before inserting the speaker.
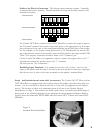
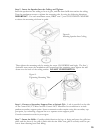
Step 3 - Connect the Wiring to the Input Terminal Block. Connect the wiring to the UL &
CE-rated, touch-proof terminal block that is attached to the side of the speaker by stripping
the insulation back about about
3/16 inches (5 mm) [do not strip any longer than this], inserting
the bare end of wire into the connector and screwing the hold-down screw until tight using a
small flat blade screwdriver. Tighten any unused screws to avoid vibration.
Figure 5:
Connecting Wires to Connector


