2
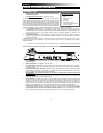
TOP PANEL OVERVIEW
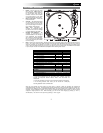
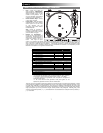
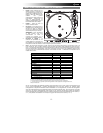
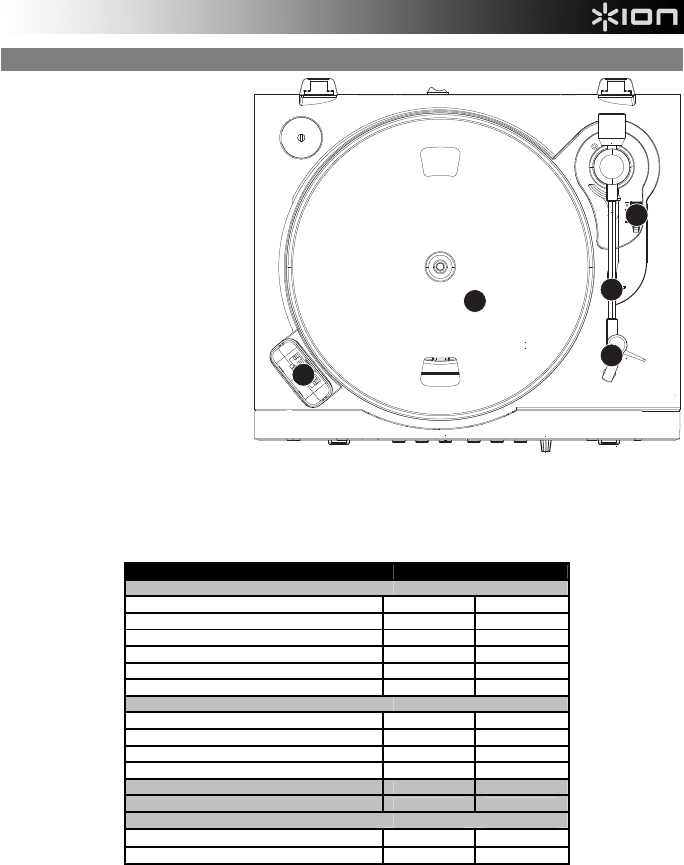
1. Platter – Put the record you would
like to play here. (Note: Make sure
that the slipmat is always placed on
top of the platter while using the
turntable. Failure to use the slipmat
may cause damage to your media
as well as damage to the turntable.)
2. Raise / Lower Lever – Raises and
lowers the tonearm.
3. Arm Clip – This specially designed
arm clip secures the tone arm while
at rest or when not in use. The arm
clip has been designed to remain in
the up position while unlocked.
Note: When transporting the
turntable, we recommend placing
the plastic cover over the cartridge
to prevent damage to the needle.
4. Cartridge and Headshell – The
cartridge is pre-mounted on a
standard headshell. The cartridge is
user replaceable and compatible
with a variety of standard cartridges.
Be sure to remove the clear plastic
cover before operating the turntable
from the cartridge.
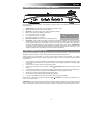
5. Dock – Connect your iPod to this dock. Please make sure that your iPod fits snuggly over the dock connector but do not
force it! For a proper fit and more stable connection, first insert the Dock Adapter that came with your iPod. The dock
allows you to record your vinyl directly to your iPod or to play back music from your iPod through the turntable’s audio
output. When connected to the dock, you can sync your iPod to your iTunes music library if the iPROFILE is connected
to your computer via USB. The iPROFILE is compatible with the following iPod models:
* On the 3rd generation iPod, only the buttons “Play”, “Rewind”, and “Fast
Forward” are supported. Buttons “Select”, “Menu”, and “Rec Mode” are
unsupported.
** On the 1st generation iPod Touch, only music player navigation is supported.
*** On the 2nd generation iPod Touch, you can record with a third-party
recording application such as iProRecorder.
Note that your turntable can also charge your iPod while it is docked. When not recording, the turntable will
automatically charge your iPod. To ensure the best recording quality and to prevent unwanted noise from entering your
recordings, iPod charging will be automatically disabled when you begin recording and re-enabled when you stop
recording. We do understand, however, that you may be recording long sessions which require your iPod to remain
charged for longer periods of time. While recording, you can turn on iPod charging by pressing |<< and >>|
simultaneously. You can turn it off at any time by pressing |<< and >>| again.
iPod Model Playback Record
iPod
7th generation (Classic)
6th generation (Classic)
5th generation
4th generation
3rd generation*
1st and 2nd generation
iPod Nano
4th generation (nano-chromatic)
3rd generation
2nd generation
1st generation
iPod Shuffle
iPod Mini
iPod Touch
2nd generation***
1st generation**
1
3
4
2
5


