


12
ADVANCED FuNCTIONS
HDMI Audio to TV
: Determines whether HDMI audio signals are passed
through the HDMI Output to the video display. In normal operation, leave
this setting Off, as audio will be played through the AVR. To use the TV by
itself, without the home theater system, turn this setting On. Mute the TV’s
speakers when using the AVR for audio.
Dolby Volume Calibration
: This setting determines the Dolby Volume
Calibration Offset, as described on page 30 in the Basic Manual.. Its default
of 0dB is best when the system’s loudspeakers have a sensitivity rating of
88dB (8 ohms, 1 watt, 1 meter). If your loudspeakers have a higher sensitivity
rating, increase the Dolby Volume Calibration setting by the difference
between your speakers’ sensitivity and 88dB. If your speakers have a lower
sensitivity, decrease the Dolby Volume Calibration setting by the difference
between 88dB and your speakers’ sensitivity.
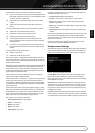
Menu Appearance
Menu Transparency
: Select whether video programs will be visible
when the menu system is in use. Select Normal for a fully transparent
background, Medium for partial transparency or Opaque to block video
programs while the menus are on screen.
Volume/Status Messages
: When the AVR is turned on, the volume
is adjusted or the source is changed, or if a change in the input signal is
detected, a status message will be displayed on screen. Select how long the
message remains visible, from 2 to 10 seconds, with a default of 3 seconds.
Select “Off” if you do not wish to see the status messages.
Menus
: This setting governs how long the Surround Modes, Video Modes
and Audio Effects menus remain visible after the last adjustment: 5, 10 or
30 seconds, 1 minute or 5 minutes. Select “No Time-Out” to view the menus
indefinitely, but this setting is not recommended, due to the danger of “burn-
in” on some video displays.
Setup and Slide-In Menus
: This setting determines how long the setup
menus (Main Menu, Speaker Setup Menu, Zone 2 Menu, all slide-in menus)
remain visible after the last adjustment. Select a time-out period of 5, 10 or
15 (the default) minutes, or no time-out, which leaves the menus on screen
until manually cleared. A time-out period avoids the possibility of burn-in
damage to plasma or CRT displays.
Screen Saver
: Program a time-out period for no activity (with no menus
displayed) before the AVR’s built-in screen saver begins. Select a period of 5,
10, 20 or 30 minutes or 1 hour, or turn off the screen saver. A time-out period
avoids the possibility of burn-in damage to plasma or CRT displays.
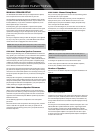
System Information
Software Version
: This line is informational only. From time to
time, Harman Kardon, Inc., may release software upgrades that improve
performance or add features. If you are experiencing difficulties with the AVR,
a customer service representative may ask for the software version of your
product to determine whether a later upgrade is available.
Upgrade Software
: If a software upgrade is released for the AVR 460/
AVR 360, installation instructions will be available in the Product Support
section of the Web site or from Harman Kardon Customer Service. At that
time, you may access this submenu to install the upgrade software.
NOTE
: During a system upgrade, do not power off the AVR or use any of its
controls. Doing so could permanently damage the AVR.
ADVANCED REMOTE CONTROL
FUNCTIONS
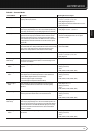
The AVR 460/AVR 360 remote control also serves as a universal remote that
may be programmed to operate other components. Refer to the Function
List (Table A13 in the appendix) for assistance in operating your other
components. The function of each button will not necessarily correspond to
the label printed on the button.
Punch-Through Programming
The punch-through feature allows you to operate one component, while
setting certain groups of controls to operate another component. For
example, while using the AVR controls for surround modes and other audio
functions, you may operate the transport controls of your DVD player. Or
while using the remote to control video functions on your TV, you may use
your cable box to change channels.
To program punch-through control while operating any device:
Press and hold the Source Selector (or Setup Button) for the main device 1.
the remote will be operating. The Source Selector will light, go dark and
then light up again, indicating the remote is in Program mode and that
you may release the button.
Select the type of punch-through programming.2.
For channel control punch-through, press the Channel Up Button.a)
To program transport control punch-through, press the Play Button.b)
Press the Source Selector for the device whose channel or transport 3.
controls will be used while operating the device selected in the first step.
The Source Selector will flash to confirm.
For example, to watch the TV while changing channels using the cable box,
press and hold the TV Button until it lights. Then press the Channel Up Button,
followed by the Cable/SAT Button.
To undo punch-through programming, follow the same steps as above, but
press the same Source Selector in Steps 1 and 3.
NOTE
: The Volume and Mute controls are always dedicated to the AVR.
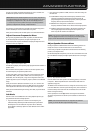
Activities (Macros)
Activities are used to program sequences of up to 19 commands that are
executed with a single button press. Activities are well suited for power on
and off commands, to send out a multidigit channel number with one button
press, or to control another device with more flexibility than the built-in
punch-through controls. Up to eleven activities may be programmed.
NOTE
: Use caution when programming complicated activities. It isn’t
possible to program a pause or delay before sending commands after
Power On, and the component may not be ready to respond to commands
immediately after powering on.