-
23
-
Settings are retained in memory even when the main
power supply is turned OFF.
The settings (indicator statuses) on shipping from the
factory are indicated to the right.
Advice
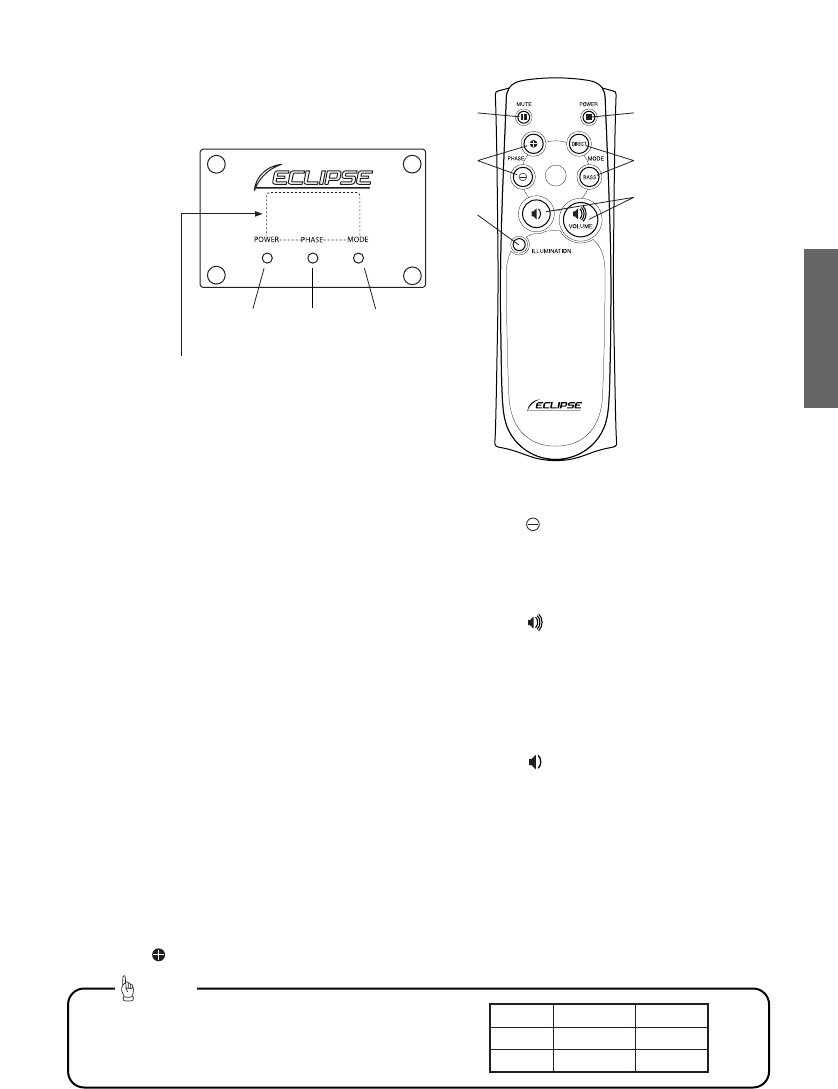
■Remote control
!3POWER button
Press this button to switch between the power
ON and standby statuses.
(The
A POWER indicator is lit in blue when
the power is ON and in red in the standby
status.)
!4MUTE button
Press this button to switch between the “mute”
and “play” statuses. The main unit goes into
the “mute” status, or returns to the normal
status, instantly.
(While the sound is muted, the A POWER
indicator is lit in red.)
!5MODE buttons
Press the BASS button to emphasize low
sounds (the MODE indicator C will switch from
being lit in white to unlit).
Press the DIRECT button to cancel the effect
of pressing the BASS button (the MODE
indicator C will light in white).
!6
PHASE button
Press the button to generate positive
phase sound (the PHASE indicator B will
switch from being lit in amber to unlit).
Press the button to generate negative
phase sound (the PHASE indicator B will light
in amber).
!7
VOLUME button
Press the button to increase the volume.
The flashing frequency of the POWER
indicator
A
will increase as the volume
increases. If you continue to press the button
after the maximum volume has been reached,
the indicator will stop flashing and remain
continuously lit after two seconds.
Press the button to reduce the volume.
The flashing frequency of the POWER
indicator
A
will decrease as the volume
decreases. If you continue to press the button
after the minimum volume has been reached,
the indicator will stop flashing and remain
continuously lit after two seconds.
!8ILLUMINATION button
Press this button to toggle between two levels
of illumination for the indicators.
Indicator panel on main unit
Remote control photoreceptor
!4
!6
!8
!3
!5
!7
ABC
ENGLISH


