


FOX HD-SDI • Installation and Operation
Installation and Operation, cont’d
2-8
FOX HD-SDI • Installation and Operation
2-9
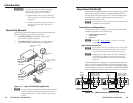
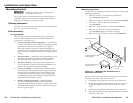
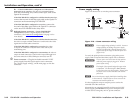
3. Use the two included tie wraps to strap the power supply
to one of the brackets.
N
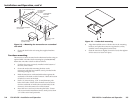
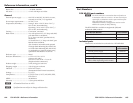
The PMK 300 has a hole in the bottom plate that allows the
projector pole to be inserted through the center of the plate
(figure 2-6), rather than outside of the plate (figure 2-5).
To install the PMK 300 in this configuration, slide the
bracket up from the bottom of the pole before the projector
is installed on the pole.
U-Bolt
Extron
PMK 300
Multi-product Projector
Mount Kit
Bracket
Brace
Figure 2-6 — Projector pole on the inside
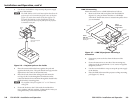
4. Place the contoured bracket brace against the pole and
opposite the back plate. The pole should fit snugly into the
depression in the center of the bracket brace.
5. Place the U-bolt around the ceiling pole and insert the
two legs of the U-bolt through the round holes on the
contoured bracket brace and then through the slotted holes
on the bracket’s mounting plate.
N
The supplied U-bolt fits a typical (1.5" to 2.0" diameter)
ceiling pole.
6. Secure the bracket to the U-bolt with the included hex
nuts, washers, and lock washers. Tighten the hex nuts just
enough that they can be loosened by hand.
PMK 350 mounting
Mount the transceiver to a PMK 350 bracket as follows:
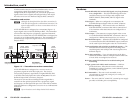
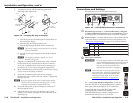
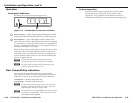
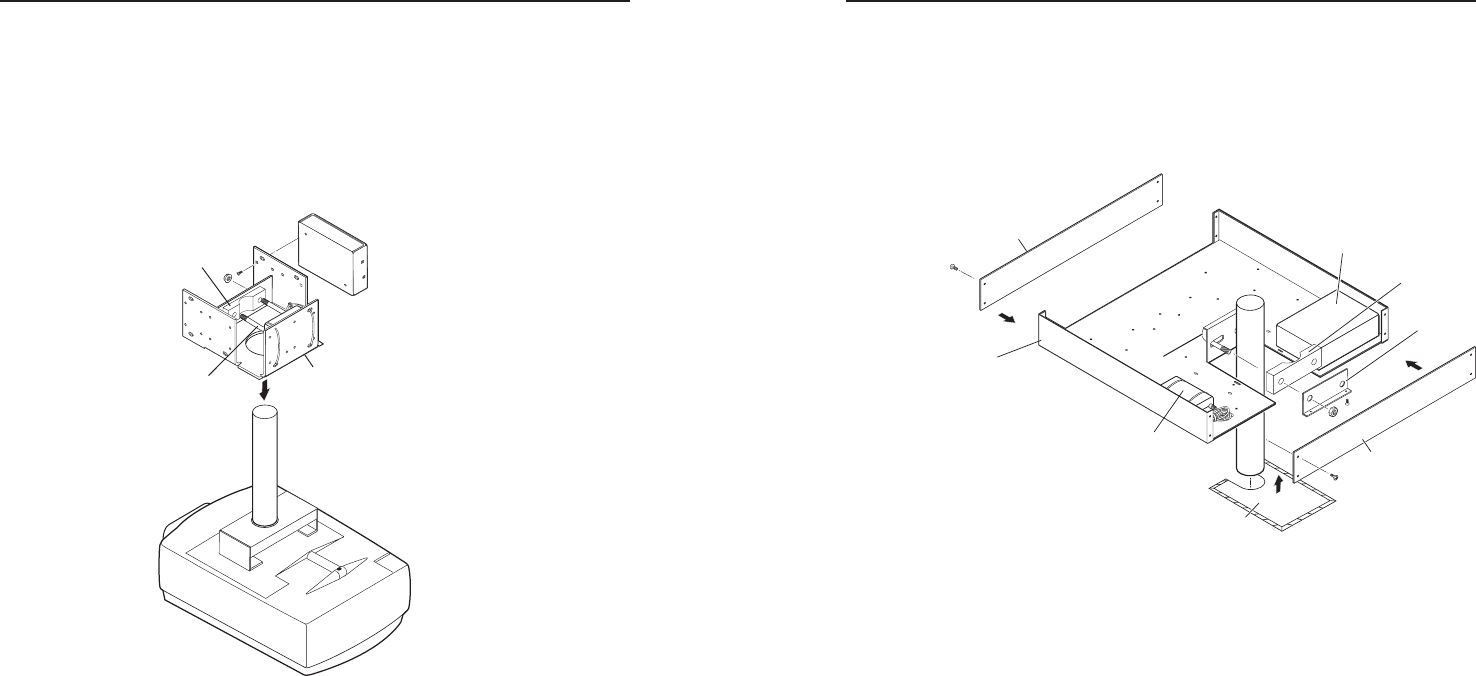
1. Remove the front and back plates from the PMK 350
(figure 2-7), using an Extron Tweeker or a #2 Philips
screwdriver. Retain the screws to reattach the plates when
you are finished.
Extron
PMK 350
Multi-product Projector
Mounting Kit
Cover Sheet
Front Plate
Rear Plate
U-bolt
L-shaped
Bracket
Contoured
Base
Extron
Power Supply
Extron
Quarter-rack
Sized Product
Figure 2-7 — PMK 350 projector mounting a
transceiver
2. If necessary, remove the feet from the bottom of the
receiver.
3. Secure the transceiver to one side of the mounting tray,
using two of the supplied 4-40 x 3/16" screws in opposite
(diagonal) corners.
4. Use the two included tie wraps to strap the power supply
to the bracket.
5. Place the PMK 350 around the projector ceiling mounting
pole (figure 2-7, above).