


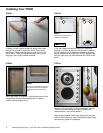

Installing Your THOR
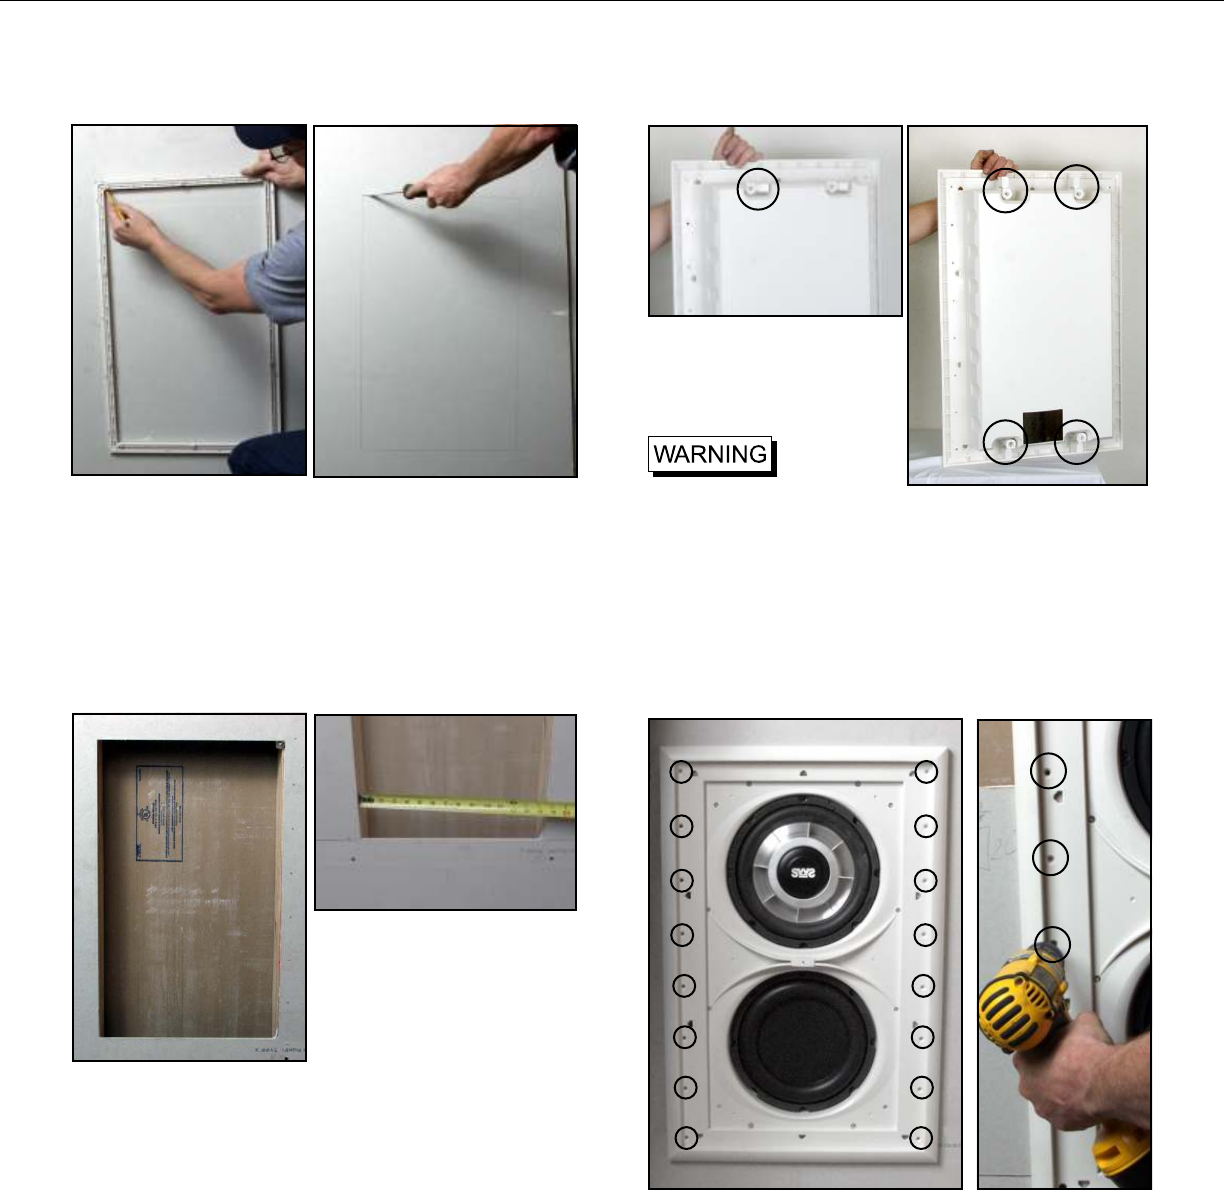
To begin you will need to locate the empty grille frame.
Use your stud finder to locate the studs (if you’re not
retrofitting). Using the empty frame, trace your cut line
with a pencil. Once you are satisfied with your cut line,
begin your cut using the sheet rock saw.
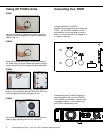
STEP#1
STEP#2
Accuracy of stud distance may vary
from frame to frame. It will depend
on the quality of the construction
work.
When the cutout is complete, it should look similar to the
image. Most of the work performed here is installer
common sense, please use it.
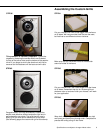
These pieces are sheet rock
stabilizers, not brackets.
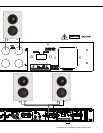
STEP#3
In the first image furthest to the left you’ll notice the
fastener in it’s neutral position– this is how it is packed.
You will need to turn all fasteners outward so that they
can be clamped to the sheet rock. You will tighten them
from the front once you have fastened the THOR to the
studs.
Note:
Note:
STEP#4
Once you have fed all wiring and connected it, slip the
THOR in the wall making sure that the sheet rock
stabilizers are in the correct position.
Begin placing screws inside holes directly into the stud
from the front. Once you have inserted all screws snugly
and securely, tighten the fasteners.
This procedure is extremely important: Tighten the
dogears by fastening the screws which are located at
the top of the active driver and the bottom of the passive
driver. If you forget to do this the sheet rock will not be
secured and the fasteners will be loose and will rattle.
STEP#5
Congratulations! You have successfully installed the
world’s most effective, efficient and down right loud in-
wall subwoofer ever made. The grille that you use is
totally up to you and can be matched to fit any decor.
(See following pages for custom cloth grille instructions).
STEP#6
8
Earthquake Sound Corp. | (510) 732-1000 | www.earthquakesound.com
9
Specifications are subject to change without notice.
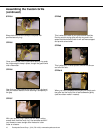
STEP#1
Cut your desired cloth two inches bigger than the frame
on all sides. We have provided cloth that can be used,
but feel free to use different colors or textures.
STEP#2
Cut your desired cloth, two inches bigger than the frame
on all sides. Remember that this is a custom grille so
whatever color or texture of cloth you choose, it will work
for your application.
STEP#3
Wrap cloth over prongs, make a small incision on cloth
over prong and push prong through cloth. Complete this
process with every prong on the frame.
Make sure that you have two inches of excess cloth
around all sides of the frame.
Assembling the Custom Grille