


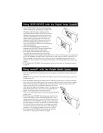

Using
SK'Y'FilSK¥Fi2
wittl ttle Delptli Audio
S~stem~
-
...
"
.,-~;
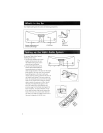
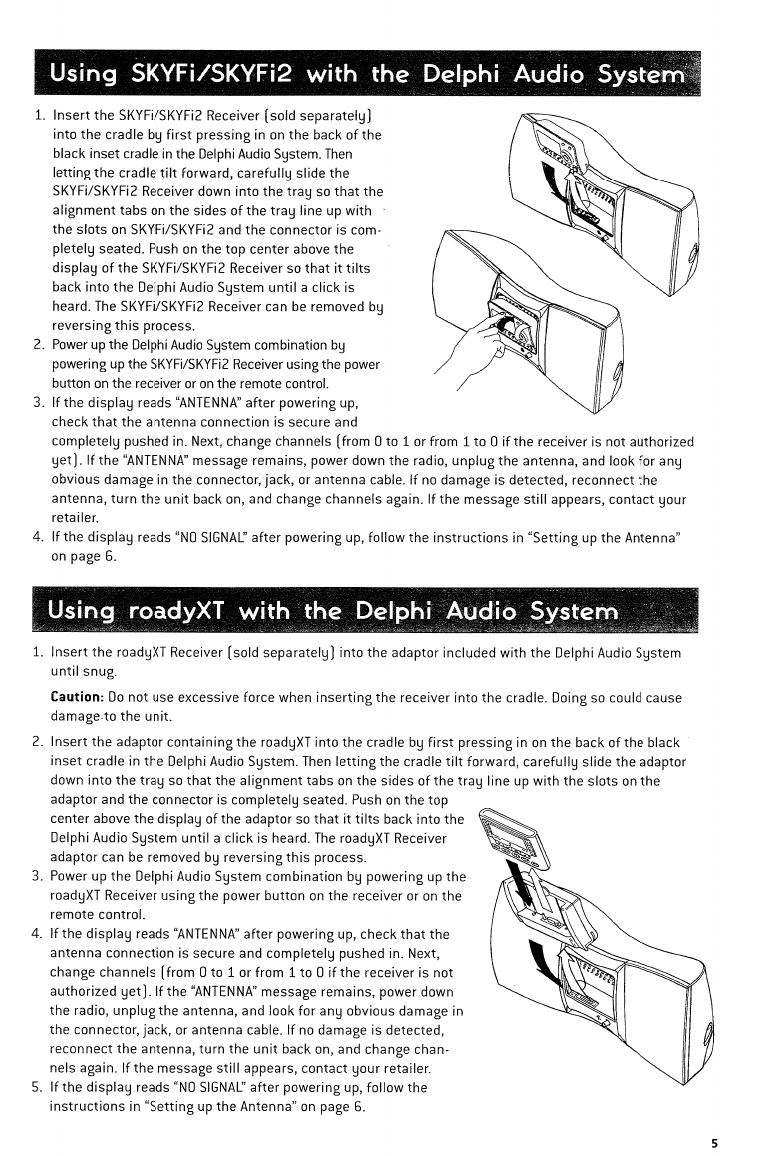
1.
Insert
the
SKYFi/SKYFi2 Receiver (sold
separately)
into
the
cradle by
first
pressing
in on
the
back
of
the
black inset cradle in the Delphi Audio System.
Then
letting
the
cradle
tilt
forward,
carefully
slide
the
SKYFi/SKYFi2 Receiver down
into
the
tray
so
that
the
alignment
tabs
on
the
sides
of
the
tray
line up
with
the
slots
on SKYFi/SKYFi2 and
the
connector
is com-
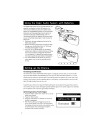
pletely seated. Push
on
the
top
center
above
the
display
of
the
SKYFi/SKYFi2 Receiver so
that
it
tilts
back
into
the
Delphi Audio System
until
a click is
heard.
The
SKYFi/SKYFi2 Receiver can be removed by
reversing
this
process.
2. Power up the Delphi Audio System combination by
powering up the SKYFi/SKYFi2 Receiver usingthe power
button
on
the receiver or
on
the remote control.
3.
If
the
display
reads
"ANTENNA"
after
powering up,
check
that
the
antenna
connection is secure and
completely pushed in. Next, change channels
(from
0
to
1 or from 1
to
0
if
the
receiver is
not
authorized
yet).
If
the
"ANTENNA"
message remains, power down
the
radio,
unplug
the
antenna, and look
for
any
obvious damage in the connector, jack, or antenna cable.
If
no damage is detected,
reconnect
the
antenna,
turn
the
unit
back on, and change channels again.
If
the
message
still
appears,
contact
your
retailer.
4.
If
the
display
reads
"NO
SIGNAL'
after
powering up, follow
the
instructions
in
"Setting
up
the
Antenna"
on
page 6.
• J
~
z"..
.. }
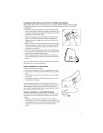
Using
I'2QadyXT
witH tHe Delphi
~md'iQ
System
':,
..
,':.
1
;{
;{
~¥=
"d}f.';-i"r;,)t> >'»4.«
,,"h
~«
>-
1;:.
'"
:{,<,<
=¥«w
....
1(
~
..
«".
:-".,.
Vq'Zm
;>;~,;-;t<
~ ~
W";:~Jo>
~~::."':
jJ~k''''1;.;
:
"",
..
jP~';««
f.0.~~"'~;~}}~~?C%W~~~
"'j;7,:,Jj~wJ
%i
~~~~~7~~1;Wr~ti
o$i
1.
Insert
the
roadyXT Receiver (sold
separately)
into
the
adaptor included
with
the
Delphi Audio System
until
snug.
Caution:
Do
not
use excessive force when
inserting
the
receiver
into
the
cradle. Doing so could cause
damage.to
the
unit.
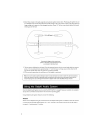
2.
Insert
the
adaptor
containing
the
roadyXT
into
the
cradle by
first
pressing
in on
the
back
of
the
black
inset
cradle in
the
Delphi Audio System. Then
letting
the
cradle
tilt
forward,
carefully
slide
the
adaptor
down
into
the
tray
so
that
the
alignment
tabs
on
the
sides
of
the
tray
line up
with
the
slots
on
the
adaptor and
the
connector is completely seated. Push
on
the
top
center above
the
display
of
the adaptor so
that
it
tilts
back
into
the
Delphi Audio System
until
a
click
is heard.
The
roadyXT Receiver
adaptor can be removed by
reversing
this
process.
3.
Power up
the
Delphi Audio System
combination
by powering up
the
roadyXT Receiver
using
the power
button
on
the
receiver or on
the
remote control.
4.
If
the
display
reads
"ANTENNA"
after
powering up, check
that
the
antenna
connection is secure and completely pushed in. Next,
change
channels
(from
0 to 1 or from 1
to
0
if
the
receiver is
not
authorized
yet).
If
the
"ANTENNA"
message remains, power down
the
radio,
unplug
the
antenna, and look
for
any obvious damage in
the
connector, jack, or antenna cable.
If
no damage is detected,
reconnect
the
antenna,
turn
the
unit
back on, and change chan-
nels again.
If
the
message
still
appears, contact
your
retailer.
5.
If
the
display
reads
"NO
SIGNAL'
after
powering up, follow the
instructions
in
"Setting
up
the
Antenna"
on
page
6.