


1-20 Rack Installation Guide
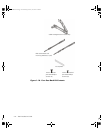
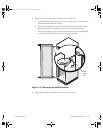
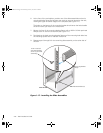
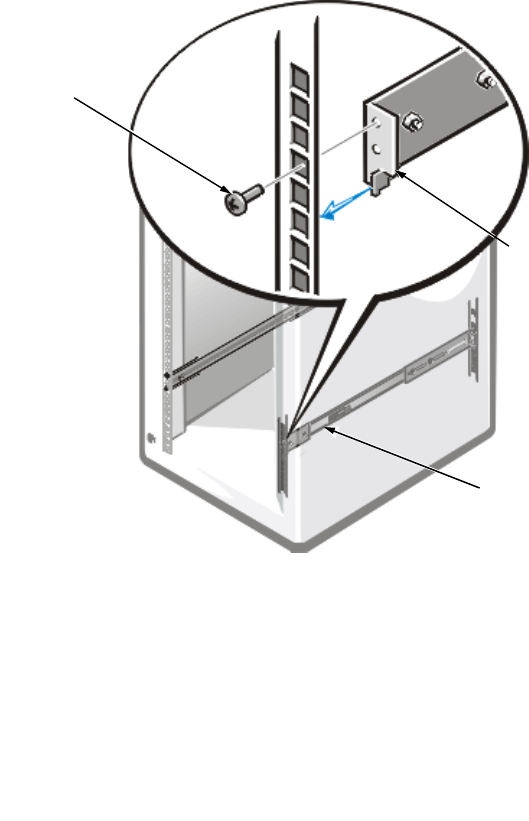
6. At the front of the rack cabinet, position one of the slide assemblies so that its
mounting-bracket flange fits between the marks or tape you placed on the rack,
marking the upper and lower edges of the template (see Figure 1-17).
The hooks on the bottom of the mounting bracket should enter the holes beside
the lower marks you made in the vertical rails.
7. Secure the front of the mounting-bracket flange with a 10-32 x 0.5-inch pan-head
Phillips screw in the front vertical rail (see Figure 1-17).
8. Push back on the back mounting-bracket flange until the mounting hook locks into
the matching square hole on the back vertical rail.
9. Repeat steps 6 through 8 for the remaining slide assembly on the other side of
the rack.
Figure 1-17. Installing the Slide Assemblies
front of rack
slide assemblies (2)
mounting-bracket
flange
10-32 x 0.5-inch
pan-head Phillips
screw (2 per slide
assembly)
2D786bk0.book Page 20 Thursday, January 18, 2001 8:44 PM