


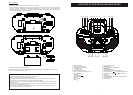
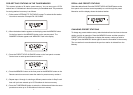
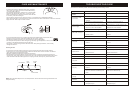
When you are ready to begin
recording, press the cassette
Record ( ) Button. The cassette
Play ( ) Button will also engage.
The tape will begin moving and
all of the material from your
selected source will be recorded
on the tape.
1 2
8
3
9
To avoid recording unwanted
material, such as radio
commercials, use the Pause
( ) Button to stop the recording
temporarily . Release the Pause
( ) Button to begin recording
again.
Select the function you wish to
record, either radio or CD, and
operate that function according
to its own instructions.
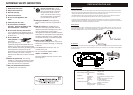
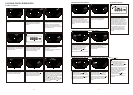
Open the Cassette Door and
insert a good quality blank
cassette tape into the slots on
the door, with the open end facing
up and the full reel on the right-
hand side. Close the Cassette
Door
When you are finished recording
press the Stop/Eject( )
Button to stop the tape.
MAKING A TAPE RECORDING
The tape recorder in this system allows you to make direct recordings from the radio or CD player to a
blank cassette in the tape compartment. An automatic recording volume level control (ALC) circuit will
automatically control the volume level of your recordings to prevent distortion. You may change the settings
of the volume during a tape recording, as these controls have no effect on the material being recorded onto
the tape.
To make a tape recording, proceed as follows:
If you wish to listen to your
recording immediately, press the
cassette Rewind ( ) Button
until the tape rewinds to the
beginning, then press the
Stop/Eject ( ) Button .
Set the FUNCTION Switch to
the TAPE position and press the
cassette Play ( ) Button to
begin playback.
1
2
3
4
Open surface side
Emptiest reel
7
2
2
1
2
4
3
Dynamic Bass Boost System (DBBS)
This special circuit provides bass response, especially at lower volume levels
where the bass has a tendency to disappear. Set the DBBS button to On
to increase the bass. Set the DBBS button to Off for normal bass response.
Note: If you have the DBBS circuit On at high volume and you are listening to
music that contains very strong bass, you may experience some distortion. If
this occurs, reduce the volume or switch the DBBS button Off .
,
,
,
,
,
,
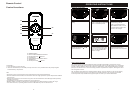
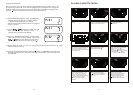
Tab for side 2
Tab for side 1
Tab
Break out the tab
Cover with tape
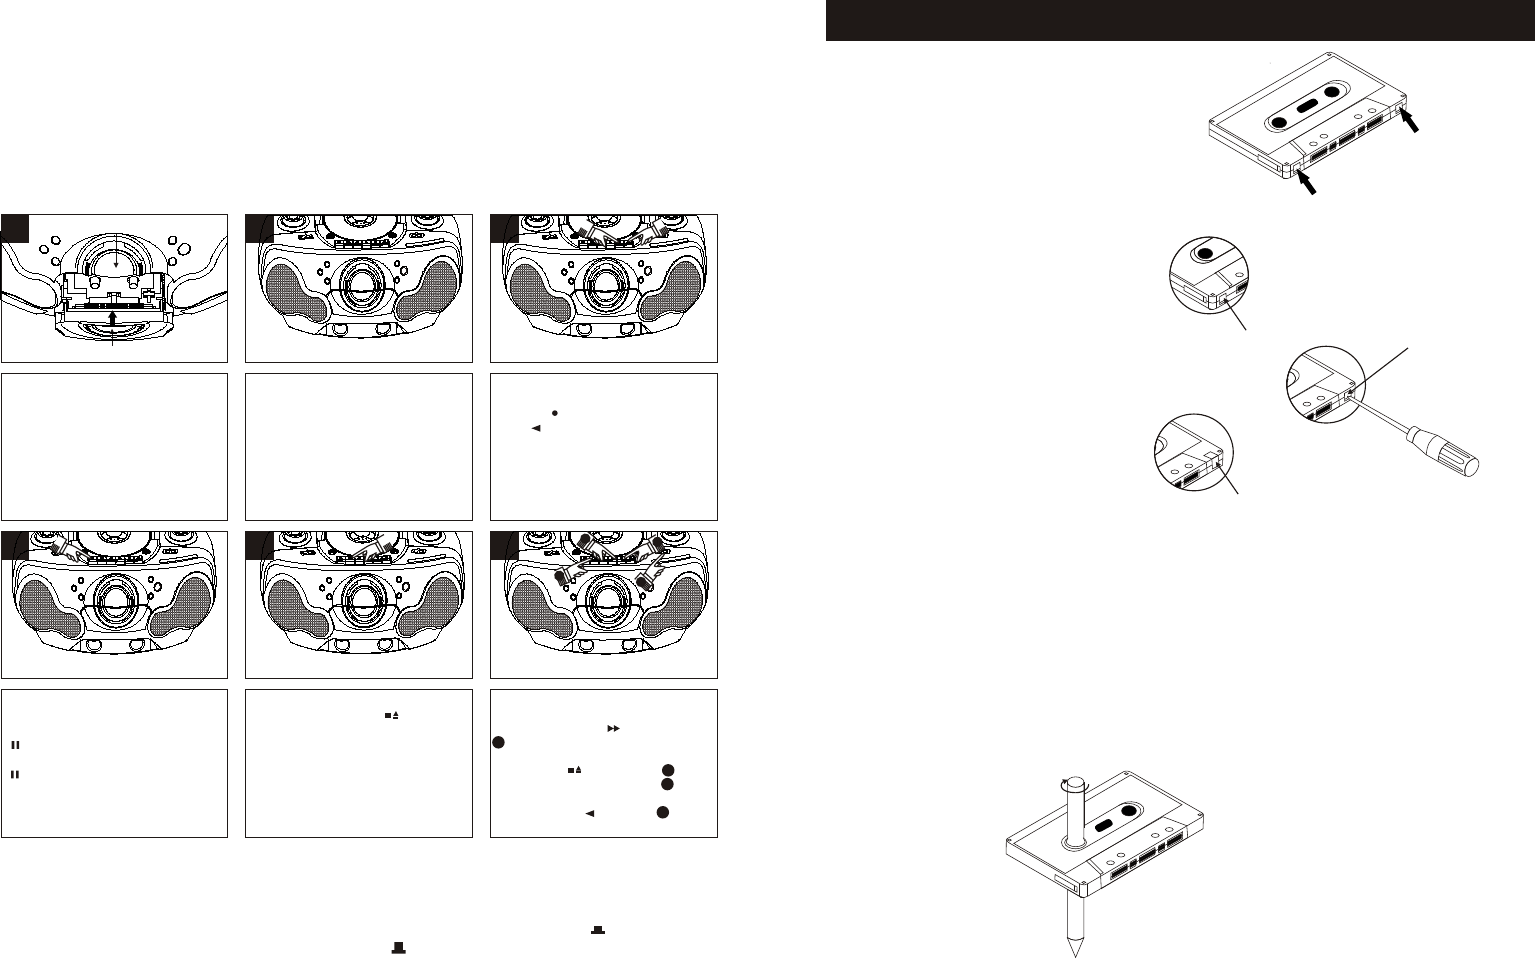
CARE AND MAINTENANCE
SAFEGUARD AGAINST ACCIDENTAL ERASURE
When a new recording is make, any program
material previously recorded is automatically
erased and only the new recording remains. To
safeguard valuable recordings from being erased
accidentally, the cassette and the deck are
equipped with a spacial device.
On the back of the cassette there is an erase
prevention tab on each side. To prevent
accidental erasing, break out these tabs wish
a screwdriver. If only one side of the tape is to
be protected break out the tab on the left side
with the side desired facing you.
To record on a tape in which the tab has been
broken, place a place of adhesive tape over that
area.
NOTE: When a tab is broken out, the record
button cannot be depressed.
CASSETTE TAPE RECOMMENDATIONS
Standard tape lengths have 15 (C-30),30 (C-60) and 45 (C-90) minutes of recording time on each side.
Longer length tapes of 60 (C-120) minutes of recording time on each side are not recommended. Use
only high quality tapes. If a problem develops, check the unit first with another cassette to determine if
the problem is with the cassette, and not with the unit.
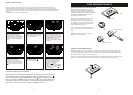
If there is any stack in the tape in the cassette, it should be removed before inserting the cassette. Place
a pencil in one of the hubs and rotate toward the outside of the cassette until all stack is taken up.
-14-
-15-