page 9
CH and CL Series Power Amplifiers
Operation Manual
2.7 Wire Your System
2.7.1 Models CH1 & CH2 Stereo Mode
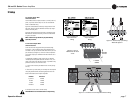
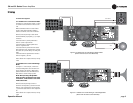
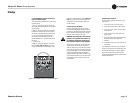
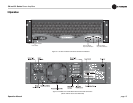
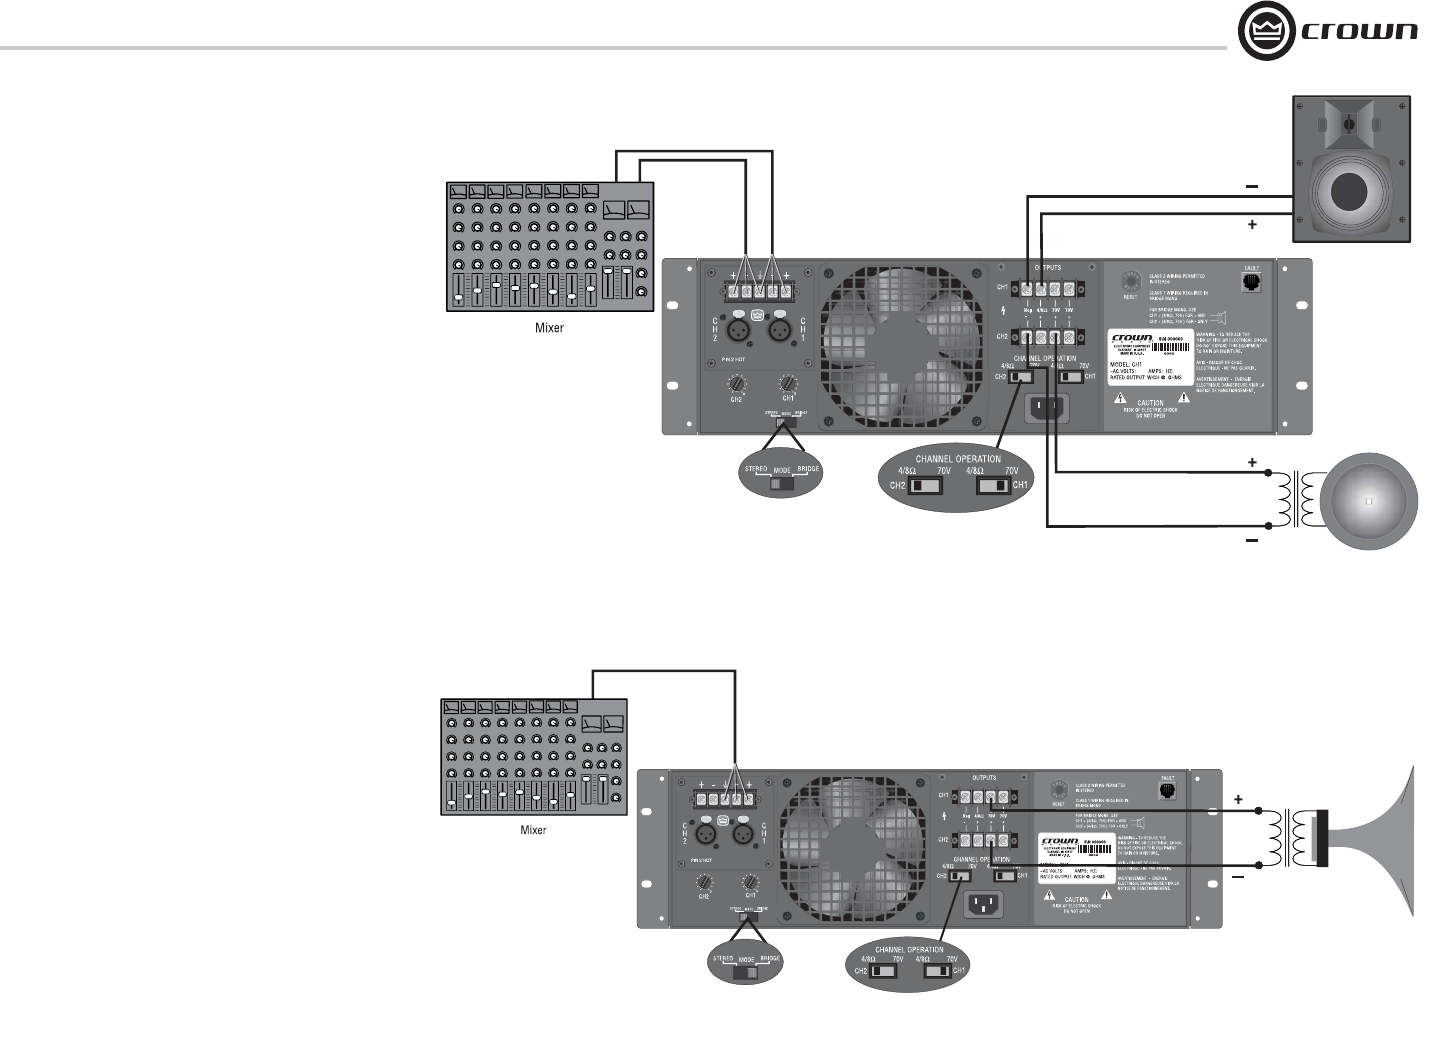
See Figure 2.10. In this example, Channel 1 is wired
to a 4/8 ohm load and Channel 2 is wired to a 70V
load.
Make sure the Mode switch is set to the “Stereo”
position. Set the Channel Operation Switch to
4/8 ohms on Channel1, and to 70V on Channel 2.
INPUTS: Connect input wiring for each channel.
OUTPUTS: Maintain proper polarity (+/–) on output
connectors.
• Connect Channel 1 positive speaker lead to
Channel 1 4/8 ohm output terminal.
• Connect Channel 1 negative speaker lead to
Channel 1 negative terminal.
• Connect Channel 2 positive transformer lead to
either of Channel 2 70V+ output terminals. (The two
70V screws are in parallel offering more wiring flexi-
bility).
• Connect Channel 2 negative transformer lead to
Channel 2 negative (–) terminal.
Refer to Section 2.5 for output connector pin assign-
ments.
2.7.2 Models CH1 & CH2 140V Bridge
Mode
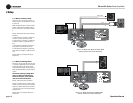
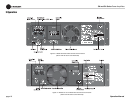
See Figure 2.11. In this example, a 140V load is
connected in Bridge Mono across the 70V+ termi-
nals of Channel 1 and Channel 2. Both Channel
Operation Switches are set to 70V. Make sure the
Mode switch is set to the “Bridge” position.
NOTE: When operating in Bridge-Mono
mode, turn down (full CCW) the level control
for Channel 2, as the Channel-1 level control
works both channels.
INPUTS: Connect input wiring to Channel 1.
OUTPUTS: Connect positive (+) transformer lead to
Channel 1 70V+ output terminal. Connect negative
(–) transformer lead to Channel 2 70V+ output termi-
nal.
Refer to Section 2.5 for output connector pin assign-
ments.
2 Setup
Figure 2.10 Models CH1 & CH2 Wiring for Stereo Mode
(Shown with No-Touch Cover Removed)
Figure 2.11 Models CH1 & CH2 Wiring for 140V Bridge Mode
(Shown with No-Touch Cover Removed)
8 or 4 ohms
70 V


