


iMedia Receiver with Video & Mic Input Crestron IM-RXV1-M & IM-RXV3-M
Installation
Ventilation
The IM-RXV1-M and IM-RXV3-M should be used in a well-ventilated area.
To prevent overheating, do not operate this product in an area that exceeds the
environmental temperature range listed in the table of specifications. Consider using
forced air ventilation and/or incrementing the spacing between units to reduce
overheating. Consideration must be given if installed in a closed or multi-unit rack
assembly since the operating ambient temperature of the rack environment may be
greater than the room ambient temperature. Contact with thermal insulating materials
should be avoided on all sides of the unit.
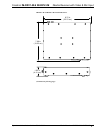
Mounting
The IM-RXV1-M and IM-RXV3-M can be mounted to any surface using the
included mounting brackets. These brackets must be installed prior to mounting.
Complete the following procedure to attach the brackets to the unit. The only tool
required is a #1 Phillips screwdriver.
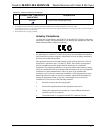
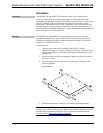
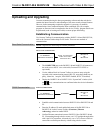
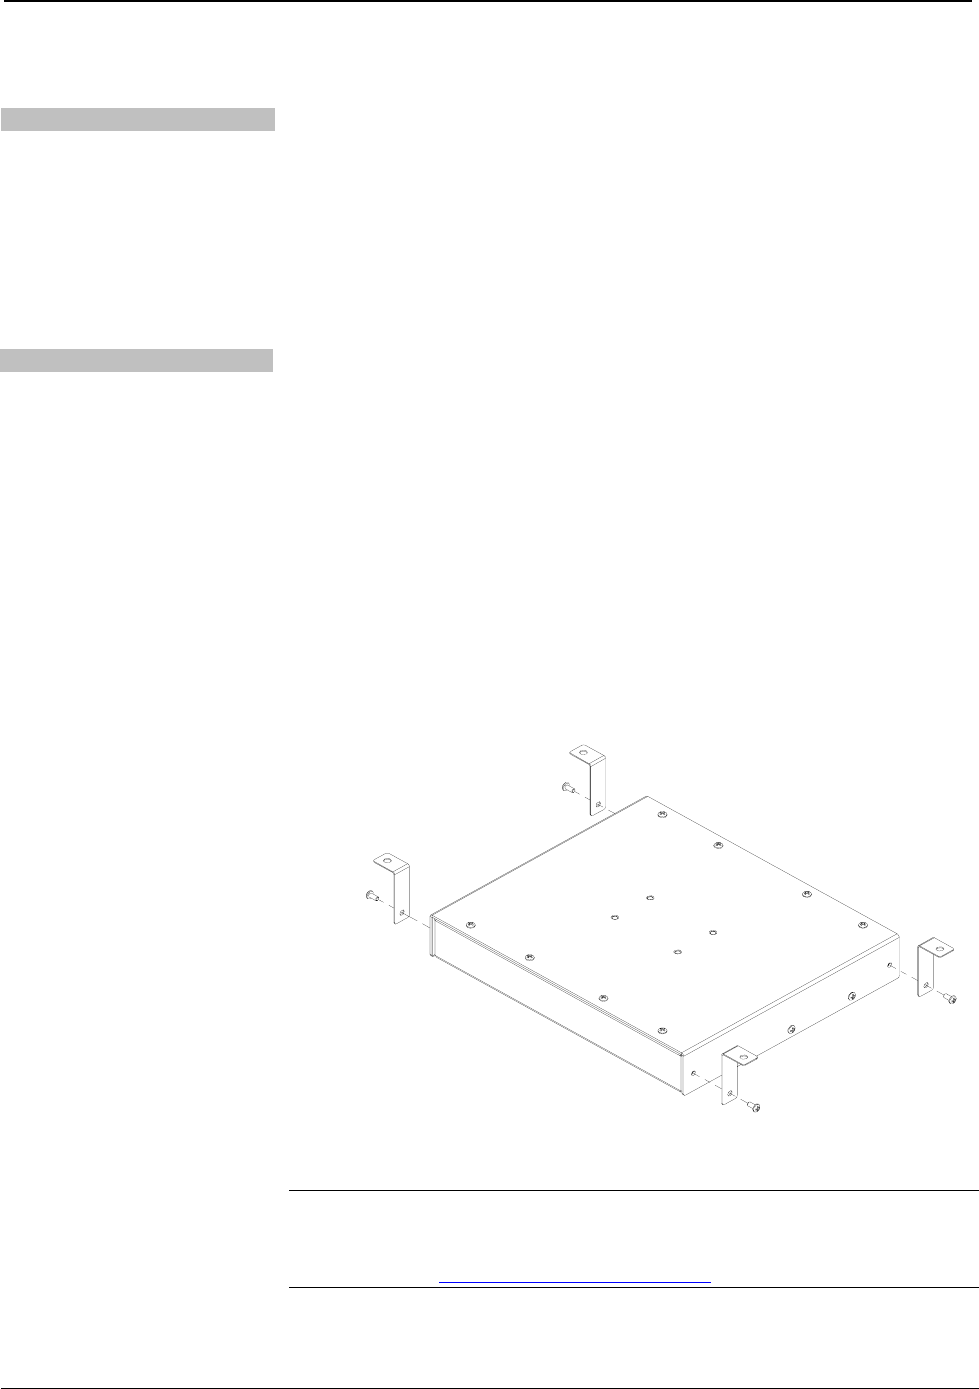
To install the ears:
1. There are screws that secure each side of the IM-RXV1-M and
IM-RXV3-M top cover. Using a #1 Phillips screwdriver, remove the screws
at each corner of the top cover. Refer to the diagram following step 3 for a
detailed view.
2. Position a bracket so that its mounting hole aligns with the hole vacated by
the screws in step 1.
3. Secure the bracket to the unit with a screw from step 1, as shown in the
following diagram.
Ear Attachment
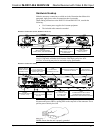
4. Repeat procedure (steps 1 through 3) to attach the remaining brackets.
NOTE: The MK-IM-RX pole mount kit is also available for mounting the
IM-RXV1-M or IM-RXV3-M to a pipe. Details can be found in the latest version of
the MK-IM-RX Installation Guide (Doc. 6451) which can be obtained from the
Crestron website (http://www.crestron.com/manuals
).
14 • iMedia Receiver: IM-RXV1-M & IM-RXV3-M Operations & Installation Guide – DOC. 6593A