


COUSTIC.COM
15
TROUBLE-SHOOTING SECTION
SYMPTOM PROBABLE CAUSE
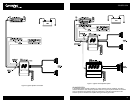
1. No power Check connections to the amplifier's Ground, B+ & Remote termi-
nals. Check connection at "+" terminal of the battery. Check the
remote turn-on terminal. Ensure it receives power when the
source is turned on (or when the switch is turned on). Refer to the
Installation Section. Check the power line fuse: if fuse is blown,
replace it; if fuse continues to blow, check the power wire and
also the amplifier for a short. If the short is in the power wire, fix
it; if the short is in the amplifier itself, see your Coustic dealer.
Check the voltage at the amplifier, and the remote ON/OFF
lead. The voltage should measure between 11V-15V. If the meas-
urement is beyond this range, have the source unit checked out
by an authorized dealer.
2. Power without sound with Turn the amplifier off, and Check all input & output signal cables
red power/protection and connections. Check the speakers for short with a VOM
indicator on (volt meter) or by connecting them to another audio system. After
making sure everything is normal, turn the amplifier on again.
3. Power without sound with The continuous red light of the power indicator signals a high
red power indicator on internal operating temperature, which results in the amplifier
switching off temporarily; when the amplifier cools down to a
safe level, the amp will automatically restart.
4. No sound from one side Check balance control.
Check speaker connections.
Check signal input connection.
5. Very low sound from Check your source unit's fader control.
both radio & tape Check the amplifier's Input Sensitivity Level.
6. Frequent automatic This indicates that the amplifier is operating at a continually
amplifier shut down undesirable high internal temperature. High operating tempera-
ture caused by inadequate ventilation: Refer to the sub-section
titled LOCATION for better amplifier location.
High operating temperature caused by an excessively low
impedance load, say below 2 ohms stereo or 4 ohms bridged:
Check for bad speakers and/or electronic crossover, proper pas-
sive crossover components; if all else fails, try rewiring the entire
system.
High operating temperature can be caused by an incorrect input
sensitivity level: refer to sub-section titled INPUT SENSITIVITY
ADJUSTMENTS for correct setting.
7. "Motorboating": The Check the amplifier's connection to the battery.
amplifier power indicator Check battery voltage. If low, recharge or replace
going off repeatedly when battery.
the audio system is on Check all ground connections.
8. Whining noise when Reroute power cable from battery to source unit directly,
engine is running with bypassing the battery terminal in the fuse box. Check power
noise varying with the connections to be sure they are clean. Check ground
accelerator (noise level connections to be sure the ground wire is in direct contact with
varies with source unit the bare metal surface of the chassis (with that spot scraped
volume control). clean of all paint, rust or grease).
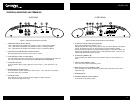
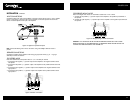
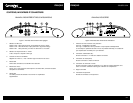
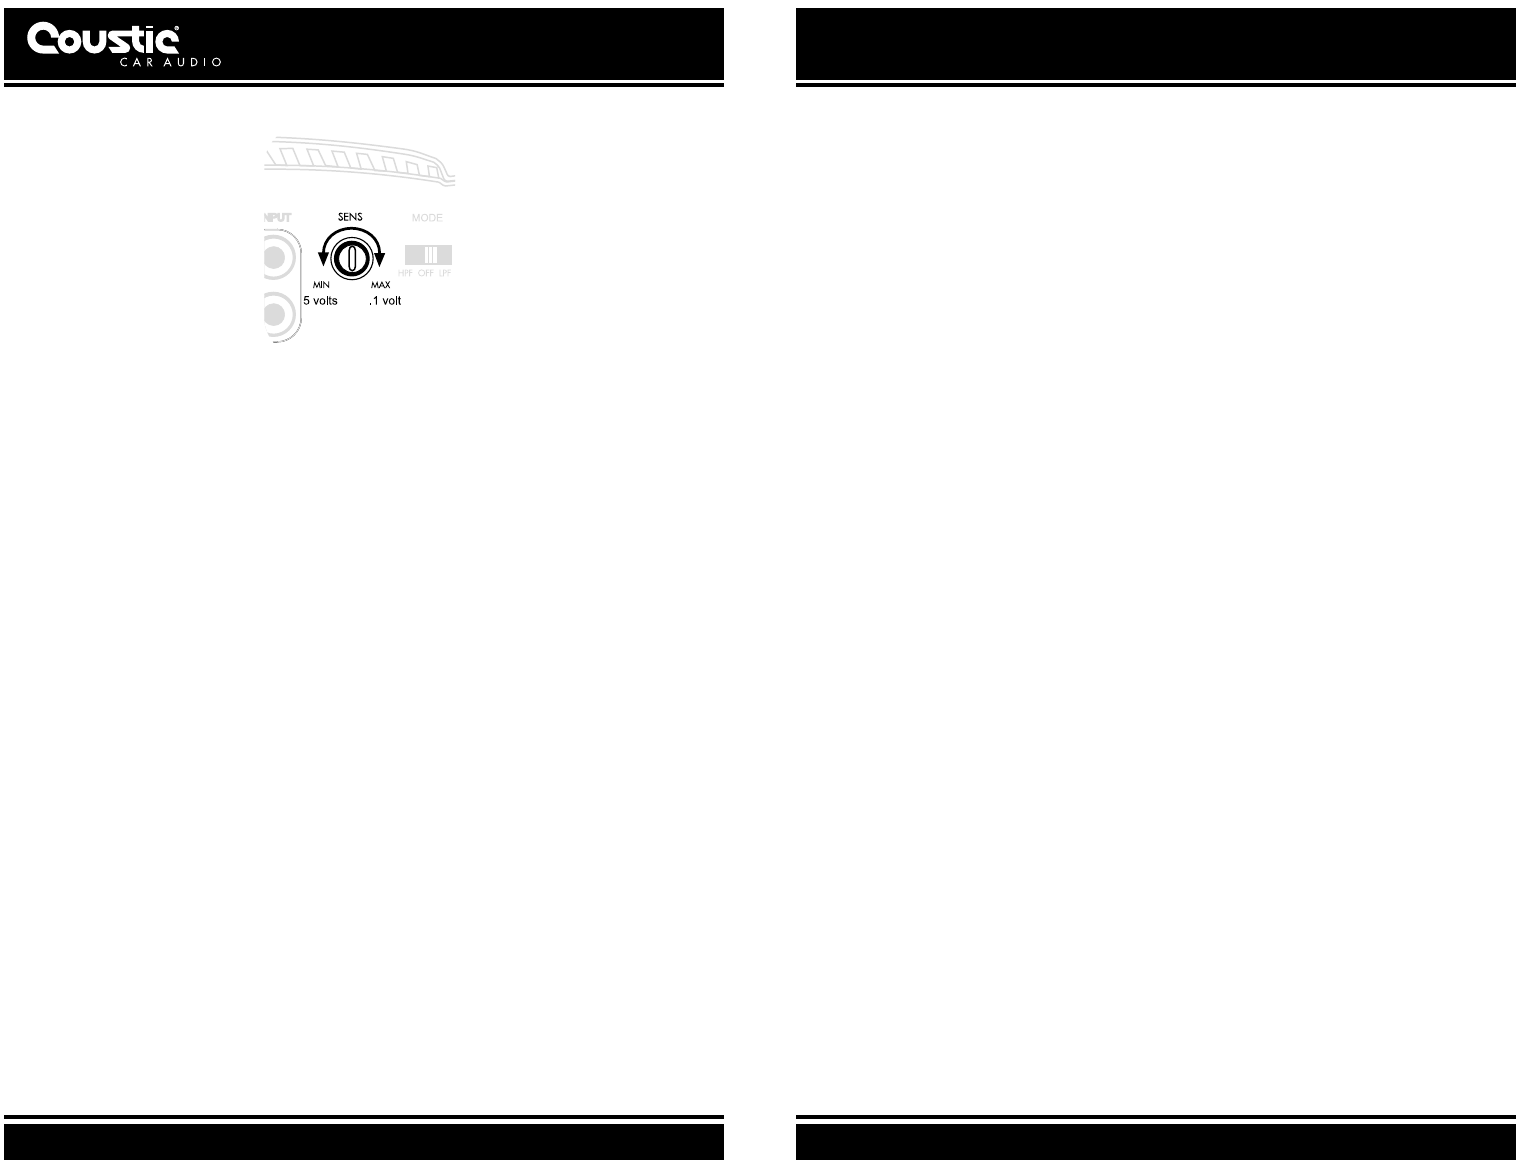
Figure 12: Input Sensitivity Control
1. Turn the Input Sensitivity Control all the way down (counter clockwise).
2. Set the volume control of the source unit to approximately
2
⁄3 of its maximum output.
3. Turn the balance control of the source unit to its center position.
4. Leave the tone (bass/treble) controls at their usual position.
5. Play a CD or tape track with wide dynamic range
6. To locate the optimum input sensitivity setting, ask the person assisting you to turn the Input
Sensitivity Control clockwise until audio distortion starts to develop. Turn the sensitivity
control counter clockwise slightly to minimize the distortion.
7. If you constantly switch between CD/tape and radio, you will need further adjustment since
radio output level differs from that of CD or tape. In this case, you need to locate a balanced
sensitivity setting which is best for both the output level of radio and that of CD or tape.