


E-11
Getting Ready
Use the procedure in this section to adjust the projected images of the two projectors so they are
approximately the same size and at the same position on the target screen (the screen, wall, or other
surface to be used as the projection surface after setup of the Projector System is complete).
z After you finish configuring the initial settings of the Control Box, perform the procedure below.
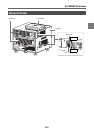
z For information about which projector is Projector A and which one is Projector B, see “Wiring” (page
E-7).
To adjust the positions of the two projectors
1. If you shut off power after finishing the procedure under “To configure initial Control
Box settings” (page E-10), turn on Control Box power.
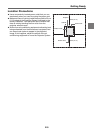
Adjustment 1: Rough alignment of the two projection screens
2. Attach the lens cover to the lens of Projector B only so only the Projector A image is
being projected on the projection screen.
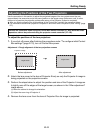
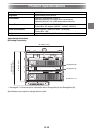
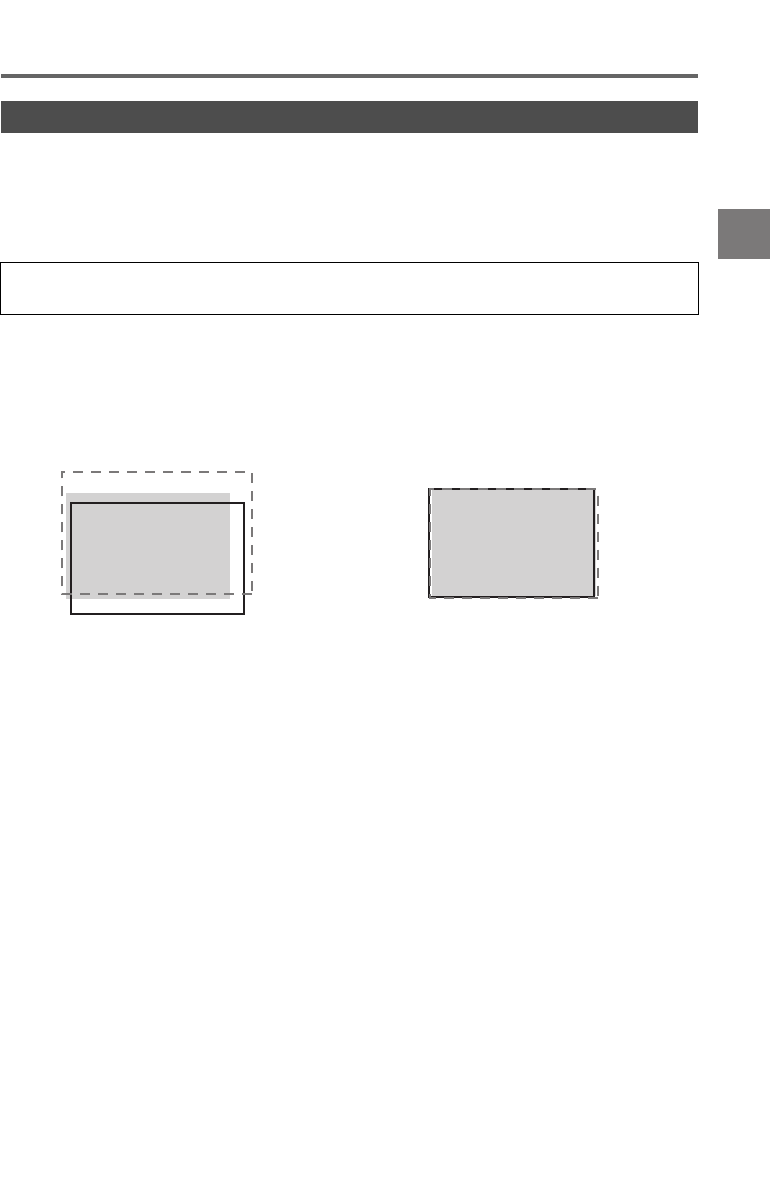
3. Perform the steps below to adjust the position and size of the Projector A image so
it slightly runs off the edges of the target screen, as shown in the “After adjustment”
image above.
4. Remove the lens cover from the lens of Projector B so its image is projected.
Adjusting the Positions of the Two Projectors
Perform the operations below using the Control Box remote controller (YT-200). Note that these
operations cannot be performed using the projector remote controller (YT-120).
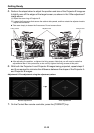
3
Before adjustment After adjustment
(1) Move the cabinet to change its orientation.
(2) Adjust the zoom ring of Projector A.
Target screen
Projector B image
Projector A image
Target screen