11
Mounting The Satellites
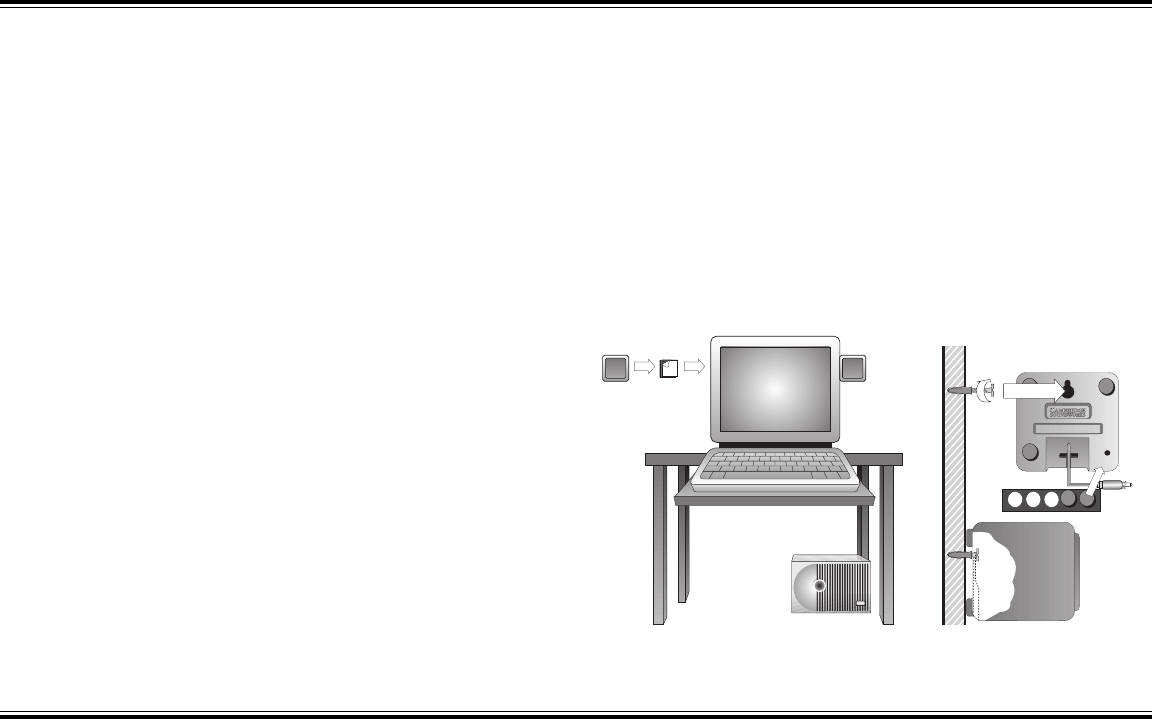
To a flat surface:
To mount the satellites the side
of a monitor or other flat surface,
use the self-adhesive “hook and
loop” fastener squares.
To the wall:
To wall-mount the cubes on
structurally strong surfaces (a
wall stud or wood panelling),
screw the No. 10 screws into the
material. Allow their heads to
protrude about
1
/4 inch to fit into
results from the subwoofer placed
on the floor in a corner. The least
bass output results with the unit
positioned away from any corners or
walls.
Once you have adjusted the
subwoofer level control, leave it in
that position. It should not be used
to compensate for differences in
recordings or games.
Have a clear line of sight from your
listening position to the satellites.
This prevents their higher frequen-
cies from being blocked. It is not
necessary for each satellite to be
aimed directly at the listener.
The relative strength of low bass
depends on how close the
subwoofer is to intersecting room
surfaces. The most bass output
Optimizing The Sound
Of Your System
the keyhole slots on the back of
each cube (as shown below).
The plastic anchors supplied will
be needed to secure the screws in
most wall surfaces. If so, drill
1
/4
inch holes in the wall, then tap the
anchors into the holes until they
are flush with the wall. Then screw
the screws into the anchors until
they protrude about
1
/4 inch.
Be sure to apply the stick-on
rubber feet to the back of the satel-
lite cubes. This assures an acousti-
cally secure installation.
Hook and loop fastener mounting Keyhole slot mounting


