3-7 CUTTER BAR HELPER SPRING
ADJUSTMENT
(9’ MODELS ONLY)
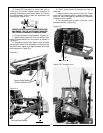
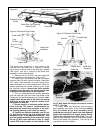
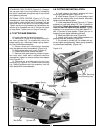
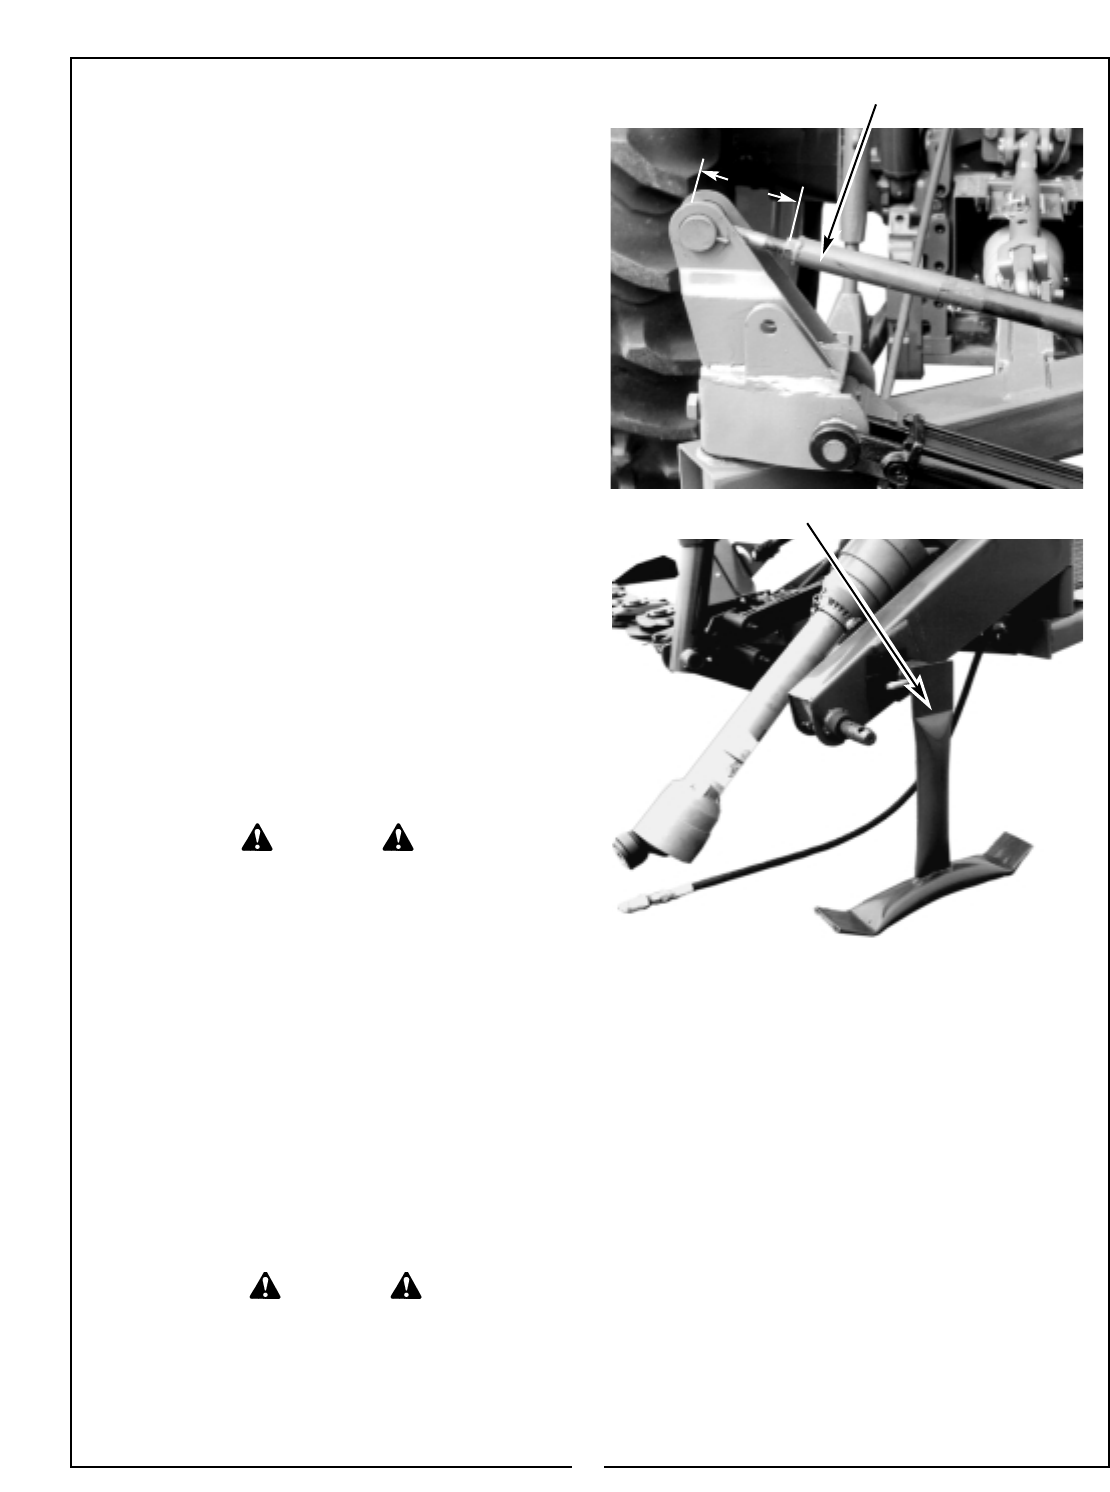
The 9’ models are equipped with a helper spring
assembly to transfer cutter bar weight from the
outer end of the cutter bar back to the frame
assembly. The recommended minimum adjustment
measurement is 5-1/2” from under the bolt head to
the end of the rod weldment nut. (Figure 3-5) To
transfer more weight, shorten the measurement. To
transfer less weight, lengthen the measurement. Be
advised, the shorter the measurement, the less the
outer end of the cutter bar can reach down.
3-8 UNHITCHING FROM TRACTOR AND
STORAGE
To prevent rust, always clean all debris from mower
after use. Store in a clean, dry place preferably with
a hard, level floor. Clean and paint any areas where
paint is missing. Apply a light coat of grease to cylin-
der rod..
Unhitch mower as follows:
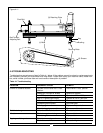
A. Pin parking stand in the down position as
shown in Figure 3-6.
B. Unfold cutter bar and lower to ground.
C. Lower 3-point hitch to rest on parking stand.
Make certain all pressure is relieved from cutter bar
cylinder.
D. Disconnect PTO driveline, hydraulic hose, and
3-point links.
WARNING
TO AVOID SERIOUS INJURY OR DEATH:
ALWAYS STORE MOWER WITH THE
CUTTER BAR IN THE UNFOLDED
(HORIZONTAL) POSITION.
Figure 3-5 Helper Spring Assembly
5-1/2”
Figure 3-6 Parking Stand
SECTION IV
MAINTENANCE
4-1 MAINTENANCE CHECK LIST
Perform scheduled maintenance as outlined below.
Lower implement to ground, turn off tractor, and set
parking brake before doing maintenance inspections
or work. Some checks may require raising machine
off ground and supporting with blocks. All bolts
should be torqued as indicated in torque at end of
manual unless otherwise indicated.
WARNING
THE MOWER CAN FALL FROM
HYDRAULIC SYSTEM FAILURE. TO AVOID
SERIOUS INJURY OR DEATH, SECURELY
SUPPORT MOWER BEFORE WORKING
UNDERNEATH.
BEFORE EACH USE
1. Perform LUBRICATION per paragraph 4-2.
2. Check blades and spindles to be sure that no
foreign objects such as wire or steel strapping
bands are wrapped around them.
3. Inspect blades for wear. Replace if necessary
per paragraph 4-3. Always replace both blades
with two blades equal in weight. Use only
genuine Bush Hog replacement parts.
4. Check blade bolts for tightness. Tighten to 50 ft./lbs.
5. Make certain all shields are in place and in good
condition. Repair or replace any missing or dam-
aged shields.
6. Check tractor tire air pressure. Refer to tractor oper-
ator’s manual.
7. During operation, listen for abnormal sounds which
might indicate loose parts, damaged bearings, or
other damage. Correct any deficiency before contin-
uing operation.
12


