


54
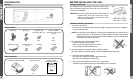
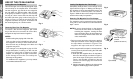
A few of the many mounting possibilities are shown below. The following precautions must
be considered when selecting the mounting location.
Installation Cautions and Warnings:
1.Fuel Tank - WARNING! Never install above your fuel tank as the holes you must drill may
pierce the tank or the fuel lines. Also check for other obstructions such as wires, etc.
2.Excessive Heat - Avoid areas exposed to direct sunlight.
3.Ease of Use - Make certain the changer is easily accessible for loading and unloading the
CD magazine.
4.Distance - The data cable that joins the changer to your existing CDC ready radio is
15 feet long. Do not exceed this length.
5.If mounting to a plastic surface, do not use the self-tapping screws provided.
Use the bolts and hex nuts provided for a more secure installation.
IMPORTANT: Failure to properly secure the CD changer is the most common cause of
“skipping” and related CD play problems.
Changer must be mounted as explained on the following pages.
WHERE TO INSTALL THE CHANGER
I N S T A L L A T I O N
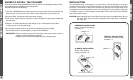
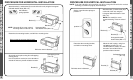
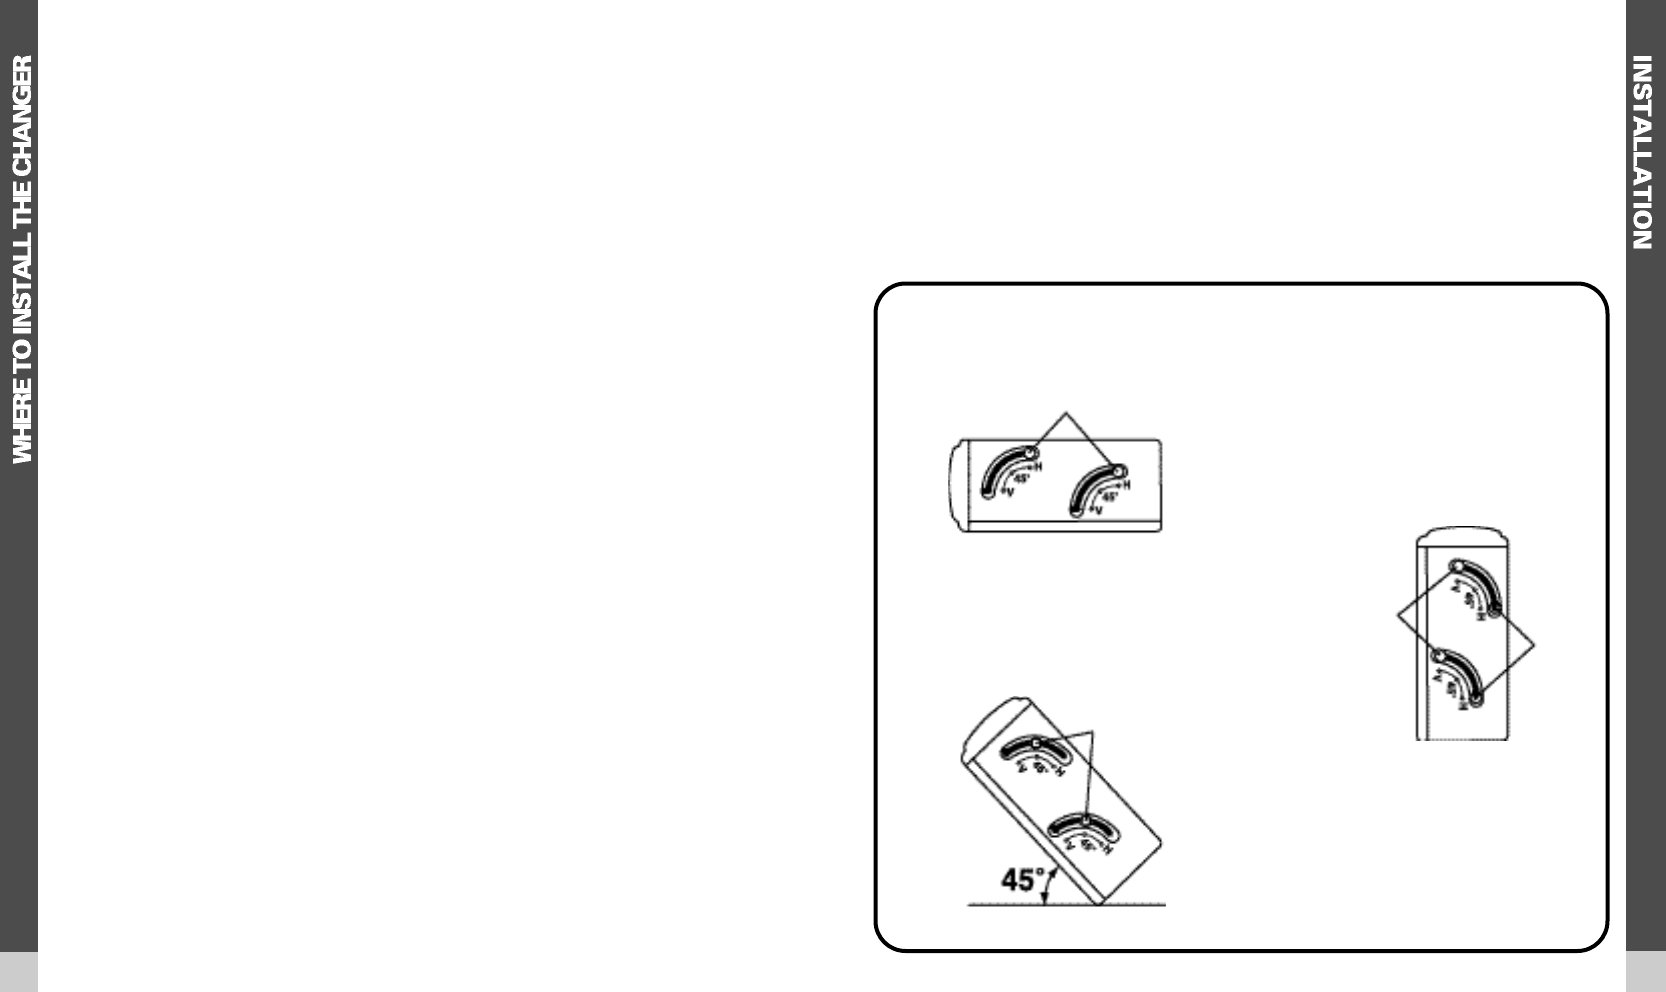
The ACC56M changer is designed for horizontal (flat), vertical (upright) or 45-degree
mounting. It must never be mounted upside-down or on either one of it's sides as explained
previously. The position of the built-in anti-vibration springs (left and right side), must
correspond to the mounting position chosen. If the springs are not set correctly for the type
of installation chosen, the anti-vibration compensation will not be effective and vibration
may cause the disc to skip.
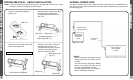
CAUTION: After setting the built-in anti-vibration springs, place the supplied Seals (B) over
the holes. These seals are used to keep dust, which could cause a malfunction,
out of the unit.
HORZONTAL INSTALLATION
Set the 4 anti-vibration springs
to position H
VERTICAL INSTALLATION
Set the 4 anti-vibration springs
to position V
45 ANGLE INSTALLATION
Set the 4 anti-vibration
springs to position 45
position H
position V
position 45