


31
Example 1: Rename AUX to ‘GAME’.
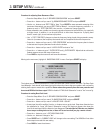
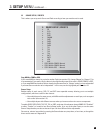
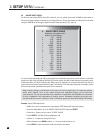
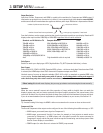
• Enter the Setup Menu. Go to ‘5. SOURCE SETUP / PRESETS’ and press SELECT.
• Press the button until you reach ‘q. AUX’ and press SELECT.
• ‘a. RENAME: AUX’ will be highlighted in red.
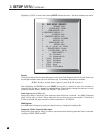
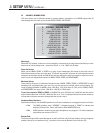
• Press SELECT. The first character ‘A’ will be highlighted in red.
• Use the Master Control Knob or the buttons to change characters. Change the first one to ‘G’.
• Press the button to move to the next character. Change it to ‘A’.
• Use the buttons to move to each remaining character. Change to ‘M’ and ‘E’.
• Press BACK to leave the submenu and return to the main menu.
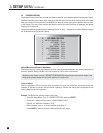
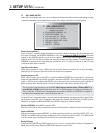
Example 2: Change SAT1 Digital Input from coaxial to optical.
• Make sure satellite receiver is connected to OPT1 and playing.
• Enter the Setup Menu. Go to ‘5. SOURCE SETUP / PRESETS’ and press SELECT.
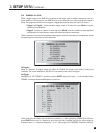
• Press the button until you reach ‘n. SAT1’ and press SELECT.
• Press the button until you reach ‘g. AUDIO IN: Dig Coax SAT’ and press SELECT.
• ‘Coax SAT’ will be highlighted. Use the buttons to change to ‘OPT1’ (sound will now be heard).
• Press BACK to leave the submenu and return to the main menu.
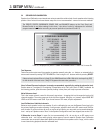
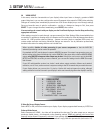
Example 3: Adjust TAPE Source Equalization.
• Make sure TAPE source component is connected to Analog Inputs and playing.
• Enter the Setup Menu. Go to ‘5. SOURCE SETUP / PRESETS’ and press SELECT.
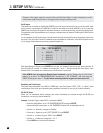
• Press the button until you reach ‘d. TAPE’ and press SELECT.
• Press the button until you reach ‘c. EQ’ and press SELECT.
• Use the buttons to move to ‘LF’ or ‘HF’. Use the buttons to adjust.
• Press BACK to leave the submenu and return to the main menu.
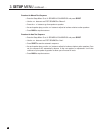
Example 4: Set DVD1 Lip-Sync Delay to 24 milliseconds.
• Enter the Setup Menu. Go to ‘5. SOURCE SETUP / PRESETS’ and press SELECT.
• Press the button until you reach ‘f. DVD1’ and press SELECT.
• Press the button until you reach ‘m. LIP-SYNC DELAY’ and press SELECT.
• Use the buttons to move from digit to digit and the buttons to adjust to ‘24 ms’.
• Press BACK to leave the submenu and return to the main menu.
3. SETUP MENU continued …