


030519 A7 Owner's Manual 4
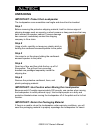
ASSEMBLING
IMPORTANT: Finish Assembly Before Connecting to Amplifier
For protection, this A7 loudspeaker is shipped with the horn assembly fixed
inside the cabinet. For optimum sound quality, follow the assembly steps below
for repositioning the horn assembly on top of the loudspeaker cabinet.
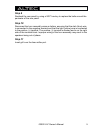
Step 1
If you would prefer to keep the horn assembly positioned inside of the cabinet,
please proceed to the next section “Placing Stereo Loudspeakers”.
Step 2
Remove the rear panel by using a 5/32” hex key to remove the bolts around the
perimeter of the rear panel. Be aware that the crossover network is attached to
the rear panel and that wires connect the crossover network to the drivers in the
cabinet. Take care not to apply tension to those connecting wires.
Step 3
Reach in behind the high frequency horn assembly and disconnect the wires.
Step 4
Support the horn assembly during removal. Using a 3/8” socket or wrench, gently
remove the nuts, washers and bolts holding the horn assembly inside the
cabinet. Keep track of the nuts, washers and bolts for later use.
Step 5
Attach the front mounting bracket to the pre-drilled holes on top of the
loudspeaker using the supplied bolts.
Step 6
Attach the horn mounting bracket to the sectoral horn to create the horn
assembly.
Step 7
Position the horn assembly on top of the cabinet over the pre-drilled holes. Using
a 3/8” socket or wrench, attach the horn assembly to the cabinet using the same
bolts, washers and nuts.
Step 8
Unscrew the plug on the top of the rear panel. Thread the high frequency horn
assembly wires through the unplugged hole on the top of the rear panel.