EnEn
EnEn
En
ENGLISH
12
EE
EE
E
(Españo(Españo
(Españo(Españo
(Españo
FF
FF
F
(França (França
(França (França
(França
RECORDING AN AUDIO SOURCE
1 Select the program source to be recorded.
Turn the FUNCTION.
2 Set the tape deck or MD recorder to the recording
mode.
3 Start the selected program source.
To monitor recorded sound during recording (when the
connected tape deck is a three-head system)
Press the TAPE MONITOR button. “TAPE ON” appears on the
display for four seconds, and then the source name selected in
step 1 comes back on. To cancel the tape monitor, press it again
so that “TAPE OFF” appears.
NOTE
• Any sound control system has no effect on recording (see
page 8).
• Input sound through the DIGITAL IN terminals cannot be
recorded. When recording the sound from the DVD, CD, MD
or LD player, connect the analog AUDIO OUT terminals of
the player to the corresponding AUDIO IN terminals of the
receiver.
The sound will be recorded in 2 ch stereo.
• When recording audio sources by the MD recorder connected
to the VIDEO 1/DVD/MD AUDIO OUT terminals, the selected
video source (see page 11) should be V2 or V3. Recording
cannot be done while the V1 (VIDEO 1) is selected and
displayed on the window.
• Input sound from the tape deck connected to the TAPE
MONITOR IN terminals cannot be recorded.
TO PLAY A DVD OR LD RECORDED IN
DOLBY DIGITAL OR DTS SURROUND
This receiver is equipped with the Dolby Digital decoder and
DTS decoder, and has the DIGITAL IN (both OPTICAL and
COAXIAL) terminals. When a DVD or LD player is connected to
the DIGITAL IN terminal of the receiver, you can enjoy theater-
quality audio right in your home when playing discs recorded in
Dolby Digital surround or DTS surround.
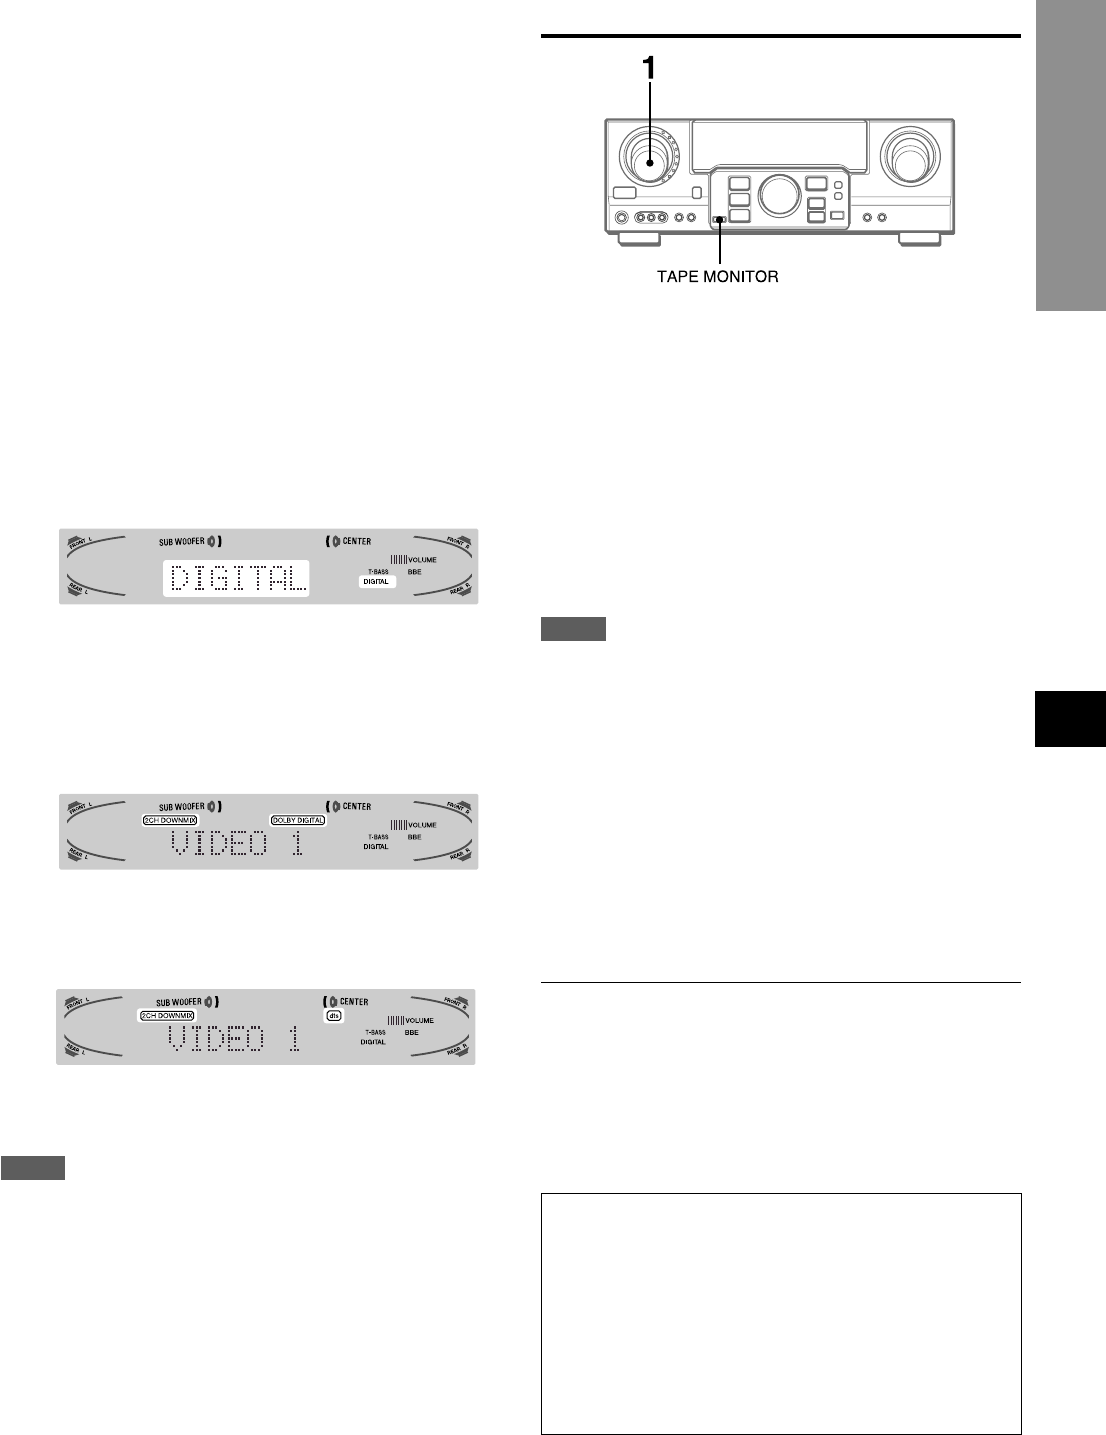
Before operation
• Check that the TAPE MONITOR is not selected. If the TAPE
MONITOR is selected, press the TAPE MONITOR button so
that “TAPE OFF” appears on the display.
• When connecting an LD player equipped with the AC-3 RF
OUT terminal, use an RF demodulator unit. Also connect the
analog AUDIO OUT terminals of the LD player to the receiver
to play all the sources. For further information, refer to the
instructions of the LD player.
1 Turn the FUNCTION to select the VIDEO 1 (VIDEO
2 or VIDEO 3) and press the DIGITAL/ANALOG/
BAND button repeatedly until “DIGITAL” is
displayed.
The DVD (LD) player connected to the OPTICAL (COAXIAL)
DIGITAL IN terminal is selected as a source.
2 Start playing the DVD (LD) recorded in Dolby
Digital surround or DTS surround.
• The “DOLBY DIGITAL” indicator will light on the display when
the bit stream of the Dolby Digital surround comes in the unit.
To select the Dolby Digital surround mode according to your
speakers, see “SELECTING DOLBY SURROUND” on page 15.
• The “dts” indicator will light on the display when the bit stream
of the DTS surround comes in the unit.
To select the DTS surround mode according to your
speakers, see “SELECTING DTS SURROUND” on page 19.
NOTE
• While the TAPE MONITOR is selected and the TAPE MONITOR
indicator turns red, “DIGITAL” cannot be selected.
• When headphones are plugged in, the Dolby Digital surround
mode or DTS surround mode is automatically changed to
“2chSTEREO” and the “2CH DOWNMIX” indicator lights on the
display.
Even if the SURROUND button is pressed while the
headphones are plugged in, the mode cannot be changed.
• This unit supports input signals of the Dolby Digital surround
bit stream, DTS surround bit stream and linear PCM whose
sampling frequency is 32 kHz, 44.1 kHz, 48 kHz and 96 kHz.
• When connecting some DVD players to the receiver through
the DIGITAL IN terminals, noise may be heard in the DVD
operation: e.g. searching a disc, skipping a chapter.
BASIC OPERATIONS
To play a DTS audio CD
There are some audio CDs recorded in DTS surround like
DVDs and LDs.
They will present you with a live-quality audio in your home.
1 Select the CD function.
2 Select the DIGITAL mode (see page 11).
The CD player connected to OPTICAL DIGITAL IN (CD)
terminal is selected as a source.
3 Start playing the CD recorded in DTS surround.
To select the DTS surround mode, see page 19.


