SENDING A FAX
2-6
ENLARGING/REDUCING THE IMAGE BEFORE TRANSMISSION
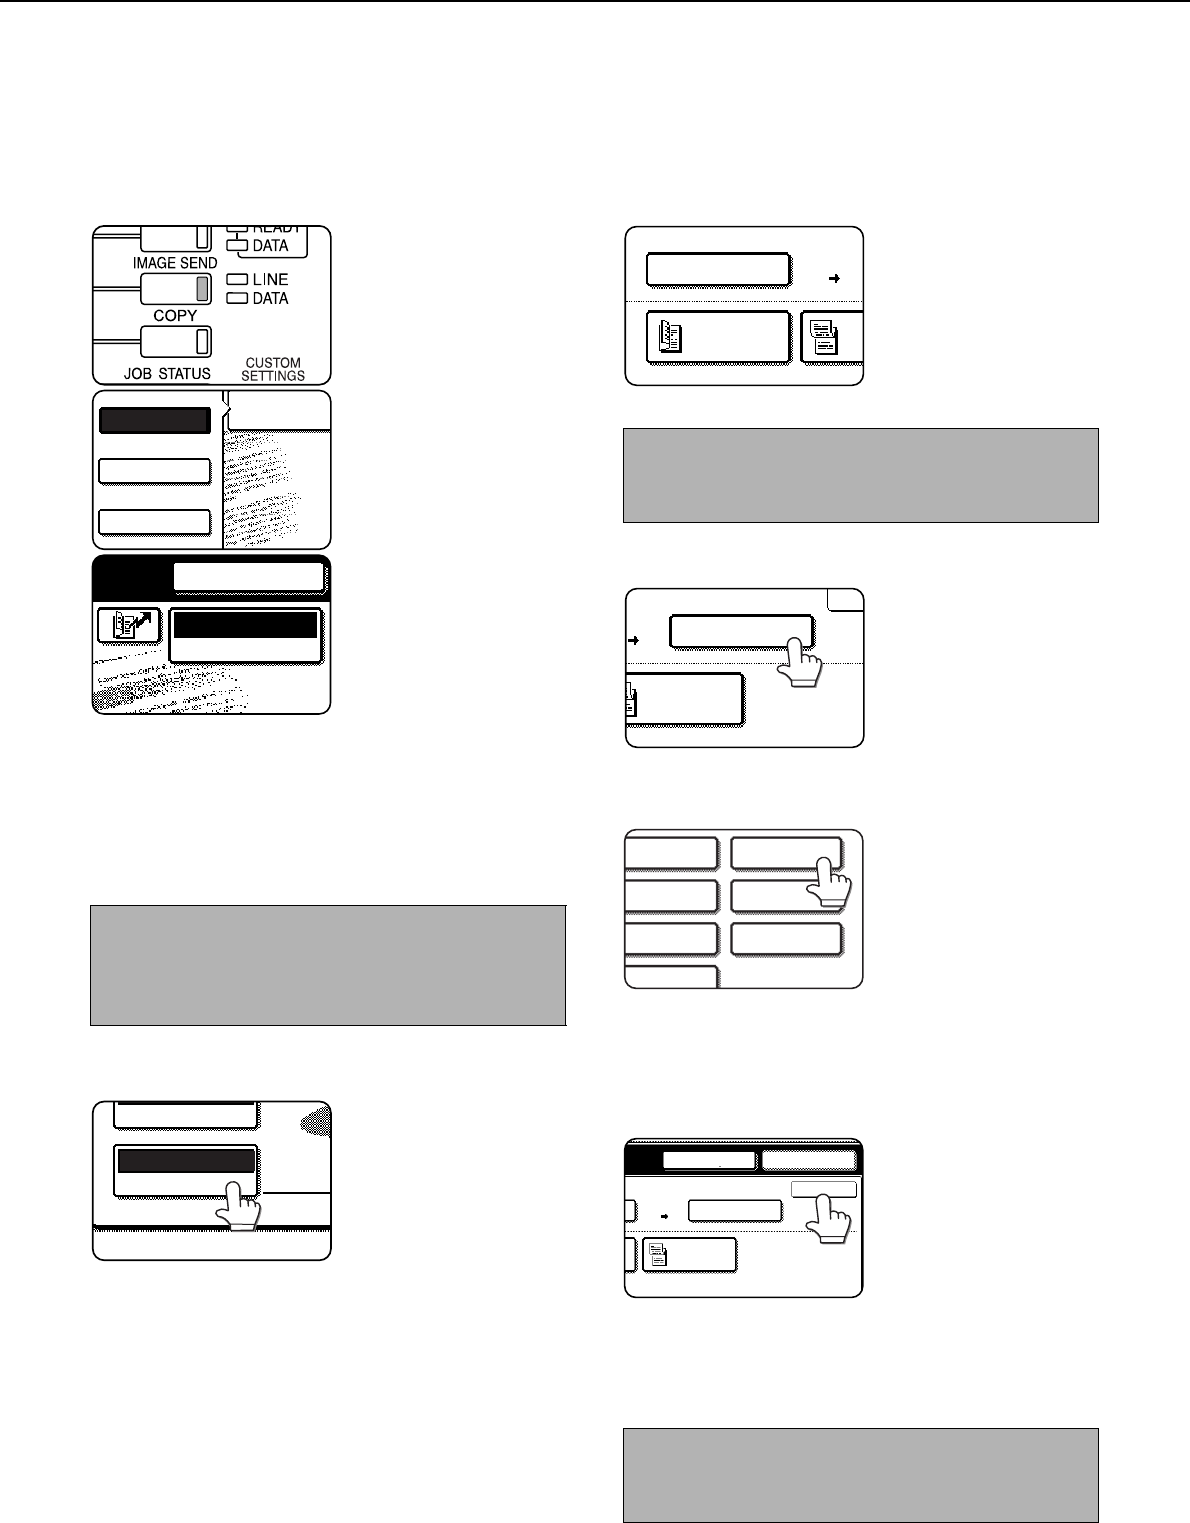
Follow these steps to enlarge or reduce the scanned image before transmission.
1
Make sure the machine is in fax mode.
When the [IMAGE
SEND] key light is on,
the machine is in fax
mode. If the light is not
on, press the [IMAGE
SEND] key.
If the network scanner
option is installed, touch
the [MODE SWITCH]
key and then the [FAX]
key to switch to fax
mode.
When fax mode is
selected, "FAX" appears
in the top half of the
[MODE SWITCH] key.
2
Load the original.
Using the automatic document feeder: Page 1-7
Using the document glass: Page 1-7
If you are using the document glass to send
multiple pages, load the first page first.
3
Touch the [ORIGINAL] key.
4
Check the original size.
If the original size has not
been correctly detected,
touch the key under
[SCAN SIZE] and specify
the original size. (See
"MANUALLY SETTING
THE SCANNING SIZE"
on page 1-8)
5
Touch the key under [SEND SIZE].
If the key under [SEND
SIZE] is greyed out,
specify a standard
original size in step 4.
6
Touch the key of the desired enlargement
or reduction size.
The [AUTO] key is no
longer highlighted. The
[MANUAL] key and the
selected size key are
highlighted.
7
Touch the OK key.
8
Check the enlargement or reduction ratio
and touch the [OK] key.
9
Continue from step 4 of "BASIC
PROCEDURE FOR SENDING FAXES"
(pages 2-2 to 2-3).
NOTE
You cannot load documents in both the automatic
document feeder and on the document glass and
send them in a single fax transmission.
FAX
E-MAIL/FTP
MODE SWITCH
INTERNET FAX
RESOLUTION
AUTO A3
ORIGINAL
NOTE
A long size, stored size, or non-standard size cannot
be specified for the original scanning size.
NOTE
After the transmission is stored, the [CA] key can be
pressed to cancel enlargement/reduction transmission.
2-SIDED
BOOKLET
2-
TA
AUTO A3
SCAN SIZE
100%
SEND SIZE
2-SIDED
TABLET
00%
AUTO
OK
SEND SIZE
70%
A4
2-SIDED
TABLET
SPEAKER RESEND
