An overview
CD ripping allows you to rip tracks on CD to
USB device. This unit supports Mass Storage
Class (MSC) devices. Connect the USB device
first before ripping.
Ripping CD to USB device
1. During CD playback, press REC on the
remote to activate the Ripping Menu.
2. Select one of the menu items using the
up/down arrow buttons. Press the left/
right arrow buttons or OK to change the
setting.
Speed
High speed ripping mode can save time
when ripping from CDs. Select 1x(normal
speed) or 2x(double speed) by pressing the
left/right arrow buttons. Press the down
arrow button to move to the next
menu item.
Source
You can select to rip one track(TRACK), the whole
disc(ALL TRACKS) or programed tracks
(PROGRAM). Press the down arrow button to
move to the next menu item.
Destination
The destination of the ripped files is
defaulted as USB. No selection is needed.
Start Ripping CD
Highlight START and press OK to
start ripping.
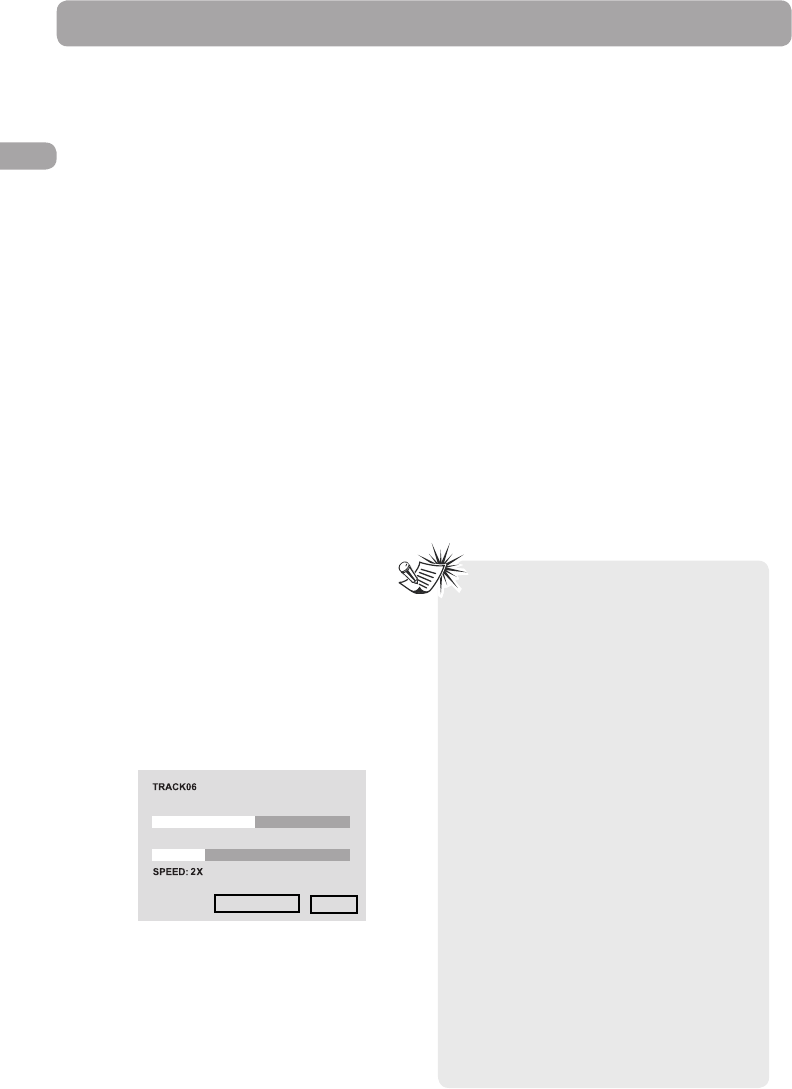
The screen above appears when ripping
start. The first progress bar represents the
progress percentage of the current ripping
track while the second progress bar
represents the total percentage. The
percentage of both bars will be identical if
there is only one track to rip.
To stop ripping during the process, highlight
"Cancel" button and press OK.
When ripping has finished, press REC to quit
the ripping menu.
File Names of Ripped Files
You can find the ripped files saved in a
folder named “CDRECORD” with file name
as “CDTKxx01”, “CDTKxx02”...etc.
CD Ripping
Notes:
• The USB device for CD ripping must be
connected to the unit in Mass Storage Class (MSC)
mode. Your device should be shown as a drive
letter, instead of the name of the USB device,
when connected to the computer in
MSC mode.
• CD Ripping function only supports CDDA
discs.
• During 1x ripping, the audio output is for
monitoring purpose only. It does not represent
the true audio quality recorded.
• During 2x ripping, the audio output is muted.
• CD Ripping function does not support
ripping files to Multi Card Reader via USB
port.
• “NO USB DEVICE” will be displayed if no USB
device is connected to the unit.
“NO PROGRAM TRACK” will be displayed if
no program list is created.
“USB DEVICE IS FULL” will be displayed if
the USB device is full.
“USB WRITE PROTECT” will be displayed if
the USB device is write-protected. You
should switch off the write protection first.
• You can select ripping speed even after
ripping is started. Highlight the SPEED
option and press the left/right arrow
buttons.
• “DEVICE REMAIN” indicates the total
remaining time of the USB device.
18
EN
Track progress
Total progress
Change Speed
Cancel