2. INSTALLATION 13
ENGLISH
2-2. Getting Ready for Operation
Try each setting procedure if necessary in the following cases.
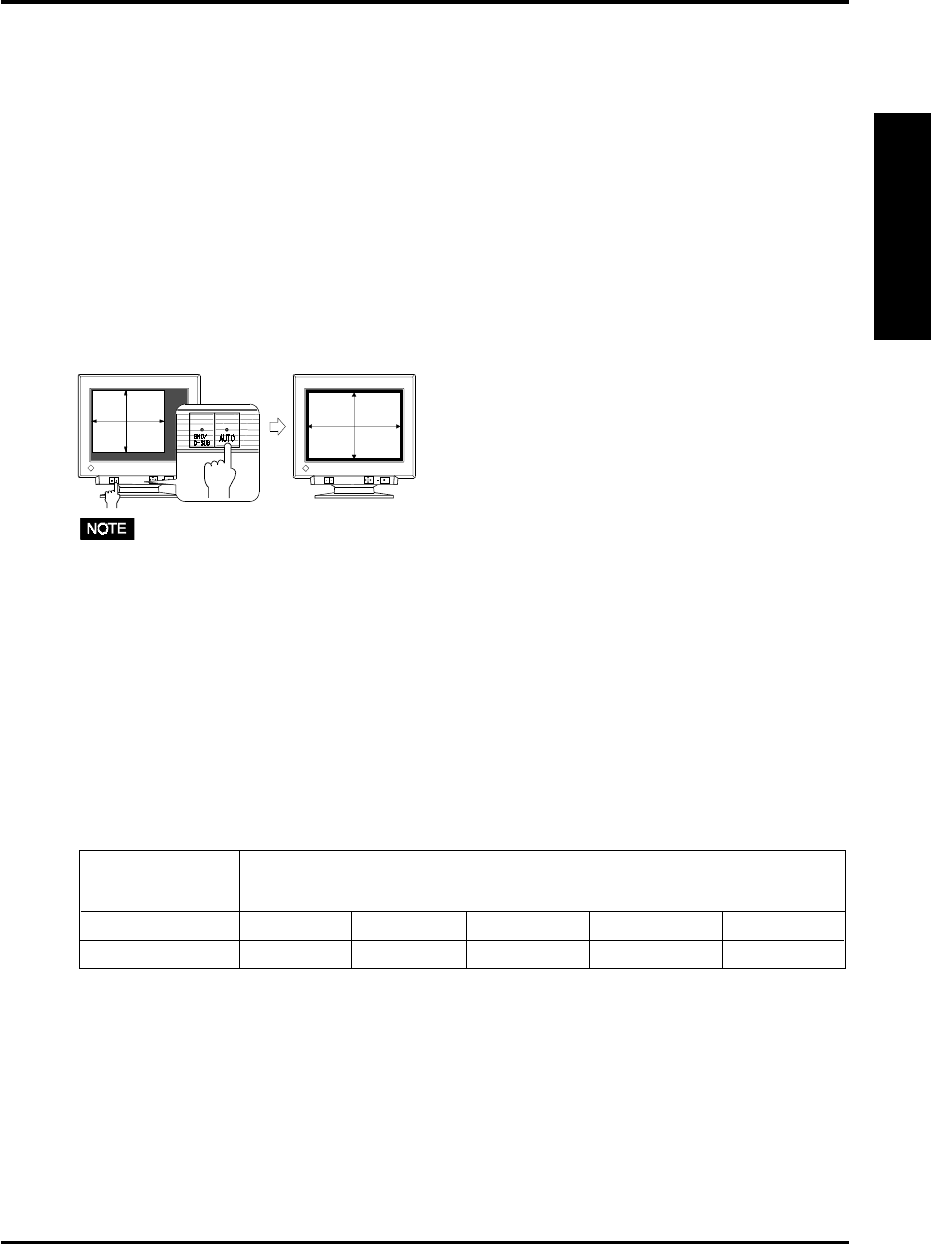
The display image size and / or position is incorrect
Press the AUTO-SIZING button on the front panel. The AUTO-SIZING function centers
the displayed image, aligning the image’s borders with respect to the monitor frame. In
general, press the AUTO-SIZING button whenever changing the graphics board or the
resolution
p.30)
, or when image size and/or position is incorrect. If further adjustment is
required, adjust the picture size/position as desired using the ScreenManager (See page
14).
• A solid-color screen (i.e. red, green, blue) may appear briefly after pressing the
AUTO-SIZING button. This is not a malfunction.
The displaying area is too large or too small
The following look-up table shows the maximum (non-interlaced) vertical refresh rates
for this model with regard to standard resolutions set forth by VESA. The best way to see
if the monitor will work with a given resolution and rate, is to compare the vertical
refresh rate of the graphics board to the monitor’s range. Refer to the graphics board
manual for specifications. If the refresh rate is within the specified range of the monitor,
it should operate properly.
Using the monitor with Windows
®
95/98/2000
A monitor information file is contained in the EIZO CRT Utility Disk included with the
monitor. It includes all the required information for best operation with Windows 95/98/
2000. Please install the enclosed utility and select your model name from the monitor
list in Windows 95/98/2000. For installation procedure, please read the readme.txt file
in the utility disk.
Horizontal Scan
Frequency (kHz)
Maximum Vertical Refresh rate (Hz)
30-96 160 144 118 89 76
640 x 480 800 x 600 1024 x 768 1280 x 1024 1600 x 1200


