17
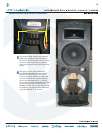
Amplifi er assembly replacement continued:
4
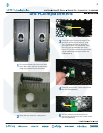
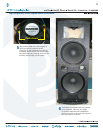
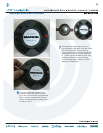
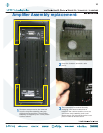
Once the two cover plates are removed,
two more screws need to be taken out in
order to separate the amplifi er assembly
from the cabinet. Keep the two screws in
a safe place.
1
2
5
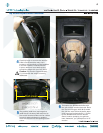
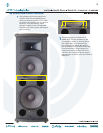
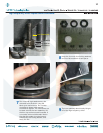
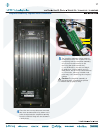
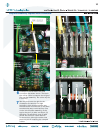
The amplifi er assembly is now ready to
be separated from the cabinet. Do not
completely take the amplifi er assembly
off yet, as fi ve cables need to be
removed fi rst (as shown above):
(1) led PCB cable, (2) blue and black,
(3) solid blue, (4) solid black, and (5)
solid yellow. Do not force cable removal
or connection, although needle-nose
pliers may aid in loosening the crimped
cables.
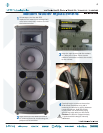
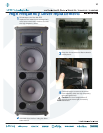
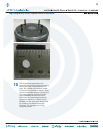
Caution: The amplifi er assembly is
approximately 18 pounds, so please
make sure to grasp it fi rmly.
1
2
3
4
5