24 EN
MasterPage: Heading0_Left
EDITING
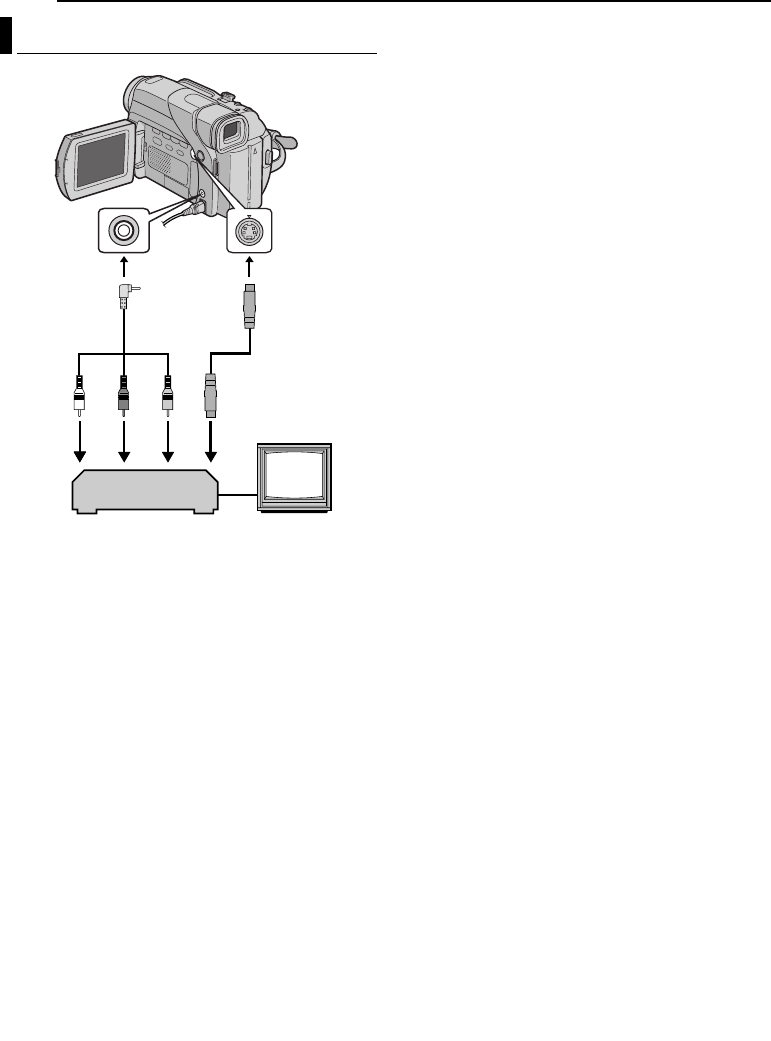
A White to AUDIO L IN
B Red to AUDIO R IN
C Yellow to VIDEO IN
D To S-VIDEO IN*
* Connect when your TV/VCR has an S-VIDEO IN
connector. In this case, it is not necessary to connect the
yellow video cable.
To use this camcorder as a player
1 Following the illustrations, connect the camcorder and
the VCR. Also refer to page 14.
2 Set the camcorder’s Power Switch to “PLAY” while
pressing down the Lock Button located on the switch.
3 Turn on the VCR’s power.
4 Insert the source cassette in the camcorder.
5 Insert the recording cassette in the VCR.
6 Engage the VCR’s AUX and Record-Pause modes.
● Refer to the instruction manual for the VCR.
7 Press 4/9 on the camcorder to start playback of the
source tape.
8 At the point you want to start dubbing, engage the
VCR’s Record mode.
9 To pause dubbing, engage the VCR’s Record-Pause
mode and press 4/9 on the camcorder.
10 Repeat steps 7 – 9 for additional editing. Stop the
VCR and camcorder.
NOTES:
● It is recommended to use the AC Adapter as the power
supply instead of the battery pack. (੬ pg. 7)
● As the camcorder starts to play your footage, it will appear
on your TV. This will confirm the connections and the AUX
channel for dubbing purposes.
● Before you start dubbing, make sure that the indications do
not appear on the connected TV. If they do, they are being
recorded onto the new tape.
To choose whether or not the following displays appear
on the connected TV
• Date/time
Set “DATE/TIME” to “AUTO”, “ON” or “OFF”.
(੬ pg. 15, 18)
• Time code
Set “TIME CODE” to “OFF” or “ON”. (੬ pg. 15, 18)
• Indications other than date/time and time code
Set “ON SCREEN” to “OFF”, “LCD” or “LCD/TV”.
(੬ pg. 15, 18)
Dubbing To A VCR
1234
TV
VCR
Audio/Video
cable
(provided)
To AV To S
S-Video cable
(optional)
GR-D32US.book Page 24 Friday, November 21, 2003 9:31 AM


