19
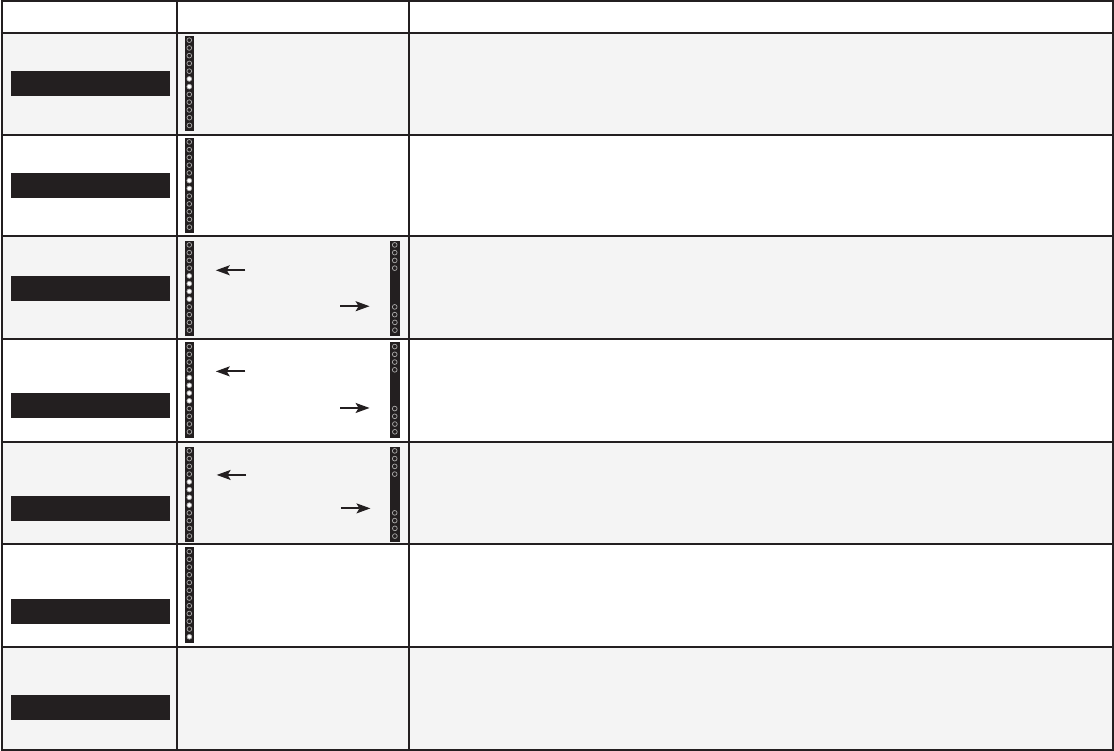
Function LED Behavior Description
Surround Balance
Two center LEDs
indicate Surround
Balance is centered.
Press the Next/Previous button to increase/decrease the surround balance level on each
side. The LED indicators will move to the top with balance levels to the right and down
with balance levels to the left.
Subwoofer Levels
Two center LEDs
indicate Subwoofer
level 0.
Press the Next/Previous button to increase/decrease the level of the subwoofer.
The LED indicators will move to the top with increasing levels and to the bottom
with decreasing levels.
Surround On/O
Press the Next/Previous button to enable/disable surround sound. When
enabled (On), all inputs will produce 5.1 surround sound. When disabled (O), the
satellite speakers will be disabled.
DTS TruVolume
On/O
Press the Next/Previous button to enable/disable TruVolume. When enabled
(On), TruVolume provides a consistent and comfortable volume level for a more
enjoyable listening experience.
Night Mode On/O
Press the Next/Previous button to enable/disable Night Mode. When enabled
(On), the Sound Bar will lower bass frequency levels to provide a more quiet envi-
ronment (ideal for apartment living and homes with sleeping children).
AV Delay
LED at the bottom
indicates no delay.
Press the Next/Previous button to increase/decrease the amount of audio delay.
The LED indicators will move to the top with increasing audio delay levels.
Speaker Test
—
Press the Play/Pause button to activate the speaker test function. A voice will
begin calling out each speaker beginning with
left front
. (Left Front, Center, Right
Front, Right Rear, Left Rear, and Subwoofer-white noise) If any of these are
missing, check the connection and run the speaker test function again.
Subwoofer
Surnd
TruVol
Night
Surr Bal
Surround On
Surround O
TruVolume On
TruVolume O
Night Mode On
Night Mode O
AV Delay
Spkr Test


