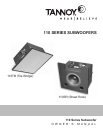
MECHANICAL INSTALLATION 110SR
NEW / EXISTING CONSTRUCTION INSTALLATION PROCEDURES:
Before you begin:
Please read and understand all of these instructions thoroughly before beginning any work.
Note that construction work for the installation of all Tannoy products must be done to local building codes by qualified,
licensed installers. A local building inspector should approve any overhead installations. Always use safety goggles when
cutting material using a RotoZip™. Tannoy assumes no liability for cause and effect of improper installation work.
Your package includes:
• 110SR subwoofer system
• 11 piece supplied screw package
• Pre-Installation Ring (PIR - SOLD SEPARATELY)
• Individually packaged grille
Parts / tools required:
The following is a list of suggested materials and tools. Your needs may differ slightly at each site.
• Rotozip™ cutout tool and Guidepoint™ bit.
• 2ea. 1/2” #8 wood screws
• Cordless screw gun
• Combination square and /or tape measure
• Additional 2” x 4” lumber, in 24” pieces
• Trim saw (optional)
Site preparation and installation procedures:
Please note that the 110SR is designed for installation in a ceiling with exposed ceiling joists. The Pre-installation Ring must
be secured to the support structure; drywall alone will not support the weight of the subwoofer. Make certain that there is
sufficient clearance above the joist (minimum 12”) for the subwoofer installation.
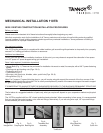
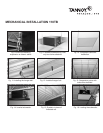
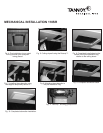
Please refer to the photographs as a guideline for installing the pre-installation ring into a wood joist or stud ceiling.
1) (Fig. 1) Measure the locations for two 24” strips of 2” x 2” or 2” x 4” blocking. These must be used in order for secure
mounting to the pre-installation ring with 2 1/2” #8 wood screws. Use a combination square to measure the thickness
of the pre-installation ring (approx. 5/8” and then transfer the measurement to the joist.
2) (Fig. 2) Screw the blocking to the joist with several evenly spaced screws. (Fig. 3) Fasten the pre-installation ring
similarly to the blocking, Note that there are no pre-drilled holes; use the wood screws to go directly through the
pre-installation ring, keeping a 1” clearance from any “T” nuts. Note: the pre-installation must be installed with “T”
nuts on the top side. The pre-installation ring is clearly marked for your safety and convenience.
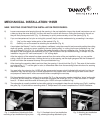
3) (Fig. 4) Shows the pre-installation ring installed against a steel stud furring channel. Attach the pre-installation ring
with screws directly through the furring and into 24” strips of blocking installed on the upper side of the channel so
that the screws will go into both. Ensure that overhead work is carried out safely and according to local building
codes.
4) After the pre-installation ring installation is complete, run your signal wires. At this time, have an electrician install
electrical circuits for your sub, if required.
5) Also at this time, we recommend that you install a safety line typically a light gauge wire rope, from a secure point
on the support structure above the subwoofer. Attach this to the strapping on either side of the sub and suspend it
in case the installation is compromised. Follow the instructions for wire rope installation from you wire rope supplier
and check with your local building codes for specifics.


