


5 Operation
When you have worked through all the points, your SkyFunk 3 is ready for operation.
> Switch on both units by means of the mains power switches.
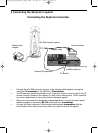
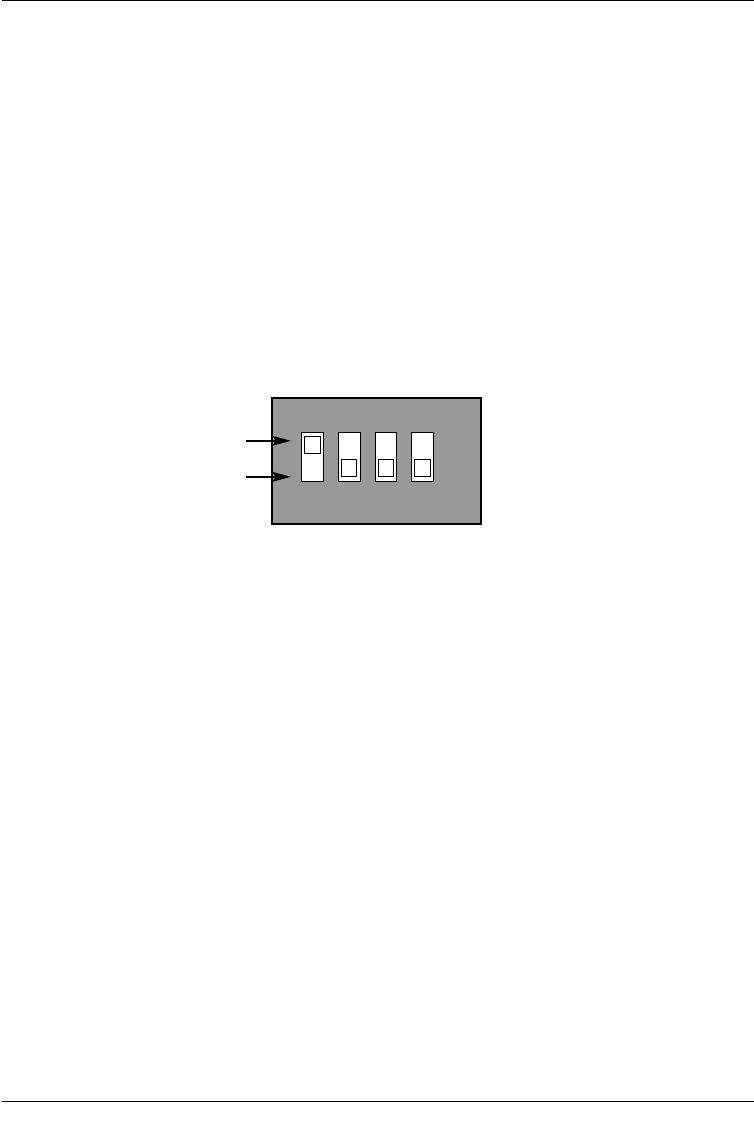
5.1 Setting the transmitter and receiver channels
To change the transmitter resp. receiver channel, select the desired channel on both units
(transmitter and receiver). The switches for channel selection are located on the rear
panel of the units. To select, e.g., channel 1,use an object with a small tip (ball-point pen,
small screwdriver, etc.) to move the switch for channel 1 to the “On” position, as shown in
the diagram. The other switches should be left in the “Off” position. Use the same procedure
to select any other channel.
Please ensure that the transmitter and receiver units must always be set to the same chan-
nel, i.e. the same switch position.
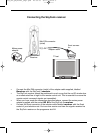
5.2 Automatic channel changes
You have the facility of receiving several different signals with a single receiver unit (maxi-
mum of 4 channels).When using this option, the signal of each transmitter will be displayed
for approx. 5 seconds. The receiver will then automatically go on to the next receiver channel
selected, and will display its signal for approx. 5 seconds. This procedure will be repeated
continuously.
To select the automatic channel changing option, proceed as follows:
> As described in point 5.1, select a different transmission channel on each of the trans-
mitter units.
> On the receiver unit, set all the channel selector switches to “On”, for those channels
on which there will be signal transmissions. All the selected channels will now be dis-
played automatically, one after the other.
7
ON DIP
1 2 3 4
Off
On
Your product carries the CE mark, and complies with all relevant EU standards.
Subject to change. Not responsible for printing errors. Correct as at 09/03
SkyFunk and TechniSat are registered trademarks of
TechniSat Digital GmbH
P.O. Box 560 - D-54541 Daun
www.technisat.de
bed_anl_SkyFunk3_engl.qxd 25.09.03 09:07 Seite 7