


SV Sound
Page 6
ting ALL speakers to “Small” works best. Let your sub make the bass! Also, is
your subwoofer turned “ON”? We don’t mean “is your subwoofer
amplifier
on?” (that’ll be important later too) but rather,
is your receiver sending a bass
signal to your sub amp?
This can only happen if you say “Yes” (or “ON”) in the
“Subwoofer” selection during the all-important setup menu of any typical Dolby
Digital/DTS capable receiver. If you have a choice of “crossover points” for your
bass, usually “80Hz” works best, unless you have unusually small main speakers.
•
I
s your receiver connected to the sub amp?
Use a well-shielded RCA
cable (sometimes called a “patch cord”) to connect the subwoofer output of your
DD/DTS receiver to either input jack of your subwoofer’s dedicated amplifier. As
mentioned earlier, you’ll need to “split” the bass signal with a “Y Cable” if you
bought a pair of subs. You only need feed
one
of the two inputs (Right or Left) of
any single Powered Box SVS however.
•
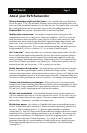
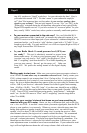
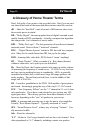
Is your Radio Shack ® sound pressure level (SPL) me-
ter ready?
This tool is absolutely essential to proper home
theater audio setup. It’s akin to a tire pressure gauge for your car
(you don’t set your tires by “feel” right?). Set the meter to “Slow”
and “C-weighting” (and turn the dial to 70 or 80dB depending on
your test tone source). Haven’t got the meter yet? Order one
from SVS. We prefer the analog instead of the digital display
model.
Getting ready to start now: Make sure your receiver/processor master volume is
set at “00 dB” or some other easy to remember reference level. Finally, ensure your
SVS’s volume control is set no more than 1/4 to 1/3rd up at first. It’s also critical to
check the subwoofer level control of your surround receiver before you begin the test
tones. Set it to no higher than about one quarter of the way up to start (for instance that
will be –5dB if your receiver’s subwoofer channel levels have typical limits running
from -10 dB to +10 dB) . Your LFE “trim”, if you have one, should be set to 0dB to
start (that’s full up) but this can be dialed down later to tame peaks if needed. IMPOR-
TANT: Turn off ANY sound-field processing modes, “peak limiters”, “mid-night
mode” etc.
Set the SPL meter to “Slow” and “C-weighting” (turn the range dial to
either 70 or 80dB).
Now play your receiver's internal test tones so you have something to
measure with your SPL meter. Better yet, buy a calibration disk, such as the Ova-
tion’s Avia test DVD. A test disk’s tones ensure your entire signal path, from the DVD
player to your speakers, is set correctly. Whatever you use, when the tones start alter-
nating from speaker to speaker (watch your sound meter now), set each full range
speaker’s level to about 75 dB (or 85dB if using Avia), by using the receiver’s dedi-
cated channel controls (leaving receiver’s master volume the same). We recommend
you turn down the receiver’s subwoofer output level before you significantly lower
your sub’s volume/gain control. This helps keep input distortion to a minimum. You
should not set the receiver’s subwoofer level much lower than -5 dB however, since
some adjustment room is needed to lower bass as needed later. If your subwoofer read-
ing is still too high then turn down the sub’s amp volume a little with each run.