


ond. If your speaker system is not securely planted on the
floor or solid surface, it can shake as it produces sound
and, consequently, the sound can be compromised. If
your speaker is sitting on the carpet and only foot gliders
are used, the bass can be ill defined and even boomy. The
use of spikes is recommended to insure secured footing for
your speakers. (See ‘Solid Footing’ for spike information
and installation instructions).
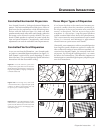
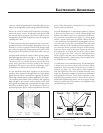
Dipolar Speakers and Your Room
MartinLogan electrostatic loudspeakers are known as dipo-
lar radiators. This means that they produce sound from
both their fronts and their backs. Consequently, musical
information is reflected by the wall behind them and may
arrive, either in or out of step, with the information pro-
duced by the front of the speaker.
The low frequencies can either be enhanced or nulled by
the position from the front wall. Your Summit’s have been
designed to be placed two to three feet from the front
wall (the wall in front of the listening position) to obtain
the best results; however, your room may see things dif-
ferently. So listening to the difference of the bass response
as a result of the changes in distance from the front wall
can allow you to get the best combination of depth of bass
and tonal balance.
Now that you know about reflective surfaces and reso-
nant objects, you can see how the midrange and high
frequencies can be affected. The timing of the initial wave
as it radiates to your ears, and then the reflected informa-
tion as it arrives at your ears later in time, can result in
confusion of the precious timing information that carries
the clues to imaging. Consequently the result is blurred
imaging and excessive brightness. Soft walls, curtains, wall
hangings, or sound dampeners (your dealer can give you
good information here) can be effective if these negative
conditions occur.
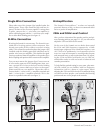
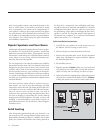
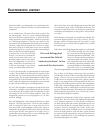
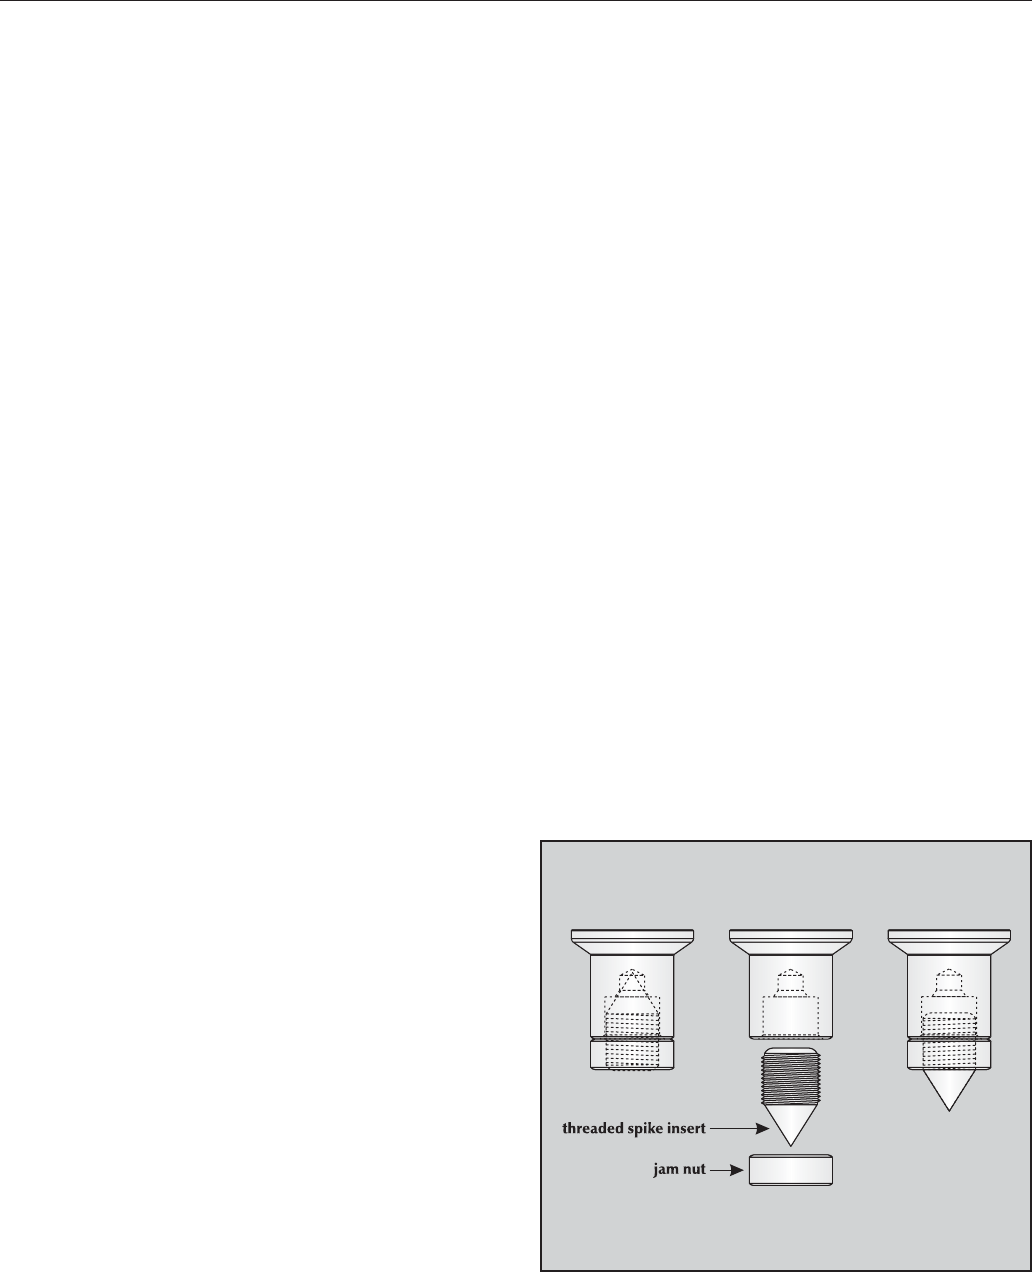
Solid Footing
After living and experimenting with your Summit’s, you
may want to use ETC (energy transfer coupler) spikes sup-
plied with the Summit (see figure 5). With the use of these
spikes, the Summit will become more firmly planted on
the floor and, consequently, bass will tighten and imag-
ing will become more coherent and detailed. It is best not
to implement the spikes, however, until you are secure in
the positioning, as the spikes can damage the floor if the
speaker is moved. The feet that attach to the bottom of
the Summit use a common
3
/8“ x 16 thread. The threaded
spike insert itself is a
3
/4“ x 16 thread.
Spike Installation Instructions:
1 Carefully lay your speaker on its side to gain access to
the bottom. (See the warning on back cover.)
2 Remove the jam nut from the bottom of the foot.
3 Remove the threaded spike insert. Flip the threaded
spike insert 180 degrees to expose the spike. Replace
the threaded spike insert.
4 Re-install the jam nut.
5 Right the speaker. Caution: Make sure your hands and
any cabling are clear of the spikes. Do not slide speaker as
spikes are sharp and can damage your floor or carpet.
6 Adjust to level by the rotating spikes. Tighten the jam nut
securely when satisfied that speaker is level. Caution:
walking the speaker may result in a broken spike or foot.
Figure 5. The ETC™ Spike.
14 Placement