


SR5IM1.DOC Page 5 of 9
2 BRACKET AND CABINET INSTALLATION
• Check that all loudspeaker cables have been prepared and installed. See section 3 Cables and
Connections.
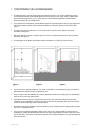
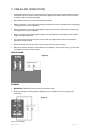
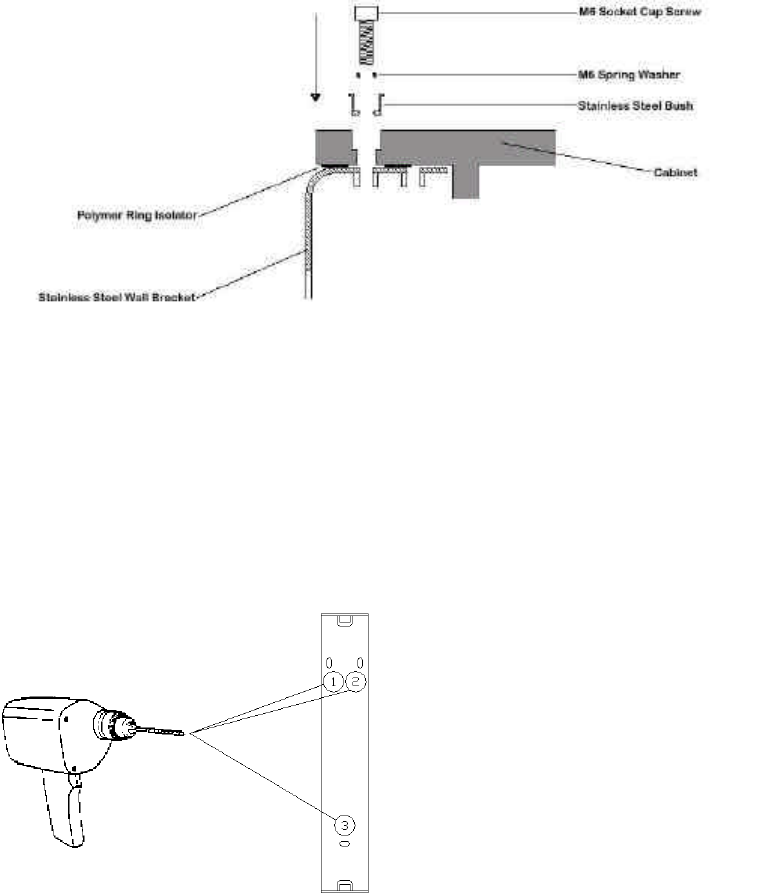
• The cabinet is secured to the bracket with 2 x M6 hex-drive socket cap machine screws, 2 x spring
washers and 2 x stainless steel bushes. See figure 8. ALWAYS store these components safely
whenever they are removed.
• Remove the two screws and washers using the supplied 5mm hex wrench and carefully detach the
bracket from the cabinet.
Figure 8
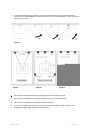
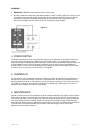
• Hold the bracket against the wall (or ceiling) in its final location and carefully mark the centres of the
three holes. To ensure a neat installation make sure the bracket is level. See figure 9.
• Place the bracket to one side.
• Drill three 5.5mm diameter holes to a clear depth of 30mm. Insert the 3 wall-plugs. Screw the bracket to
the wall using the supplied 3 x No 8 cross-head screws. Before tightening the screws check the
orientation of the bracket.
Figure 9
• Check that the 2 x bushes are correctly fitted to the cabinet. Carefully locate the cabinet over the bracket
and fit the 2 x M6 screws and 2 x spring washers. Do not tighten the screws completely until all cables
have been connected. Tighten the screws securely but do not use excessive force.
• To adjust the cabinet angle, loosen the M6 screws slightly, adjust the cabinet, then re-tighten the
screws.
• Take care not to mark any wall coverings when using the hex wrench.