


Page 2 Eazy6 Owner’s Manual
Page 2 AIM7 DT Owner’s Manual
5. Add insulation. If the area in the ceiling is not already insulated, add an adequate
amount insulation material to loosely cover the back of the speaker. If the insulation
material used is faced with foil or paper, position the foil or paper away from the
speaker.
SPEAKER INSTALLATION
The unique integral four foot mounting system incorporated into your AIM DT speaker
allows for a quick installation by following these easy steps.
1. Remove the grille. It may be necessary to push one or two of the mounting screws,
and its attached foot, towards the baffle and against the inside surface of the grille
to force the grille out of its retaining groove.
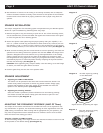
2. Attach the speaker cable (observing the proper polarity with your amplifier, + to +
and - to -). Either channel may be attached to either terminal set, however, be sure
that polarity (+ and -) is correct on each channel or the performance of the speaker
will be seriously affected, as one channel will cancel out the other. (See Diagram 2)
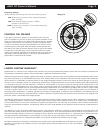
3. Make sure the mounting feet are turned inward to clear the opening, and insert the
speaker into the ceiling. Position the speaker into the hole. Note: The flange of the
speaker is designed to flex and conform to any small imperfections in the ceiling’s
surface. Tighten the four screws on the front of the baffle only enough to make
the flange become snug against the ceiling. As you tighten the screws, the feet will
automatically flip into an outward position thereby clamping the drywall between
the feet and the flange. (See Diagram 3)
CAUTION:
Over tightening may warp the baffle, crack the ceiling, cause the flange
to distort, and make the grille difficult to install.
4. Push the grille firmly into the slot in the speaker baffle.
SPEAKER ADJUSTMENT
1. Adjusting the AIM7 DT Mechanism
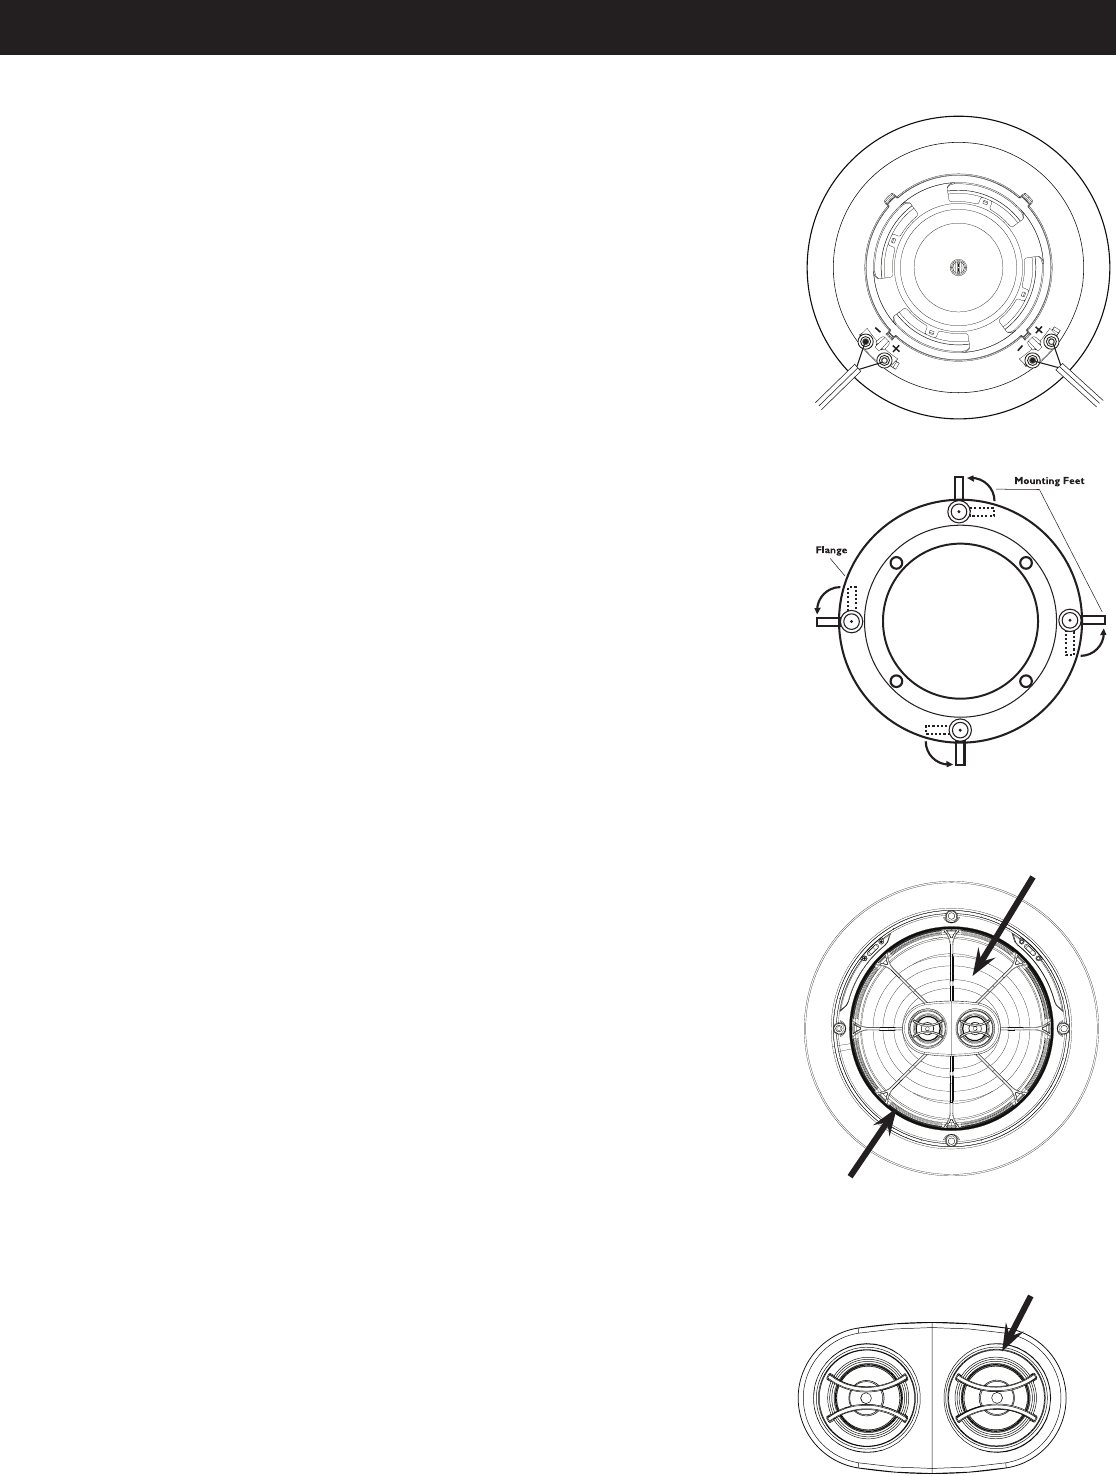
The woofer can be pivoted to best direct the sound towards the listener. The
woofer easily rotates and pivots to almost any position desired. Simply apply
pressure with fingertips to the outer surface of the PivotBall and move the
speaker to the desired position
(See Diagram 4).
2. Adjusting the Pivoting Tweeters
Once the woofer is positioned, further refinement can be made by pointing
the tweeter towards the listener. Gently pivot the tweeter to point it in the
desired direction
(See Diagram 5).
ADJUSTING THE FREQUENCY RESPONSE (AIM7 DT Three)
The output of the woofer and tweeter on the AIM7 DT Three can be adjusted to suit
any environment. In general, we recommend leaving all of the adjustments at the flat
(0dB) setting. To determine which settings will be appropriate for your speakers, you
may need to experiment until the desired sound is achieved. Use the chart to deter-
mine the result of the setting you select.
Selecting a Setting on AIM7 DT Three
To select a setting, simply use a finger to move the switches mounted on the inner side
of the speaker to the desired setting (See Diagram 6).
Diagram 3
Diagram 2
PRINTER'S INSTRUCTIONS:
INSTR,INSTL,6.XDT • LINEINSTR,INSTL,AIM DT • INK: BLACK • MATERIAL: 70LB GLOSS PAPER • SIZE: 8.500" X 11.000" • SCALE: 1-1 • FOLDING: HALF FOLD
Do NOT adjust by pushing
on the WavePlane
Adjust direction by pushing the edges
Diagram 4
Diagram 5
Pivot the Tweeter by gently
pushing on the sides