26
US
C:\Documents and
Settings\pc13\Desktop\J9052007_2662265111HT7000DH_US\2662265111\US03CON_HT-
7000DH-U.fm
masterpage: Left
HT-7000DH
2-662-265-11 (1)
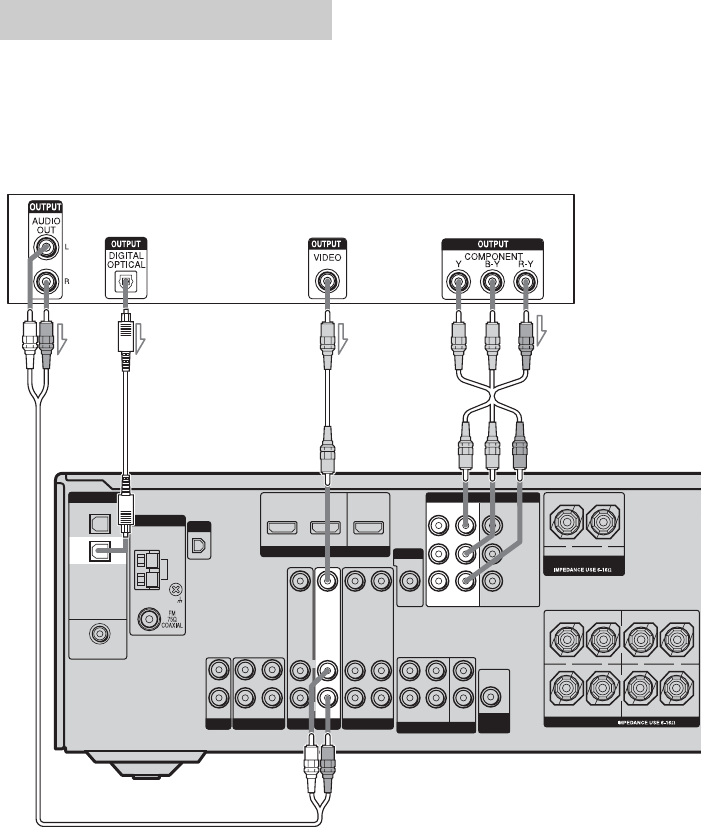
The following illustration shows how to
connect a satellite tuner.
It is not necessary to connect all the cables.
Connect audio and video cords according to
the jacks of your components.
Notes
• When connecting optical digital cords, insert the
plugs straight in until they click into place.
• Do not bend or tie optical digital cords.
Tip
All the digital audio jacks are compatible with
32 kHz, 44.1 kHz, 48 kHz, and 96 kHz sampling
frequencies.
Hooking up a satellite tuner
VIDEO 1
MULTI CH IN
FRONT
CENTER
SUB
WOOFER
SURROUND
VIDEO IN
AUDIO IN
AUDIO
OUT
VIDEO IN VIDEO OUT
MD/TAPE
SA-CD
/
CD
L
R
L
R
L
R
SUB
WOOFER
L
L
R
OUT ININ
VIDEO IN
DVD
AUDIO IN
AUDIO OUT
VIDEO OUT
MONITOR
OUT
Y
P
B
/C
B
/B–Y
P
R
/C
R
/R–Y
MONITOR
DVD IN
ASSIGNABLE
MONITOR OUT
XM
ANTENNA
AM
SURROUND FRONT A
R
R
L
L
+
–
+
–
SPEAKERS
ASSIGNABLE
DIGITAL
OPTICAL
VIDEO 1
IN
VIDEO 2
IN
DVD
IN
COAXIAL
DVD
IN
VIDEO 2
IN
CENTER
+
–
SPEAKERS
VIDEO 2
AUDIO IN
R
COMPONENT VIDEO
HDMI
VIDEO 2 IN
Satellite tuner
A
BCD
A Audio cord (not supplied)
B Optical digital cord (not supplied)
C Video cord (not supplied)
D Component video cord (not supplied)
US01COV_HT-7000DH-U.book Page 26 Wednesday, January 25, 2006 3:30 PM


